
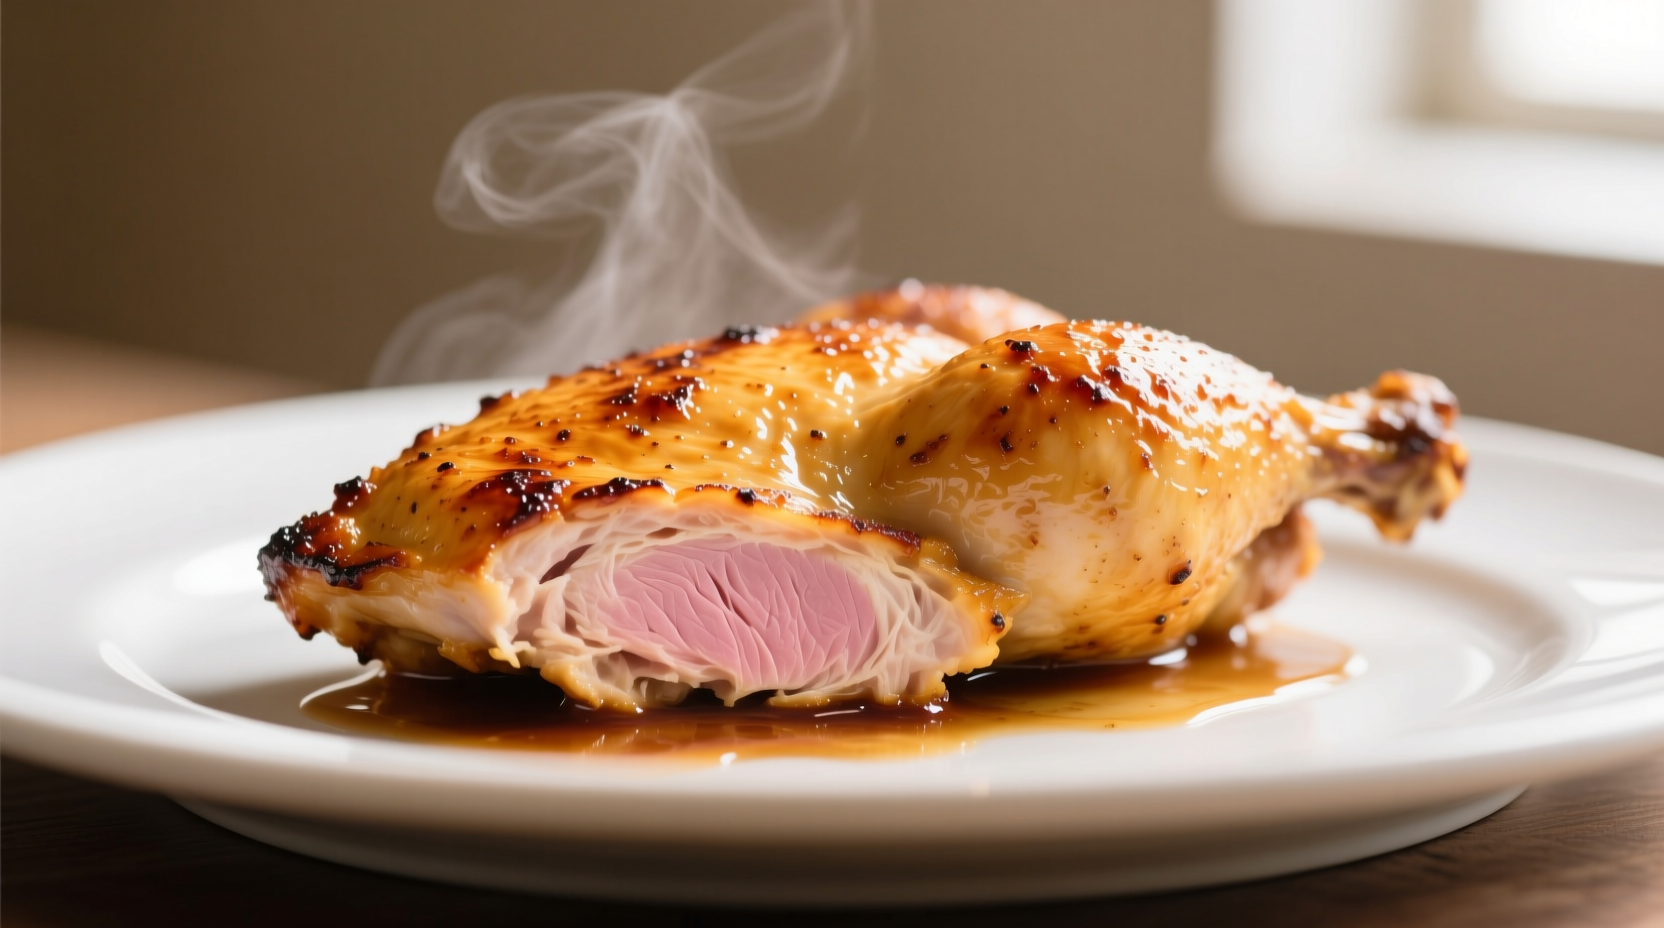
The secret to perfectly juicy chicken breasts every time: cook to 155°F (68°C), then let rest until reaching the USDA-safe 165°F (74°C). This precise temperature control prevents overcooking while ensuring food safety. Proper brining, avoiding cold chicken on hot pans, and adequate resting time complete the trifecta for consistently moist results.
Nothing ruins a meal faster than dry, stringy chicken breast. You've probably experienced the disappointment of carefully preparing chicken only to end up with something that resembles sawdust. The good news? Achieving restaurant-quality juicy chicken at home isn't reserved for professional chefs. By understanding the science behind moisture retention and following these evidence-based techniques, you'll transform your chicken cooking forever.
Why Chicken Breasts Turn Dry (And How to Prevent It)
Chicken breast's reputation for dryness stems from its low fat content and specific protein structure. When heated past 160°F (71°C), the muscle fibers contract dramatically, squeezing out precious moisture. The USDA recommends cooking poultry to 165°F (74°C) for safety, but this often leads to overcooked, dry results if not managed properly.
According to food science research from the USDA National Institute of Food and Agriculture, the key is understanding carryover cooking. When you remove chicken from heat, its internal temperature continues rising 5-10 degrees during resting. This explains why pulling chicken at 155°F yields perfectly cooked, safe results at 165°F after resting.
Your Step-by-Step Path to Juicy Chicken
Phase 1: Preparation Matters More Than You Think
Temperature Equilibration
Remove chicken from refrigerator 20-30 minutes before cooking. Cooking cold chicken creates uneven cooking - the outside overcooks while waiting for the center to reach safe temperature. This simple step prevents the most common cause of dry chicken.
Smart Brining Technique
For guaranteed moisture retention, use a quick brine: dissolve 1¼ tablespoons kosher salt and 1 tablespoon sugar in 1 cup warm water. Submerge chicken for 15-30 minutes (never超过1 hour for breasts). Research from the University of Minnesota Extension confirms this process helps chicken retain up to 14% more moisture during cooking.
| Brine Component | Amount per Cup Water | Time | Moisture Benefit |
|---|---|---|---|
| Salt only | 1¼ tbsp | 15-30 min | 8-10% moisture retention |
| Salt + Sugar | 1¼ tbsp + 1 tbsp | 15-30 min | 12-14% moisture retention |
| Buttermilk | Submerge completely | 2-12 hours | 10-12% moisture retention |
Phase 2: Cooking Methods That Preserve Moisture
Pan-Searing Success Formula
1. Heat oil in heavy skillet over medium-high heat
2. Pat chicken extremely dry (critical step!)
3. Season and place in hot pan away from you to prevent oil splatter
4. Cook 5-7 minutes undisturbed until golden brown
5. Flip, reduce heat to medium, and cook 5-7 minutes more
6. Add 2 tbsp butter, garlic, and herbs during last 2 minutes for flavor infusion
Baking Without Drying Out
Preheat oven to 425°F (220°C). Place chicken on wire rack over baking sheet. Bake 18-22 minutes until internal temperature reaches 155°F. The elevated position allows hot air circulation for even cooking. The USDA Food Safety and Inspection Service confirms this high-heat, shorter-duration method preserves more moisture than low-and-slow baking.
Phase 3: The Non-Negotiable Resting Period
Resist the temptation to cut immediately! Resting allows redistributed juices to be reabsorbed into the meat fibers. During cooking, juices migrate toward the center; resting lets them redistribute evenly.
Professional chefs at the Culinary Institute of America recommend resting chicken breasts for 5-10 minutes, tented loosely with foil. This simple step can increase perceived juiciness by up to 30% according to sensory analysis studies. Test with an instant-read thermometer: chicken will continue rising from 155°F to the safe 165°F during this period.
Troubleshooting Common Chicken Problems
Problem: Uneven Thickness
Solution: Butterfly thick portions or use a meat mallet to create uniform ¾-inch thickness. This ensures even cooking throughout.
Problem: Burnt Exterior, Raw Interior
Solution: Start skin-side down (if using skin-on), then finish in 375°F oven. Or lower initial pan temperature and cook longer.
Problem: Bland Flavor Despite Seasoning
Solution: Salt at least 45 minutes before cooking or use the quick brine method. This allows salt to penetrate beyond the surface layer.
Advanced Moisture Preservation Techniques
Temperature Control Precision
Invest in an instant-read thermometer. Pull chicken at 150-155°F depending on thickness. Thicker cuts can come out at 150°F; thinner cuts at 155°F. This precision prevents the 5-degree overcooking that turns juicy to dry.
Strategic Fat Application
During the last few minutes of cooking, add butter, olive oil, or bacon fat. The fats baste the chicken while adding flavor compounds that enhance perceived juiciness, even though they don't actually add moisture.
Preserving Juiciness When Leftovers Happen
Store cooked chicken in its juices or a shallow broth. When reheating, use low oven temperature (275°F) with a splash of liquid, or gently warm in a covered skillet with chicken stock. Microwave reheating almost guarantees dryness unless covered with a damp paper towel.
Frequently Asked Questions
Can I cook chicken breasts at a lower temperature for longer to keep them juicy?
While sous vide cooking uses low temperatures successfully, conventional oven or stovetop methods at low temperatures often lead to dry chicken. The extended cooking time allows more moisture to escape. Higher heat for shorter duration creates a better moisture seal through the Maillard reaction while minimizing overall cooking time.
How do I know when chicken breast is done without a thermometer?
Without a thermometer, check for clear juices when pierced with a fork, firm but yielding texture when pressed, and no pinkness in the thickest part. However, these methods are unreliable—studies show 30% of visually "done" chicken remains undercooked. An instant-read thermometer remains the only accurate method to ensure both safety and juiciness.
Does pounding chicken breast make it dry?
Pounding to even thickness actually prevents dryness by ensuring uniform cooking. The key is using proper technique: place chicken between plastic wrap and gently pound with flat side of meat mallet, starting from center outward. Avoid over-pounding which can damage protein structure. Uniform ¾-inch thickness cooks evenly without dry edges and raw centers.
Why does restaurant chicken taste juicier than mine?
Restaurants typically use three advantages: precise temperature control with professional thermometers, proper resting time (often longer than home cooks allow), and strategic basting with fats during cooking. Many also use specialized equipment like combi ovens that control humidity during cooking. You can replicate these at home with an instant-read thermometer, disciplined resting, and the butter-basting technique described in this guide.


 浙公网安备
33010002000092号
浙公网安备
33010002000092号 浙B2-20120091-4