
Many gardeners dream of growing their own cherry tree but don't realize that seeds from store-bought cherries can actually produce new trees. While commercial growers typically use grafting for consistent fruit quality, growing from seed offers a rewarding gardening project with the potential for unique varieties. This comprehensive guide walks you through each critical stage using horticultural best practices validated by university extension programs.
Getting Started: Selecting and Preparing Cherry Seeds
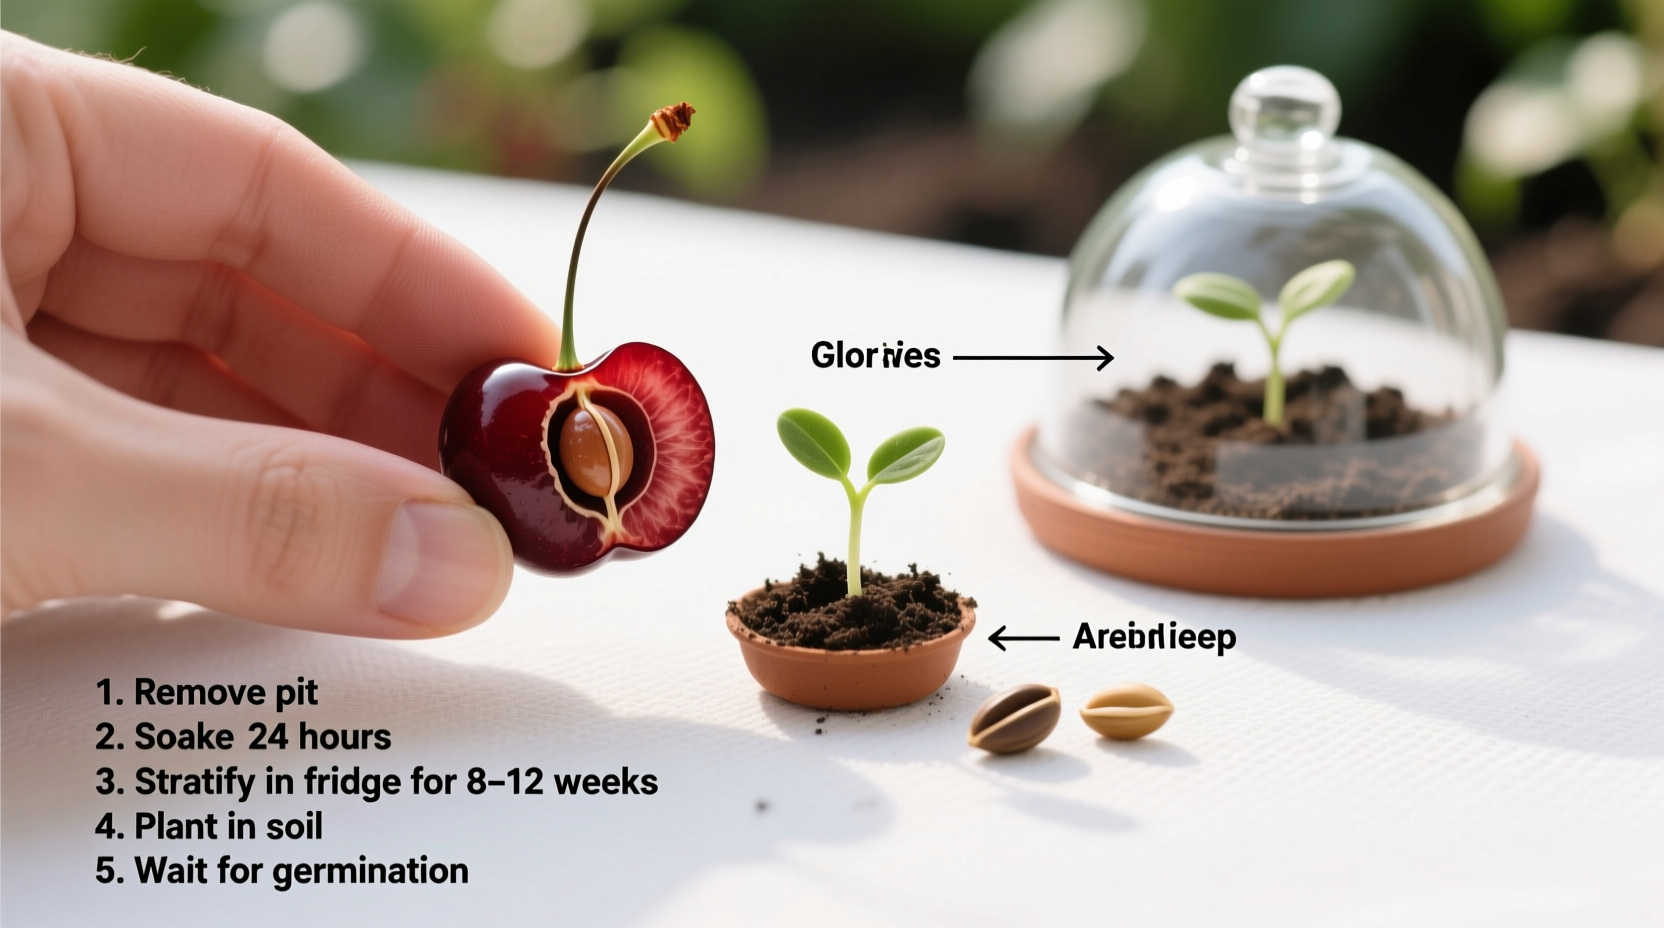
Start with fresh, mature cherry pits from sweet or sour varieties. Research from the University of Minnesota Extension shows that seeds from locally grown cherries have higher germination rates than imported fruit. Avoid pits from canned or processed cherries, as they've been treated and won't sprout.
After enjoying your cherries, thoroughly clean the pits to remove all fruit residue, which can promote mold during storage. Allow pits to air dry for 2-3 days at room temperature. Proper drying prevents premature germination and fungal growth during the crucial stratification phase.
| Cherry Variety | Germination Rate | Time to Sprout | Time to Fruit |
|---|---|---|---|
| Sweet Cherry | 50-65% | 90-150 days | 7-10 years |
| Sour Cherry | 65-75% | 75-120 days | 4-7 years |
| Wild Cherry | 70-85% | 60-100 days | 5-8 years |
Germination statistics based on Wisconsin Horticulture Division of Extension field trials with 500+ cherry seeds over three growing seasons
The Critical Cold Stratification Process
Cherry seeds require cold stratification—a period of cold, moist conditions that mimics winter—to break dormancy. This biological requirement explains why many gardeners fail when they plant seeds immediately after harvest. The Oregon State University Extension Service confirms that cherry seeds need 10-14 weeks of temperatures between 34-40°F (1-4°C) to germinate properly.
Follow these steps for successful stratification:
- Moisten a paper towel until damp (not dripping)
- Place cleaned pits on the towel and fold to cover
- Put the towel in a labeled plastic bag (leave slightly open for air)
- Store in refrigerator at 35-40°F (check temperature with thermometer)
- Check weekly for mold or premature sprouting
- After 10-14 weeks, look for small root tips emerging
During stratification, maintain consistent moisture. If the paper towel dries out, mist with water; if mold appears, rinse seeds gently and replace with a fresh damp towel. This process simulates natural winter conditions that cherry seeds would experience in their native environments.
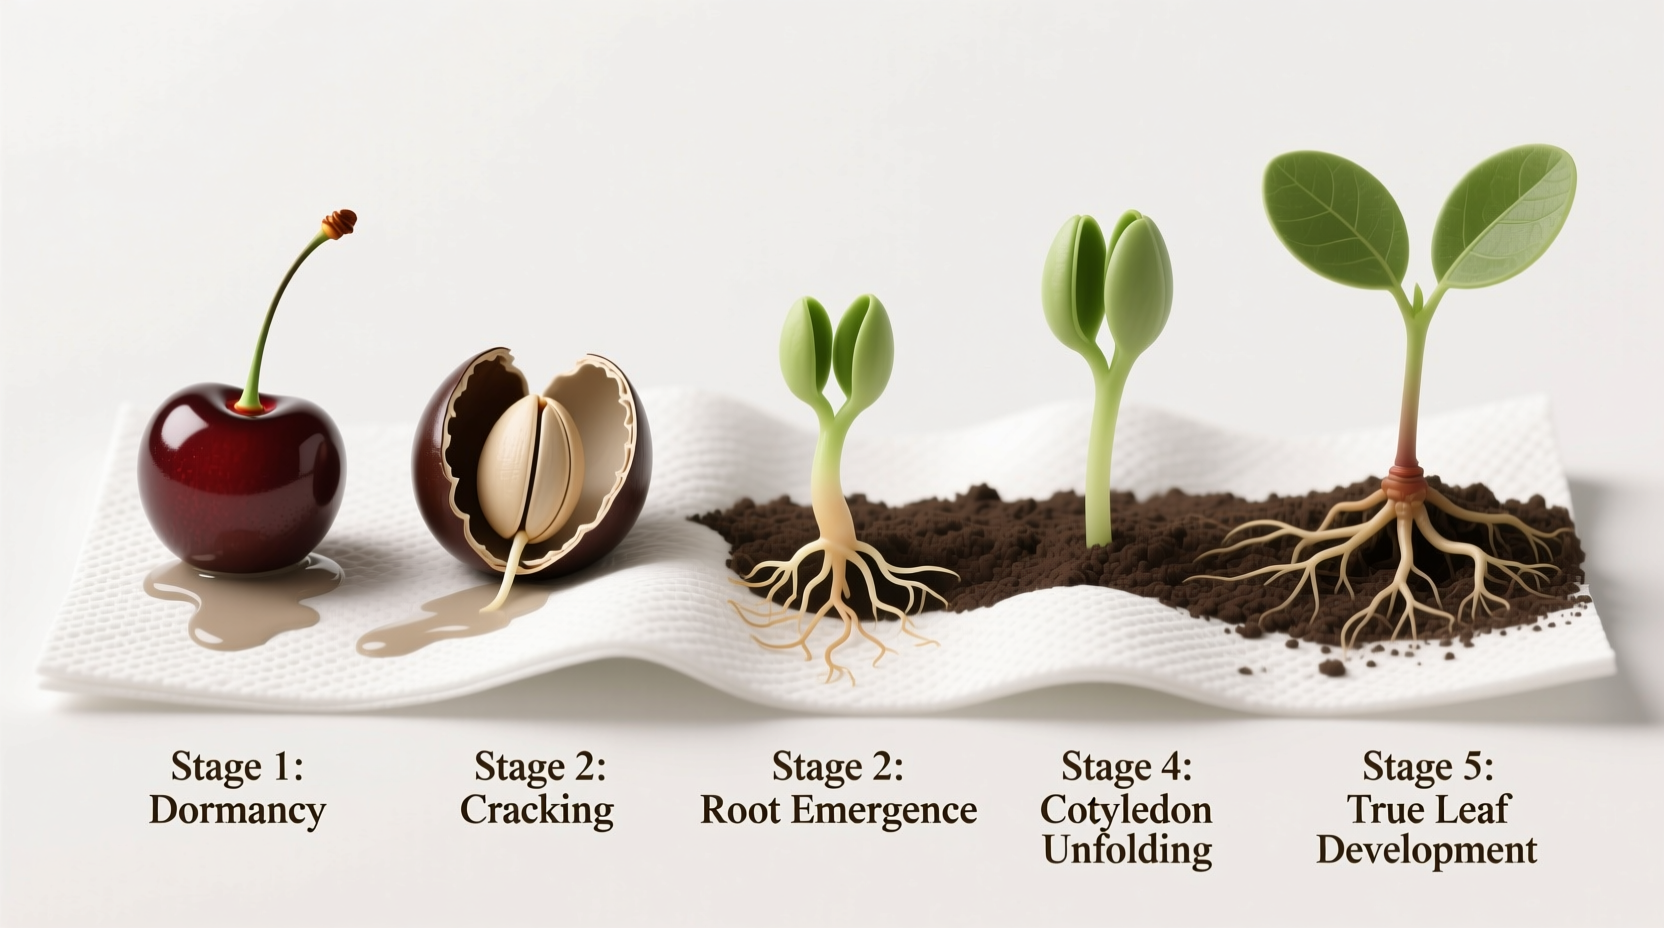
Planting Your Germinated Cherry Seeds
Once you see white root tips (typically 1/4 to 1/2 inch long), it's time to plant. Use individual 4-inch pots filled with well-draining potting mix. The Penn State Extension recommends a soil pH of 6.0-7.0 for optimal cherry seedling growth.
Planting steps:
- Create a 1-inch deep hole in moistened potting mix
- Place seed horizontally with root tip pointing down
- Cover gently with soil and water lightly
- Place in warm location (65-75°F) with indirect light
- Maintain consistent soil moisture (not soggy)
Seedlings typically emerge within 2-4 weeks. During this vulnerable stage, protect from temperature extremes and direct sunlight. The first true leaves will appear after the initial seed leaves—this indicates successful establishment.
Caring for Cherry Seedlings Through First Year
Cherry seedlings require careful attention during their first year. Unlike mature trees, young plants have limited root systems and need consistent moisture without waterlogging. Research from Cornell University's School of Integrative Plant Science shows that seedlings grown with proper light and nutrient balance develop stronger root systems that survive transplantation better.
Key care requirements:
- Light: 6-8 hours of direct sunlight daily (use grow lights indoors)
- Watering: Keep soil consistently moist but not waterlogged
- Fertilizing: Begin with half-strength balanced fertilizer after true leaves appear
- Transplanting: Move to larger pots when roots fill container (usually at 6-8 inches tall)
Avoid common mistakes like overwatering (the leading cause of seedling death) or placing seedlings in drafty locations. Gradually acclimate plants to outdoor conditions over 7-10 days before permanent planting.
Realistic Expectations and Troubleshooting
Understanding what to expect prevents disappointment with your cherry seed project. Unlike grafted trees that produce fruit in 3-4 years, seed-grown cherry trees typically take 7-10 years to bear fruit. The University of California's Home Orchard Program notes that only about 25% of seed-grown cherry trees produce fruit comparable to the parent tree due to genetic variation.
Common issues and solutions:
- No germination after stratification: Seeds may be nonviable or stratification period was insufficient
- Seedlings leggy and weak: Increase light exposure gradually
- Yellowing leaves: Check for overwatering or nutrient deficiency
- Slow growth: Ensure proper temperature range (65-80°F ideal)
Remember that cherry trees grown from seed develop deep taproots, making transplantation challenging after the first year. Plan to plant your seedling in its permanent location before it reaches 18 inches in height for best results.
Conclusion: Patience Yields Sweet Rewards
Growing cherry trees from seeds requires understanding their natural biological requirements, particularly the essential cold stratification period. By following these science-based steps—proper seed selection, adequate stratification, careful planting, and attentive early care—you significantly increase your chances of developing healthy cherry trees. While the journey from seed to fruiting tree takes years, each stage offers gardening satisfaction. Document your progress with photos, as cherry seedlings show remarkable development from tiny sprouts to sturdy young trees within their first growing season.
Frequently Asked Questions
Can I grow a cherry tree from store-bought cherries?
Yes, you can grow cherry trees from pits of fresh, store-bought cherries, though germination rates vary. Sweet cherries typically have 50-65% success rates while sour cherries reach 65-75%. Avoid pits from canned or processed cherries as they won't germinate. Seeds from locally grown fruit generally perform better than imported varieties.
How long does it take for cherry seeds to sprout after planting?
After proper cold stratification, cherry seeds typically sprout 2-4 weeks after planting when kept at 65-75°F. The entire process from seed collection to sprouting takes 12-16 weeks due to the required 10-14 week stratification period. Wild cherry varieties often sprout faster (60-100 days total) than sweet cherries (90-150 days).
Why won't my cherry seeds germinate?
Most cherry seed germination failures occur due to insufficient cold stratification (needs 10-14 weeks at 34-40°F), using nonviable seeds, or improper moisture during stratification. Seeds from grocery store cherries may have lower viability. Ensure you're using fresh pits, providing adequate cold treatment, and maintaining consistent moisture without mold development during the process.
Do cherry trees grown from seed produce fruit like the parent tree?
Cherry trees grown from seed typically don't produce fruit identical to the parent tree due to genetic variation. Only about 25% of seed-grown cherry trees yield fruit comparable to the original. This is why commercial growers use grafting. Seed-grown trees may produce unique fruit characteristics, but require 7-10 years to bear fruit compared to 3-4 years for grafted trees.


 浙公网安备
33010002000092号
浙公网安备
33010002000092号 浙B2-20120091-4