
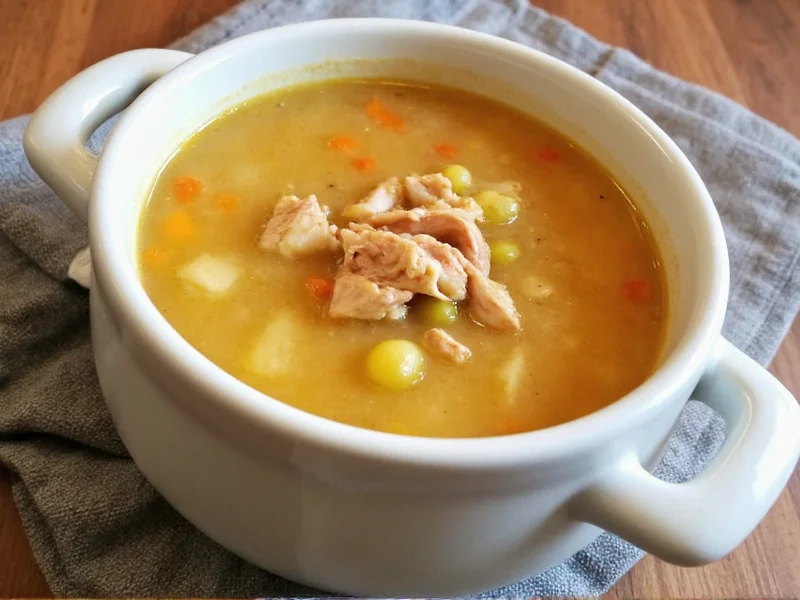
Why Homemade Chicken Soup Beats Store-Bought Every Time
Creating chicken soup from scratch isn't just a nostalgic tradition—it delivers measurable advantages over canned or packaged alternatives. When you control the ingredients, you eliminate unnecessary preservatives, excess sodium, and artificial flavors. The slow simmering process extracts collagen from chicken bones, creating gelatin-rich broth that supports gut health and joint function. Unlike commercial versions that often use flavor enhancers, authentic homemade chicken soup provides genuine comfort with recognizable ingredients you can pronounce.
Essential Ingredients for Authentic Flavor
The magic of exceptional chicken soup lies in ingredient quality and proper ratios. While regional variations exist, these components form the foundation of a balanced broth:
| Ingredient | Quantity | Preparation Tip |
|---|---|---|
| Chicken pieces (bone-in) | 2-3 lbs | Use a mix of thighs, drumsticks, and wings for optimal flavor |
| Yellow onions | 2 medium | Leave skin on for richer color |
| Carrots | 3 medium | Cut into 1-inch chunks |
| Celery stalks | 3 stalks | Include leafy tops for extra flavor |
| Fresh parsley | 1/4 cup | Add at the end for bright flavor |
| Bay leaves | 2 | Remove before serving |
Step-by-Step Preparation Guide
Building Flavor Foundations
Begin by placing chicken pieces in a large stockpot with enough cold water to cover by two inches. Bring to a gentle simmer—never a rolling boil—which would make the broth cloudy. Skim off any foam that rises to the surface during the first 10 minutes. This initial step ensures a clear, clean-tasting broth.
The Simmering Process
Add all vegetables and aromatics after the initial skimming. Maintain a bare simmer (small bubbles occasionally breaking the surface) for 90 minutes to 2 hours. This slow extraction process pulls maximum collagen and flavor from the bones without making the meat tough. The longer you simmer (within reason), the richer your broth becomes.
Finishing Touches
Remove chicken pieces when cooked through (about 165°F internal temperature). Strain the broth through a fine-mesh sieve, then return it to the pot. Shred the chicken, discarding skin and bones, and return to the broth. For classic chicken noodle soup, add cooked egg noodles during the last 5 minutes of cooking. Finish with fresh herbs and a squeeze of lemon juice to brighten flavors.
Advanced Techniques for Exceptional Results
The Mirepoix Ratio Secret
Professional chefs follow a precise vegetable ratio: 50% onions, 25% carrots, 25% celery. This balance creates the ideal flavor foundation without any single vegetable dominating. Chop all vegetables to uniform sizes for even cooking and consistent flavor release.
Temperature Control Matters
Many home cooks make the critical error of boiling their soup vigorously. Maintain a temperature between 180-200°F (82-93°C)—just below simmering point. This gentle heat extracts flavors gradually while preventing fat emulsification that makes broth greasy.
Variations for Different Dietary Needs
Gluten-Free Option: Skip noodles and add cooked quinoa or rice during the final 10 minutes. For extra heartiness, include diced sweet potatoes.
Keto-Friendly Version: Increase healthy fats by adding avocado chunks before serving. Replace starchy vegetables with low-carb alternatives like zucchini noodles (add in last 2 minutes).
Immune-Boosting Upgrade: Add one inch of fresh ginger and 2 garlic cloves when simmering the broth. Finish with a tablespoon of apple cider vinegar to help extract minerals from bones.
Storage and Reheating Best Practices
Homemade chicken soup actually improves in flavor after 24 hours as ingredients meld. Store in airtight containers with these guidelines:
- Refrigerator: Up to 5 days (fat layer on top helps preserve freshness)
- Freezer: Up to 6 months in portion-sized containers
- Reheating: Warm gently over medium-low heat without boiling to preserve texture
When freezing, leave 1-inch headspace for liquid expansion. For best results, freeze broth separately from noodles to prevent mushiness upon reheating.
Common Mistakes That Ruin Chicken Soup
Even experienced cooks sometimes sabotage their efforts with these errors:
- Boiling instead of simmering – creates cloudy, greasy broth
- Adding salt too early – concentrates as liquid reduces, making soup overly salty
- Overcooking vegetables – add delicate vegetables like peas in the last 5 minutes
- Skipping the skimming step – leaves impurities that affect flavor
- Using only breast meat – lacks the collagen-rich bones needed for rich broth
Scientifically Proven Health Benefits
Research published in Chest Journal confirms chicken soup's anti-inflammatory properties can help reduce symptoms of upper respiratory infections. The steam helps clear nasal passages while the warm liquid soothes sore throats. Unlike processed versions, homemade soup contains:
- Natural electrolytes for hydration
- Gelatin from bones that supports gut lining
- Customizable sodium levels for heart health
- Higher vitamin content from fresh vegetables
The amino acid cysteine released during cooking may help thin mucus, making it easier to expel. This explains why generations have turned to chicken soup as “Jewish penicillin” for colds and flu.
Conclusion: The Soul-Sustaining Power of Simplicity
Mastering homemade chicken soup requires no special equipment—just patience and attention to fundamental techniques. By controlling ingredients and process, you create more than just a meal; you craft a healing elixir that connects us to culinary traditions spanning centuries. Whether you're cooking for health, comfort, or simply to nourish loved ones, this timeless recipe delivers unmatched satisfaction through its elegant simplicity.
Frequently Asked Questions
How long should I simmer chicken soup for best flavor?
For optimal flavor extraction, simmer chicken soup for 90 minutes to 2 hours. This timeframe allows sufficient time for collagen to convert to gelatin without overcooking the meat. Bone-in pieces are essential—the bones release marrow and collagen that create rich, satisfying broth. Avoid boiling, which makes broth cloudy and greasy.
Can I make chicken soup without chicken bones?
You can make chicken soup without bones, but the broth will lack depth and body. Bone-in pieces are crucial for extracting collagen that creates rich, gelatinous texture. If using only boneless chicken, add 2 tablespoons of tomato paste during vegetable sauté and include extra celery leaves and parsley stems to boost flavor complexity. For vegetarian version, use mushroom stems and kombu seaweed.
Why does my homemade chicken soup taste bland?
Bland chicken soup usually results from three issues: insufficient simmering time, adding salt too early, or using only breast meat. Ensure you simmer bone-in pieces for at least 90 minutes, add salt in the final 30 minutes of cooking, and include dark meat for richer flavor. Adding an acid like lemon juice or apple cider vinegar at the end brightens flavors significantly.
What's the best way to store homemade chicken soup?
Cool soup quickly by placing the pot in an ice bath, then transfer to airtight containers. Refrigerate for up to 5 days or freeze for 6 months. For best results, store broth separately from noodles to prevent sogginess. Leave 1-inch headspace in containers for liquid expansion during freezing. Always label with date and contents.
How can I make my chicken soup more nutritious?
Boost nutrition by adding extra vegetables like kale or spinach during the last 5 minutes of cooking. Include garlic and ginger for immune support. For protein boost, add white beans or lentils. The addition of 1 tablespoon of apple cider vinegar helps extract minerals from bones. Using organic, pasture-raised chicken increases omega-3 content in the broth.




 浙公网安备
33010002000092号
浙公网安备
33010002000092号 浙B2-20120091-4