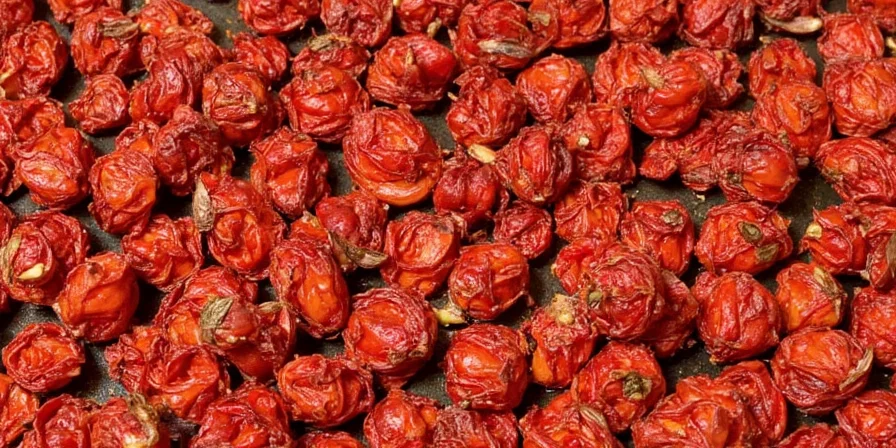
Yes, you can successfully dry chilies in your home oven with simple equipment. This practical guide shows exactly how to preserve your harvest while maintaining maximum flavor and preventing spoilage - no special tools required. Follow these proven steps used by home gardeners and professional chefs alike.
How to Dry Chilies in Your Home Oven: The Simple, Reliable Method
Drying chilies in your oven gives you consistent results that beat sun-drying every time. Unlike sun-drying which depends on weather conditions, your oven provides controlled heat that preserves flavor while preventing mold. Most home cooks can complete the process in 6-8 hours with basic kitchen tools.
Why Oven Drying Works Best for Home Preservation
- Prevents spoilage even during humid weather
- Maintains consistent heat for even drying
- Preserves more flavor compounds than air-drying
- Ready to use for cooking, grinding, or storing
Basic Oven Drying Method for Beginners
Step 1: Select and Prepare Your Chilies
Choose firm, blemish-free chilies. Popular varieties that dry well include:
| Chili Type | Best For | Drying Time |
|---|---|---|
| Jalapeño | Chipotles, hot sauce | 6-8 hours |
| Serrano | Salsas, seasoning | 5-7 hours |
| Cayenne | Spice blends, heat | 4-6 hours |
| Ancho/Poblano | Moles, stews | 8-10 hours |
Step 2: Simple Preparation (5 Minutes)
- Wash chilies and pat completely dry
- Leave stems intact for easier handling
- Slice large chilies lengthwise (like bell peppers)
- Remove seeds only if you want milder results
Step 3: Arrange for Proper Airflow
Place chilies in a single layer on a baking sheet lined with parchment paper. Leave at least 1 inch between each chili. For best results, use the middle rack position in your oven.
Step 4: Set the Right Temperature
Set your oven to the lowest possible temperature (usually 140-170°F or 60-75°C). If your oven doesn't go this low, prop the door open 1-2 inches and check temperature with an oven thermometer.
Step 5: Monitor Drying Progress
- Check every 2 hours after the first 3 hours
- Flip chilies halfway through drying time
- Finished chilies should be brittle and snap easily
- Store in airtight containers once completely cooled
Common Questions About Oven-Dried Chilies
Can I dry jalapeños in a regular home oven?
Absolutely. For jalapeños, slice them lengthwise, arrange on a baking sheet, and dry at 150°F for 6-8 hours. They're done when they snap cleanly when bent. This creates perfect chipotles for sauces and salsas.
How do I know when chilies are fully dried?
Dry chilies should be brittle enough to snap when bent. For larger varieties, they should lose about 85% of their original weight. When held to light, properly dried chilies show no translucency.
What's the best way to store dried chilies?
Store cooled, completely dry chilies in airtight containers away from light. For long-term storage (more than 6 months), use vacuum-sealed bags with oxygen absorbers. Glass jars work better than plastic for preserving flavor.
Can I speed up the drying process?
Yes, but carefully. You can increase airflow by using a convection setting or placing a fan near (not in) the oven. Never exceed 175°F as higher temperatures destroy flavor compounds. Drying too fast creates chilies that appear dry but still have internal moisture that leads to spoilage.
Do I need special equipment?
No special equipment needed! A regular home oven, baking sheet, and basic kitchen tools are sufficient. An oven thermometer helps ensure accurate temperature, but isn't essential for first attempts.
Troubleshooting Common Drying Problems
| Problem | Likely Cause | Solution |
|---|---|---|
| Chilies moldy after storage | Not fully dry before storing | Dry longer, ensure they snap when bent |
| Dull, faded color | Oven too hot | Reduce temperature, check with thermometer |
| Burnt or bitter taste | Excessive heat exposure | Keep below 175°F, increase airflow |
| Uneven drying | Poor air circulation | Space chilies farther apart, rotate pan |
| Leathery instead of brittle | Not completely dry | Continue drying, check moisture content |
From Harvest to Spice Rack: Practical Applications
Dried chilies open up endless culinary possibilities. Crumble them into rubs, steep in vinegar for hot sauce, or grind into powder for seasoning. For best flavor, use your dried chilies within 6-12 months. The simplest way to enjoy your preserved harvest is to add whole dried chilies to soups and stews - they rehydrate perfectly during cooking and infuse dishes with deep, complex flavor.
Many home gardeners find oven drying transforms their cooking throughout the year. Instead of wasting surplus chilies, you'll have homemade spice blends ready whenever recipes call for them. The process takes minimal active time but pays off with restaurant-quality results you can't get from store-bought dried chilies.


 浙公网安备
33010002000092号
 浙B2-20120091-4