

Making chili at home is simpler than most people think, and the results far surpass canned or restaurant versions. This comprehensive guide shares professional techniques developed through decades of perfecting the ideal chili recipe. Whether you're a beginner cook or looking to refine your technique, these evidence-based methods will help you create deeply flavorful chili every time.
Essential Ingredients for Authentic Chili
The foundation of great chili starts with quality ingredients. While regional variations exist, these core components create a balanced flavor profile that satisfies most palates:
| Ingredient | Quantity | Preparation Notes |
|---|---|---|
| Ground beef (80/20) | 1.5 lbs | Brown in batches for proper searing |
| Yellow onion | 1 large, diced | Cook until translucent before adding meat |
| Garlic cloves | 3, minced | Add after onions, cook 1 minute |
| Crushed tomatoes | 28 oz can | San Marzano preferred for sweetness |
| Red kidney beans | 2 (15oz) cans, drained | Rinse to reduce sodium |
| Chili powder | 2 tbsp | Use pure chili powder, not seasoning mix |
Equipment Checklist for Making Chili
Having the right tools ensures proper technique execution:
- 6-quart heavy-bottomed pot or Dutch oven (essential for even heat distribution)
- Wooden spoon for stirring
- Meat thermometer (to verify proper browning)
- Can opener
- Colander for rinsing beans
Step-by-Step Instructions to Make Chili
Follow these precise steps for restaurant-quality results:
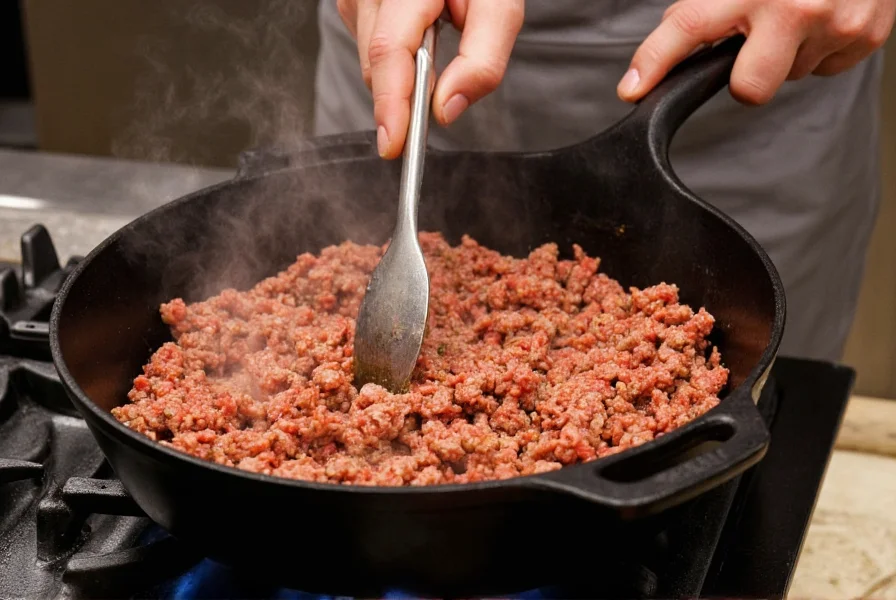
- Brown the meat properly: Heat 1 tbsp oil in your pot over medium-high heat. Add half the ground beef in an even layer without crowding. Let sear undisturbed for 3-4 minutes until deep brown crust forms. Break into chunks and continue browning for 5-7 minutes total. Remove and repeat with remaining meat.
- Sauté aromatics: Reduce heat to medium. Add onions and cook for 5 minutes until translucent. Add garlic and cook 1 minute until fragrant.
- Build flavor foundation: Return all meat to pot. Stir in chili powder, cumin, paprika, and oregano. Cook for 2 minutes to toast spices.
- Add liquids and simmer: Pour in tomatoes, tomato paste, and beef broth. Bring to gentle boil, then reduce to low simmer.
- Final additions: After 30 minutes of simmering, add drained beans. Continue simmering uncovered for 15-30 minutes until desired thickness.
Cooking Time Guidelines
Timing affects both texture and flavor development:
- Minimum cooking time: 45 minutes (for weeknight meals)
- Ideal cooking time: 60-90 minutes (allows flavors to meld)
- Maximum cooking time: 3 hours (for special occasions)
- Cooling time: 15-20 minutes before serving (flavors intensify)
Customizing Your Chili Recipe
Personalize your chili while maintaining structural integrity:
Vegan Chili Option
Substitute ground beef with 2 cups cooked lentils and 1 cup chopped mushrooms. Use vegetable broth instead of beef broth. Add 1 tbsp soy sauce for umami depth.
White Chicken Chili Variation
Replace beef with 2 lbs shredded cooked chicken. Use white beans instead of kidney beans. Substitute green chilies and tomatillos for tomatoes. Add 1 tsp cumin and ½ tsp coriander.
Common Mistakes When Making Chili
Professional chefs consistently avoid these errors:
- Boiling instead of simmering: High heat breaks down tomatoes and makes chili watery
- Adding all ingredients at once: Layering flavors through proper cooking sequence is essential
- Using pre-seasoned meat: Control sodium by seasoning yourself during cooking
- Skipping the resting period: Chili tastes significantly better after 15-20 minutes off heat
Serving Suggestions for Perfect Chili
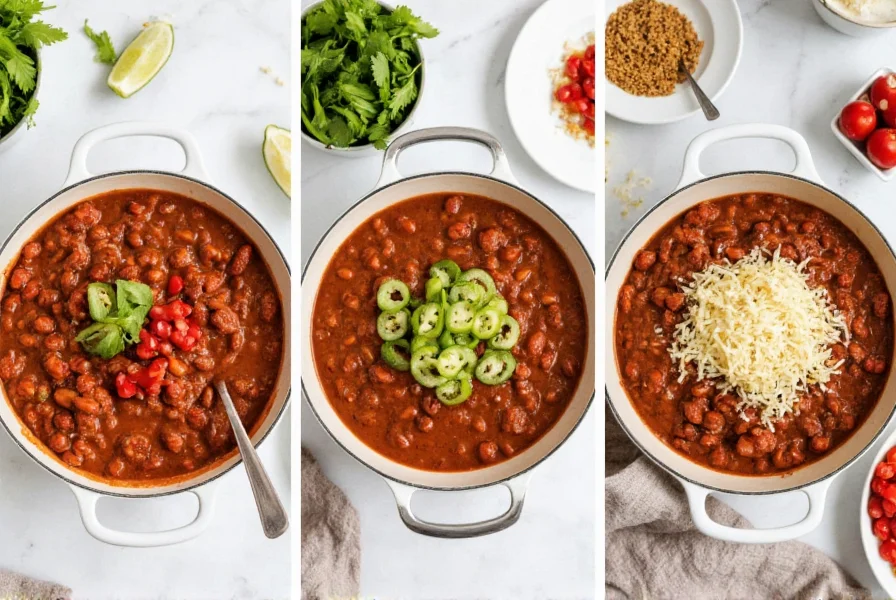
Elevate your chili experience with these professional presentation techniques:
- Serve in pre-warmed bowls to maintain temperature
- Offer toppings in small bowls for customization
- Pair with cornbread that has a slightly sweet profile
- Provide cooling elements like sour cream for balance
Storage and Reheating Instructions
Chili often improves with time. Follow these storage guidelines:
- Refrigeration: Store in airtight container for up to 5 days
- Freezing: Portion into freezer bags (lay flat for storage) for up to 3 months
- Reheating: Warm gently on stove over medium-low heat, stirring occasionally
- Revitalizing: Add ¼ cup broth when reheating frozen chili to restore moisture
Frequently Asked Questions
How can I make chili thicker without adding more ingredients?
The best method to thicken chili is to simmer it uncovered for an additional 15-20 minutes. The natural evaporation concentrates flavors while improving texture. Alternatively, mash some beans against the pot side before adding them to release starches that naturally thicken the mixture.
What's the secret to making chili less spicy if I've added too much heat?
To reduce spiciness in over-seasoned chili, add 1-2 tablespoons of sugar or honey to balance the heat. Dairy products like sour cream or shredded cheese added when serving also counteract spiciness. For future batches, toast your chili powder in the pot before adding liquids to mellow its heat while preserving flavor.
Can I make authentic chili without beans?
Yes, traditional Texas-style chili omits beans entirely. For beanless chili, increase meat content to 2 lbs and add 1 cup beef broth for moisture. Simmer for 2-3 hours to develop depth, and consider adding a small amount of unsweetened chocolate (1 oz) for complexity. The texture will be thicker and meat-focused.
How do I prevent my chili from becoming too acidic?
To balance acidity in chili, add ½ teaspoon baking soda after tomatoes have simmered for 20 minutes. Alternatively, include 1-2 tablespoons of brown sugar or a small peeled potato (removed before serving) which naturally absorbs excess acid. Using fire-roasted canned tomatoes also reduces perceived acidity.


 浙公网安备
33010002000092号
浙公网安备
33010002000092号 浙B2-20120091-4