
Chili is one of America's most beloved comfort foods, with regional variations spanning from Texas-style meat-heavy versions to Cincinnati-style with spaghetti. A well-prepared chili balances rich meat flavors, aromatic spices, and the perfect texture that develops through proper simmering. Whether you're using traditional beef, turkey, chicken, or plant-based proteins, the key to exceptional chili lies in layering flavors and allowing sufficient cooking time for ingredients to meld.
Essential Ingredients for Perfect Chili
The foundation of any great chili recipe starts with quality ingredients. While regional variations exist, these components form the backbone of a classic chili preparation:
| Ingredient | Quantity | Preparation Notes |
|---|---|---|
| Ground beef or plant-based alternative | 1 pound | 80% lean for optimal flavor and texture |
| Yellow onion | 1 medium, diced | Yellow provides best flavor foundation |
| Garlic cloves | 3, minced | Fresh is essential for authentic flavor |
| Crushed tomatoes | 28-ounce can | San Marzano variety preferred |
| Red kidney beans | 15-ounce can, drained | Rinse thoroughly before adding |
| Chili powder | 2 tablespoons | Use a quality brand for best results |
| Cumin | 1 teaspoon | Toast whole seeds and grind for freshness |
| Paprika | 1 teaspoon | Sweet or smoked depending on preference |
Equipment You'll Need
While you can prepare chili in almost any cooking vessel, having the right equipment makes the process more efficient and improves results:
- 6-8 quart heavy-bottomed pot or Dutch oven (essential for even heat distribution)
- Wooden spoon or heat-resistant spatula
- Sharp chef's knife and cutting board
- Can opener
- Measuring spoons and cups
- Ladle for serving
Step-by-Step Preparation Guide
Follow these detailed instructions for preparing authentic, flavorful chili that will satisfy even discerning palates. This traditional chili cooking technique emphasizes flavor development through proper browning and simmering.
1. Prepare Your Ingredients
Before beginning the cooking process, properly prepare all ingredients. Dice the onion and bell pepper into 1/4-inch pieces for even cooking. Mince the garlic finely to ensure it distributes evenly throughout the chili. Drain and rinse the kidney beans thoroughly to remove excess sodium and the starchy liquid that can affect texture.
2. Brown the Meat Properly
Heat your pot over medium-high heat. Add the ground meat without breaking it apart immediately. Allow it to develop a proper sear on one side before stirring, which creates fond (those delicious browned bits) that forms the flavor foundation. Once browned, break the meat into smaller pieces and continue cooking until no pink remains. Drain excess fat if necessary, but retain some for flavor.
3. Build Flavor Layers
Add the diced onion, bell pepper, and minced garlic to the pot with the meat. Cook for 5-7 minutes until vegetables soften and become aromatic. This step, called "sweating," releases natural sugars and builds the flavor base for your chili. Don't rush this process—properly cooked aromatics make a significant difference in the final product.
4. Add Spices and Tomatoes
Stir in the chili powder, cumin, paprika, salt, and black pepper. Cook for 1-2 minutes to toast the spices, which enhances their flavor. Add the crushed tomatoes (with their liquid), tomato paste, and beef broth. Stir well to combine all ingredients.
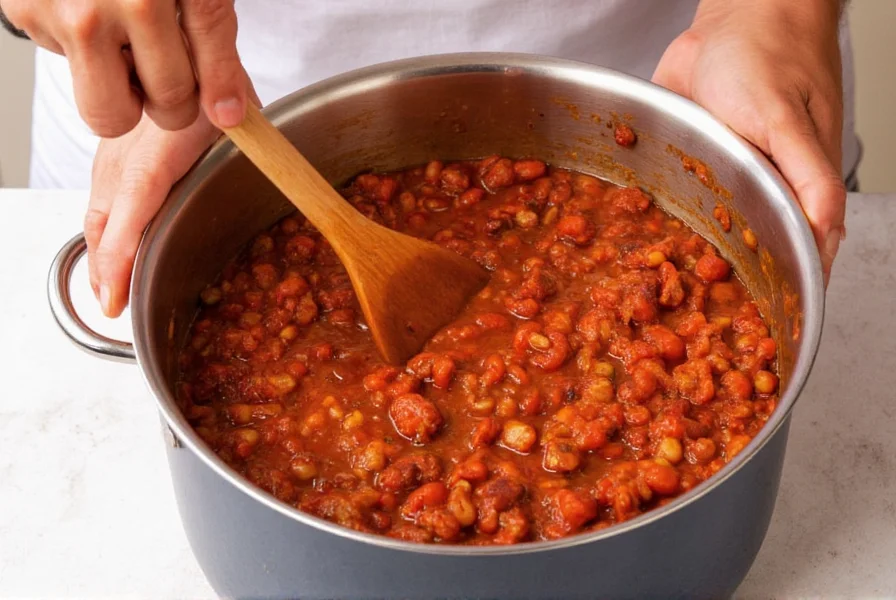
5. Simmer for Flavor Development
Bring the mixture to a gentle boil, then reduce heat to low. Cover the pot partially and let the chili simmer for at least 30 minutes, though 60-90 minutes yields superior results. Stir occasionally to prevent sticking. The extended simmering time allows flavors to meld and the texture to thicken naturally. For best results when learning how to prepare chili, avoid rushing this critical step.
Variations for Different Dietary Preferences
One of the beauties of chili is its adaptability to various dietary needs and preferences. Understanding these variations helps you customize your chili preparation method for any occasion.
Texas-Style Meat Chili
Omit beans and focus solely on meat (typically beef chuck or brisket, cubed rather than ground). Use only meat, onions, garlic, and spices with no tomato products for an authentic regional variation. This version requires longer cooking time (3-4 hours) to tenderize the meat properly.
Vegetarian Chili
Replace meat with a combination of beans (kidney, black, pinto), lentils, and textured vegetable protein or mushrooms for meaty texture. Use vegetable broth instead of beef broth. Add extra vegetables like zucchini, corn, or sweet potatoes for additional texture and nutrition.
White Chicken Chili
Use boneless chicken breasts or thighs instead of beef, white beans instead of red, and green chilies with tomatillos or green salsa instead of tomatoes. This variation requires less cooking time (20-30 minutes after chicken is cooked through) to maintain the delicate chicken texture.

Serving Suggestions and Accompaniments
The perfect chili experience extends beyond just the cooking process. Consider these serving suggestions when planning your chili preparation:
- Toppings: Shredded cheddar cheese, sour cream, diced onions, fresh cilantro, sliced jalapeños, or avocado
- Side dishes: Cornbread, saltine crackers, or rice complement chili perfectly
- For Cincinnati-style: Serve over spaghetti with a sprinkle of oyster crackers
- For Frito pie: Serve in a bag of Fritos topped with cheese
Storage and Reheating Instructions
Chili often tastes even better the next day as flavors continue to meld. Proper storage ensures your homemade chili maintains quality:
- Cool completely before storing (within 2 hours of cooking)
- Store in airtight containers in the refrigerator for up to 4 days
- Freeze in portion-sized containers for up to 3 months
- Reheat gently on the stove over medium-low heat, adding a splash of broth or water if needed
- Never reheat chili more than once for food safety
Troubleshooting Common Chili Problems
Even experienced cooks encounter issues when preparing chili. Here's how to address common problems:
Chili Is Too Thin
If your chili hasn't thickened sufficiently after simmering, create a slurry by mixing 1 tablespoon cornstarch with 2 tablespoons cold water. Stir into the chili and simmer for 5-10 minutes until thickened. Alternatively, mash some of the beans against the side of the pot to naturally thicken the mixture.
Chili Is Too Spicy
Add acidity with a splash of lime juice or vinegar, sweetness with a teaspoon of sugar or honey, or dairy with a dollop of sour cream or yogurt. You can also add more beans or tomatoes to dilute the heat without compromising flavor.
Chili Lacks Depth of Flavor
Enhance flavor by adding umami-rich ingredients like a tablespoon of soy sauce, Worcestershire sauce, or a small amount of instant coffee. A splash of beer or red wine added during cooking can also deepen flavors. For authentic chili preparation techniques, consider adding a small piece of dark chocolate.
Frequently Asked Questions
How long should I simmer chili for optimal flavor?
For optimal flavor development, simmer chili for at least 30 minutes, though 60-90 minutes yields superior results. The extended simmering time allows flavors to meld and the texture to thicken naturally. Some traditional recipes call for simmering up to 3-4 hours, particularly for meat-heavy versions like Texas-style chili.
Can I make chili in a slow cooker?
Yes, you can make chili in a slow cooker. Brown the meat and sauté vegetables first, then transfer everything to the slow cooker. Cook on low for 6-8 hours or high for 3-4 hours. The slow cooking process develops deep flavors, but avoid overcooking beans, which can become mushy. Add beans during the last 2 hours of cooking for best texture.
What's the difference between chili powder and chili seasoning?
Chili powder is a single spice made from ground dried chilies, while chili seasoning is a pre-mixed blend containing chili powder plus other spices like cumin, garlic powder, and oregano. For best results when preparing chili from scratch, use individual spices rather than pre-made seasoning to control flavor balance and avoid excess salt.
How can I make my chili less acidic?
If your chili tastes too acidic, add a small pinch of baking soda (1/8 teaspoon at a time) which neutralizes acidity. Alternatively, add sweetness with a teaspoon of sugar, honey, or a grated carrot. Dairy products like sour cream when serving can also balance acidity. Be careful not to overcorrect, as some acidity is important for flavor balance.


 浙公网安备
33010002000092号
浙公网安备
33010002000092号 浙B2-20120091-4