
Discover the foolproof method for growing crisp, flavorful onions from sets that even beginner gardeners can master. Whether you're preparing for summer salads or caramelizing for soups, properly planted onion sets deliver reliable harvests with minimal effort compared to seed starting. Our comprehensive guide walks through each critical step using time-tested techniques verified by agricultural extension services.
Why Onion Sets Outperform Seeds for Home Gardeners
Onion sets—small dormant bulbs grown from seed the previous year—offer significant advantages over direct seeding. They establish faster, resist bolting in cool springs, and mature 30-40 days sooner than seed-grown plants. According to University of Minnesota Extension, sets achieve 85-90% germination rates versus 60-70% for seeds under typical home garden conditions.
Preparing Your Garden for Success
Successful onion cultivation begins with proper soil preparation 2-3 weeks before planting. Follow these essential steps:
- Test soil pH using a kit—onions thrive in slightly acidic conditions (6.0-6.8). Amend alkaline soils with elemental sulfur
- Enrich with organic matter by mixing 3 inches of compost into the top 6 inches of soil
- Create raised beds 4-6 inches high to improve drainage in heavy soils
- Apply balanced fertilizer (10-10-10) at 2 lbs per 100 sq ft before planting
| Onion Variety | Best Climate Zone | Days to Maturity | Storage Duration |
|---|---|---|---|
| Yellow Sweet Spanish | 3-9 | 110 | 6-8 months |
| Red Burgundy | 4-8 | 95 | 4-5 months |
| White Bermuda | 6-10 | 90 | 3-4 months |
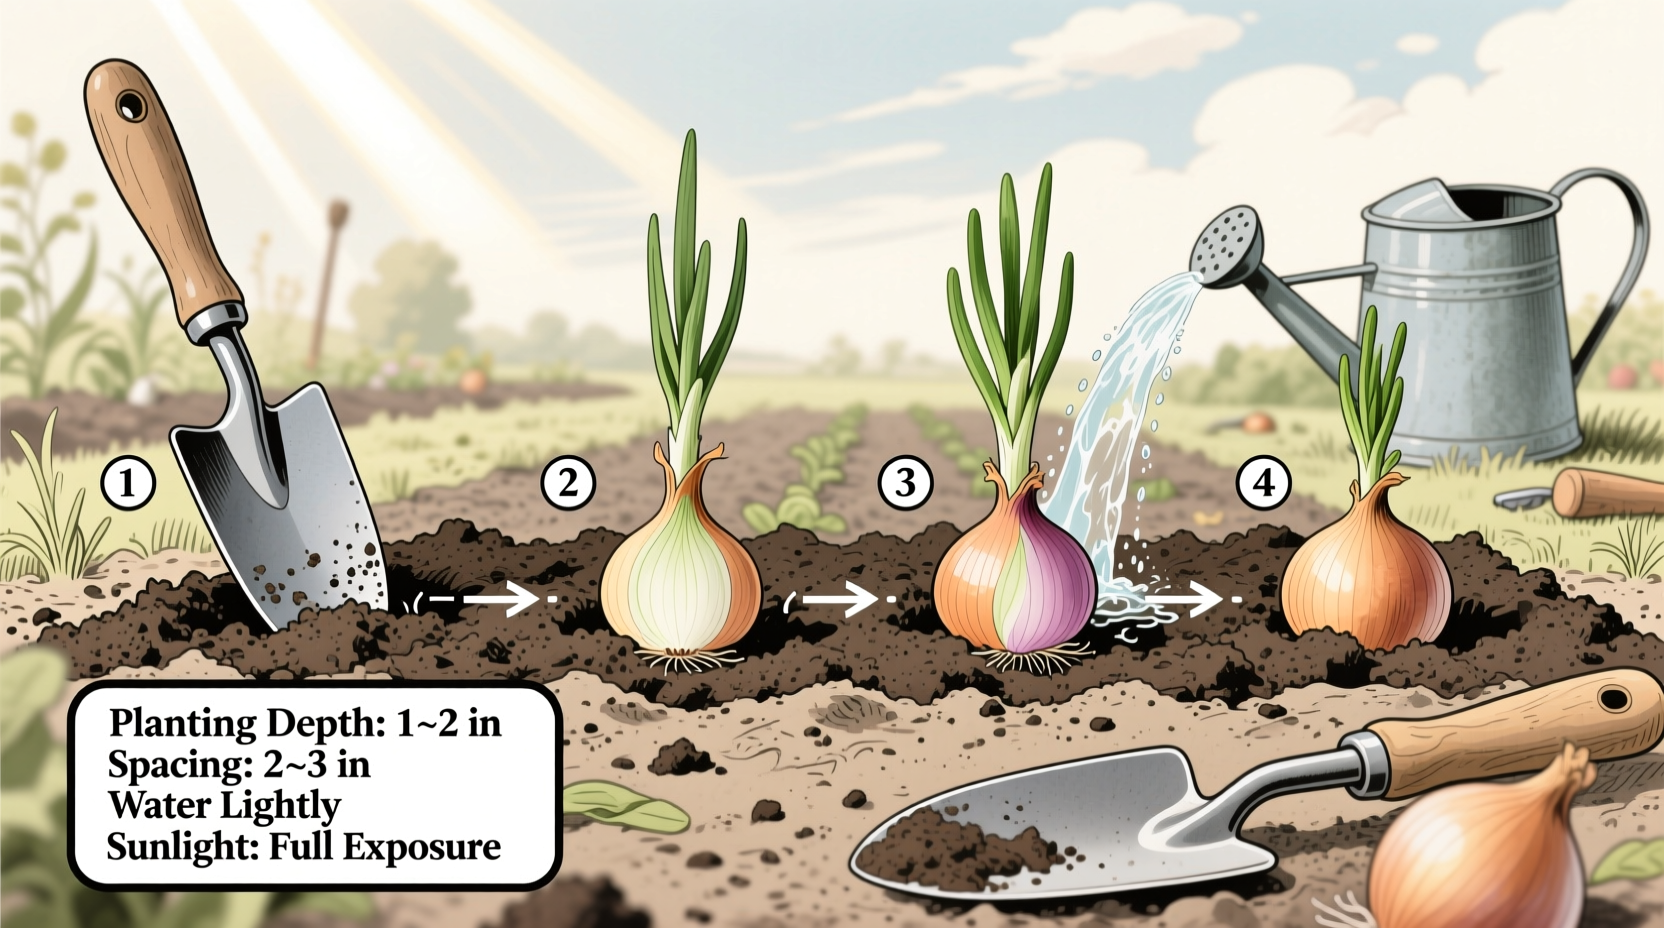
Step-by-Step Planting Process
Follow this precise sequence for optimal bulb development:
- Timing is critical: Plant sets 4-6 weeks before your area's last expected frost date. Use the USDA Plant Hardiness Zone Map to determine your specific window
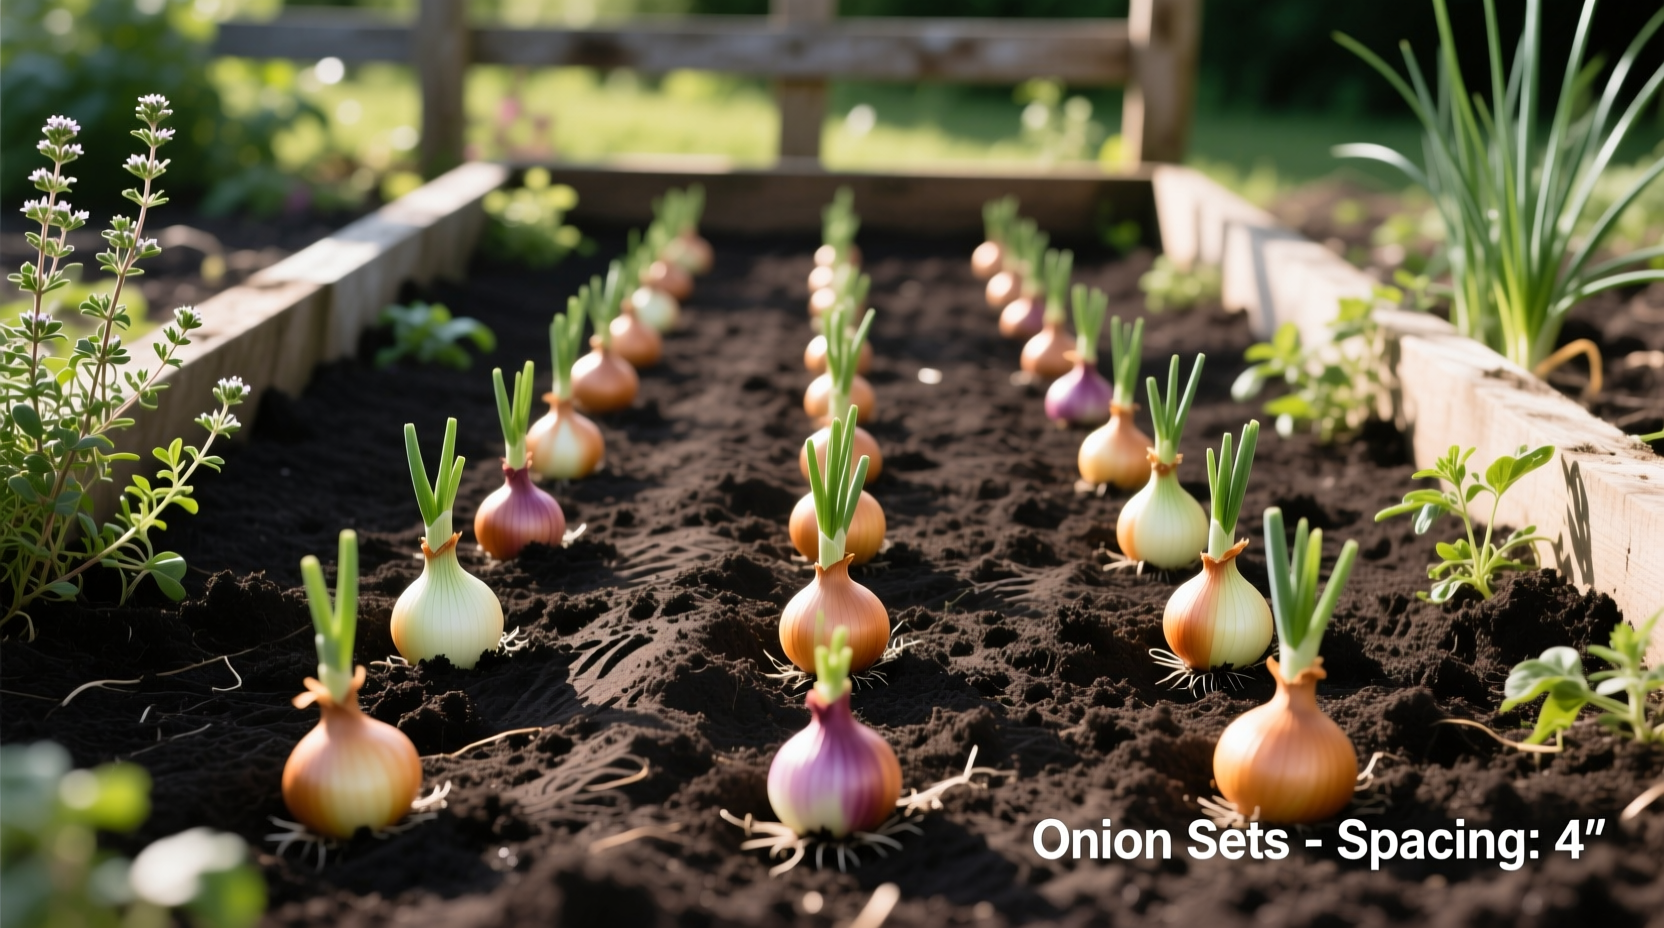
- Prepare sets: Separate any clumped bulbs and discard moldy or shriveled specimens
- Dig planting furrows 1 inch deep for small sets (under 1" diameter) or 2 inches deep for larger sets
- Position bulbs with pointed ends up, 4-6 inches apart for standard onions or 2-3 inches for green onions
- Cover gently with soil, leaving tips slightly exposed in heavy soils
- Water thoroughly to settle soil around bulbs (1 inch of water)
Avoid These Common Planting Mistakes
Based on Oregon State University Extension field reports, these errors reduce yields by 30-50%:
- Planting too deep: Exceeding 2 inches depth restricts bulb expansion
- Ignoring spacing requirements: Crowded plants produce undersized bulbs
- Using nitrogen-heavy fertilizer at planting (use balanced formula instead)
- Planting in waterlogged soil which causes rot before sprouting
Essential Care Through Growing Season
Maintain healthy plants with these science-backed practices:
- Watering schedule: Provide 1 inch of water weekly, increasing to 2 inches during bulb formation (June-July)
- Weed control: Hand-pull weeds weekly—onions have shallow roots damaged by cultivation
- Fertilization: Apply high-nitrogen fertilizer when tops reach 6 inches, then switch to potassium-rich formula during bulbing
- Pest monitoring: Check for thrips (tiny yellow insects) and onion maggots (white larvae) weekly
Harvesting and Curing for Maximum Storage
Timing your harvest correctly determines storage success. Watch for these natural indicators:
- Top fall-over: When 50% of foliage naturally collapses, stop watering
- Bulb inspection: Gently brush soil to check for full-sized bulbs with dry outer skins
- Curing process: After harvest, dry bulbs in shaded, well-ventilated area for 2-3 weeks
- Storage conditions: Keep in mesh bags at 32-40°F with 65-70% humidity
Troubleshooting Guide
Resolve these frequent issues using research-backed solutions:
- Small bulbs: Usually caused by overcrowding or premature bolting—ensure proper spacing and plant appropriate varieties for your day-length zone
- Yellowing leaves: Indicates nitrogen deficiency—apply balanced liquid fertilizer immediately
- Rotting at base: Sign of excess moisture—improve drainage and reduce watering frequency
- Fungal diseases: Prevent with crop rotation and copper-based fungicides at first sign of trouble
Regional Planting Considerations
Adapt these techniques based on your climate zone:
- Cold climates (Zones 3-5): Plant as soon as soil is workable in spring; choose short-day varieties
- Moderate climates (Zones 6-7): Plant in early spring for summer harvest or fall for overwintering
- Warm climates (Zones 8-10): Plant in fall for spring harvest; select intermediate-day varieties


 浙公网安备
33010002000092号
浙公网安备
33010002000092号 浙B2-20120091-4