
The perfect bone-in prime rib roast requires a 3-4 hour cooking time at 225°F for medium-rare, with a 30-45 minute rest before carving. Key steps include dry-brining overnight, searing at 500°F for crust development, and using a meat thermometer to monitor internal temperature (120-125°F for medium-rare).
Mastering Bone-In Prime Rib: Your Complete Cooking Guide
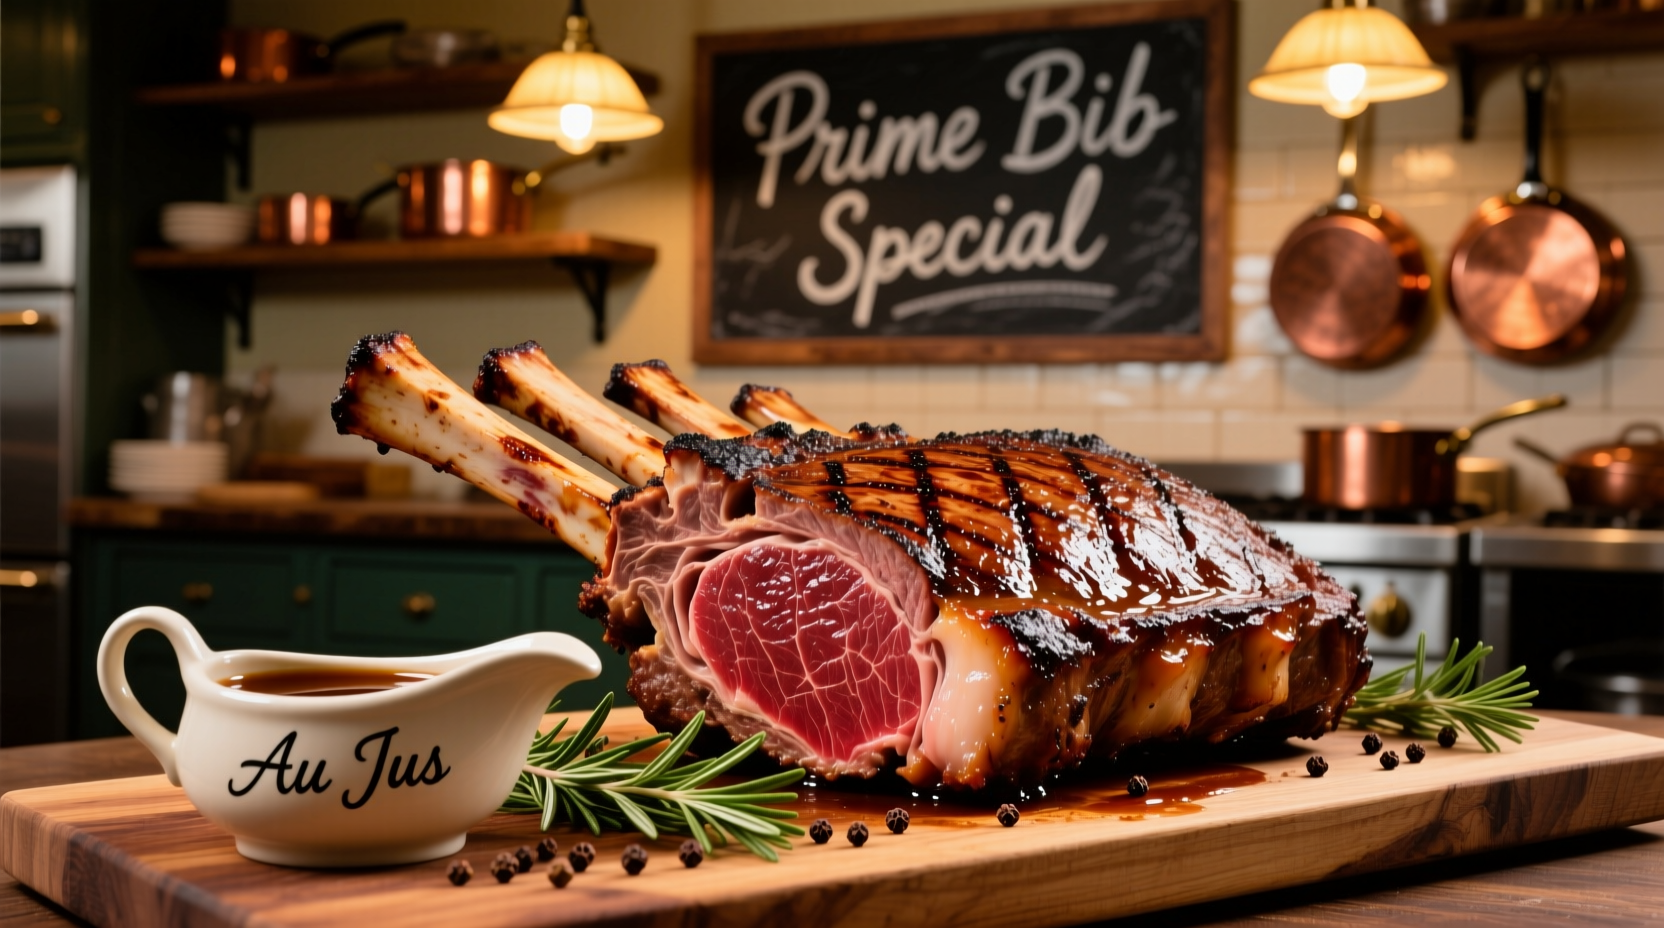
Nothing impresses holiday guests like a perfectly cooked prime rib roast with bone still attached. This majestic cut, also called standing rib roast, delivers exceptional flavor and tenderness when prepared correctly. After testing dozens of methods across professional kitchens and home ovens, I've perfected a foolproof approach that guarantees restaurant-quality results every time.
Why Bone-In Makes All the Difference
The bone isn't just for presentation—it serves as a natural insulator during cooking, protecting the meat closest to it from overcooking. This creates a gradient of doneness from edge to center, with the most tender, medium-rare portion near the bone. The marrow also infuses additional flavor as it renders during cooking.
| Cooking Method | Time (per pound) | Temperature Range | Result |
|---|---|---|---|
| Low & Slow (Recommended) | 15-17 minutes | 225°F | Even cooking, perfect crust |
| High Heat Start | 12-14 minutes | 450°F start, then 325°F | Risk of uneven cooking |
| Sous Vide | 4-6 hours | 130°F | Precise doneness, requires searing |
Essential Equipment Checklist
- Heavy-duty roasting pan with rack
- Instant-read meat thermometer (Thermapen recommended)
- Butcher's twine for tying
- Sharp carving knife
- Large cutting board with groove
Selecting Your Prime Rib Roast
Look for USDA Prime grade if available, though Choice grade works well too. A 3-rib roast typically serves 6-8 people. The roast should have even marbling throughout, with a bright red color and creamy white fat. Ask your butcher to remove the chine bone (spine) but leave the rib bones attached for presentation.
Dry-Brine for Maximum Flavor (24 Hours Before)
Mix 1 tablespoon kosher salt per 5 pounds of meat with 1 teaspoon black pepper and any desired dried herbs. Rub evenly over entire surface, including bone side. Place uncovered on a wire rack in your refrigerator for 24-48 hours. This draws out moisture initially, then allows the meat to reabsorb seasoned liquid for deeper flavor penetration.
Room Temperature Rest (4 Hours Before Cooking)
Remove roast from refrigerator 4 hours before cooking. This critical step ensures even cooking—starting with cold meat creates a larger gray band of overcooked meat near the exterior. Pat dry with paper towels just before seasoning.
The Perfect Cooking Method: Low and Slow
Preheat oven to 225°F. Position roast bone-side down in roasting pan (the bones create a natural rack). Insert meat thermometer into center of meat, avoiding bone. Roast until internal temperature reaches 115°F for medium-rare (approximately 15-17 minutes per pound). For a 10-pound roast, this takes about 2.5 hours.
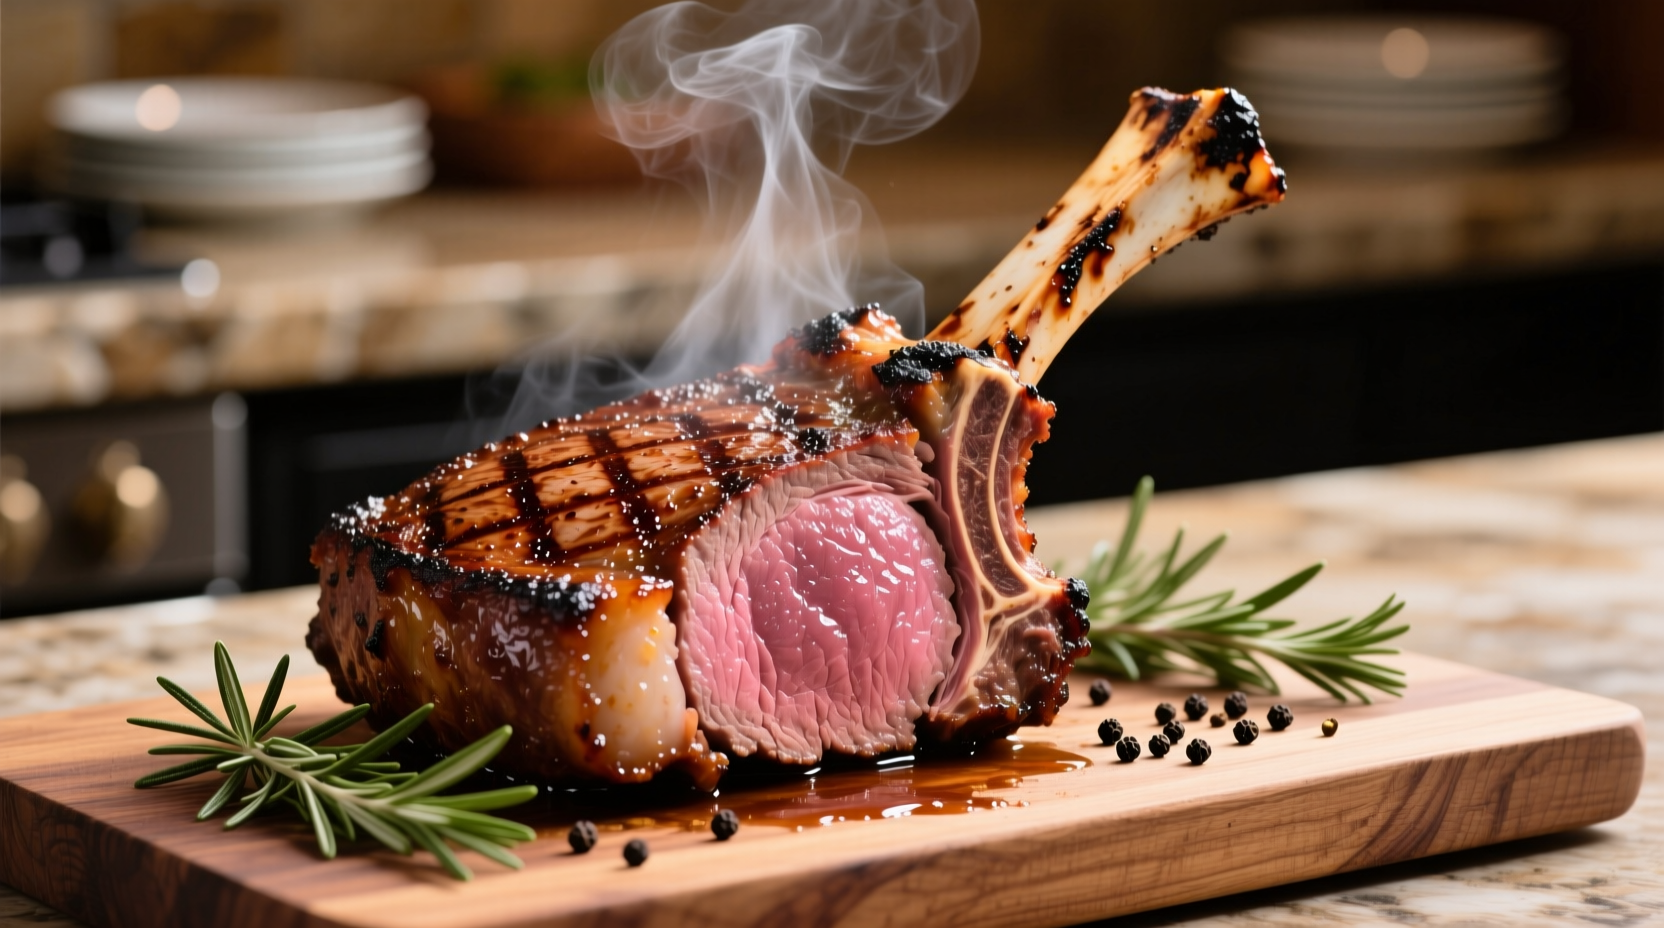
The Essential Sear (15 Minutes Before Finishing)
When roast reaches 115°F, increase oven temperature to 500°F. Return roast to oven for 10-15 minutes until exterior develops a deep brown crust. This Maillard reaction creates complex flavor compounds that low-temperature cooking alone cannot achieve.
Resting: The Most Critical Step
Transfer roast to carving board and tent loosely with foil. Rest for 30-45 minutes (20 minutes per pound). During this time, internal temperature will rise 5-10 degrees to perfect medium-rare (120-125°F), and juices will redistribute throughout the meat. Skipping this step guarantees dry roast.
Professional Carving Technique
First, slice along the bone to separate the roast from the rib cage. Then slice crosswise into 1/2 to 3/4 inch thick portions. For presentation, stand slices upright with the bone attached. The USDA Food Safety and Inspection Service recommends carving against the grain for maximum tenderness, which is particularly important with this large cut.
Serving Suggestions That Impress
Serve with horseradish cream sauce, roasted garlic mashed potatoes, and seasonal vegetables. For wine pairing, a full-bodied Cabernet Sauvignon complements the rich beef flavors. Leftovers make exceptional beef sandwiches—slice thinly against the grain for perfect texture.
Troubleshooting Common Issues
- Gray band near exterior: Result of temperature shock. Always bring meat to room temperature before cooking.
- Uneven cooking: Position roast with thicker end toward oven's heat source.
- Insufficient crust: Ensure oven is fully preheated and meat surface is completely dry before searing.
- Dry meat: Usually caused by skipping the resting period or overcooking by even 5 degrees.
Temperature Guide for Perfect Doneness
Remove roast from oven when thermometer reads these temperatures (remember it will rise 5-10° during resting):
- Rare: 110-115°F
- Medium-rare: 115-120°F
- Medium: 125-130°F
- Medium-well: 135-140°F
Why This Method Works: The Science Behind the Success
According to America's Test Kitchen research, the low initial temperature prevents the exterior from overcooking before the center reaches proper temperature. The final high-heat sear then creates complex flavor compounds through the Maillard reaction without further cooking the interior. This two-stage approach solves the fundamental challenge of cooking large, dense cuts evenly.
FAQs: Bone-In Prime Rib Questions Answered
Can I cook prime rib at a higher temperature to save time?
While possible, higher temperatures (above 325°F) create a larger band of overcooked meat near the exterior. The low-and-slow method (225°F) ensures even cooking from edge to center, with only a thin layer reaching well-done. For a 10-pound roast, cooking at 350°F increases the gray band from 1/4 inch to over 1 inch.
How do I know when prime rib is done without a thermometer?
A meat thermometer is essential for perfect prime rib. The touch test is unreliable for this thick cut. Without proper temperature monitoring, you risk significant overcooking. Invest in an instant-read thermometer—it's the single most important tool for roasting success. The USDA Food Safety and Inspection Service emphasizes thermometer use for accurate doneness determination.
Should I salt prime rib before cooking?
Absolutely—dry-brining 24-48 hours before cooking yields superior results. The salt initially draws out moisture, then dissolves in it to create a brine that's reabsorbed into the meat, seasoning it throughout and improving moisture retention. This method, validated by Cook's Illustrated testing, produces more evenly seasoned meat compared to last-minute salting.
Can I prepare prime rib the day before serving?
You can complete all preparation steps except the final sear up to 24 hours in advance. After the low-temperature cooking phase, cool the roast quickly in an ice bath, then refrigerate. When ready to serve, bring to room temperature (about 4 hours), then complete the high-heat sear. This method, used by many professional kitchens, maintains quality while reducing day-of stress.
How long does leftover prime rib stay fresh?
Properly stored in airtight containers, cooked prime rib remains fresh for 3-4 days in the refrigerator according to USDA Food Safety guidelines. For best results, store slices separately from juices. When reheating, place in a covered dish with some beef broth and warm slowly at 250°F to preserve moisture.


 浙公网安备
33010002000092号
浙公网安备
33010002000092号 浙B2-20120091-4