
Perfectly cooked pork loin requires proper temperature control (145°F internal temperature with 3-minute rest), strategic seasoning, and the right cooking method for your equipment. This guide delivers step-by-step instructions for oven roasting, grilling, and reverse sear techniques with precise timing charts and professional chef tips to ensure juicy, flavorful results every time.
Mastering pork loin cooking transforms an often-overlooked cut into a restaurant-quality centerpiece. Unlike the smaller tenderloin, pork loin comes from the back muscles and offers generous portions perfect for family dinners. With proper technique, you'll achieve tender, juicy meat with a beautifully caramelized exterior—no more dry, tough results. Let's break down the process into actionable steps you can implement immediately.
Understanding Your Pork Loin Cut
Pork loin (also called center-cut loin roast) runs along the pig's back, yielding a long, cylindrical roast typically weighing 3-5 pounds. It's leaner than shoulder cuts but contains more marbling than tenderloin, making it ideal for dry-heat cooking methods. The National Pork Board confirms that proper cooking technique prevents the common issue of dryness in this lean cut.
| Cut Type | Weight Range | Fat Content | Best Cooking Methods |
|---|---|---|---|
| Center-Cut Loin | 3-5 lbs | 8-10% | Oven roasting, grilling, reverse sear |
| Tenderloin | 1-1.5 lbs | 5-7% | Pan-searing, quick roasting |
| Butterfly Cut | 2-4 lbs | 7-9% | Stuffing, rolling, roasting |
Preparation Essentials for Success
Start with proper preparation to set yourself up for perfect results. Remove any excess fat cap (leaving 1/4 inch for flavor), then pat the entire surface completely dry with paper towels. Moisture prevents proper browning—a critical step for flavor development. Allow the roast to sit at room temperature for 45-60 minutes before cooking; this ensures even heat distribution.
For maximum flavor penetration, implement a dry brine: generously coat all sides with 1 teaspoon kosher salt per pound of meat 12-24 hours before cooking. The salt draws out moisture initially, then gets reabsorbed along with the meat's natural juices, seasoning from within while improving moisture retention. This technique, validated by food science research from the American Meat Science Association, significantly reduces post-cook moisture loss.
Flavor Building Techniques
Build complex flavors through strategic seasoning. Create a versatile dry rub using this professional ratio:
- 2 parts smoked paprika
- 1 part garlic powder
- 1 part onion powder
- 1/2 part black pepper
- 1/4 part cayenne (optional)
Apply the rub 30 minutes before cooking to allow flavors to meld with the meat's surface. For deeper flavor infusion, consider a 4-12 hour marinade using acidic components like apple cider vinegar or citrus juice combined with olive oil and herbs. The USDA Food Safety and Inspection Service recommends never marinating at room temperature—always refrigerate during this process.
Mastering Cooking Methods
Choose your cooking method based on available equipment and desired results:
Oven Roasting (Most Reliable Method)
- Preheat oven to 425°F
- Sear roast on all sides in hot oil (2 minutes per side)
- Transfer to roasting pan, insert thermometer
- Roast at 375°F until internal temperature reaches 140°F (approximately 20 minutes per pound)
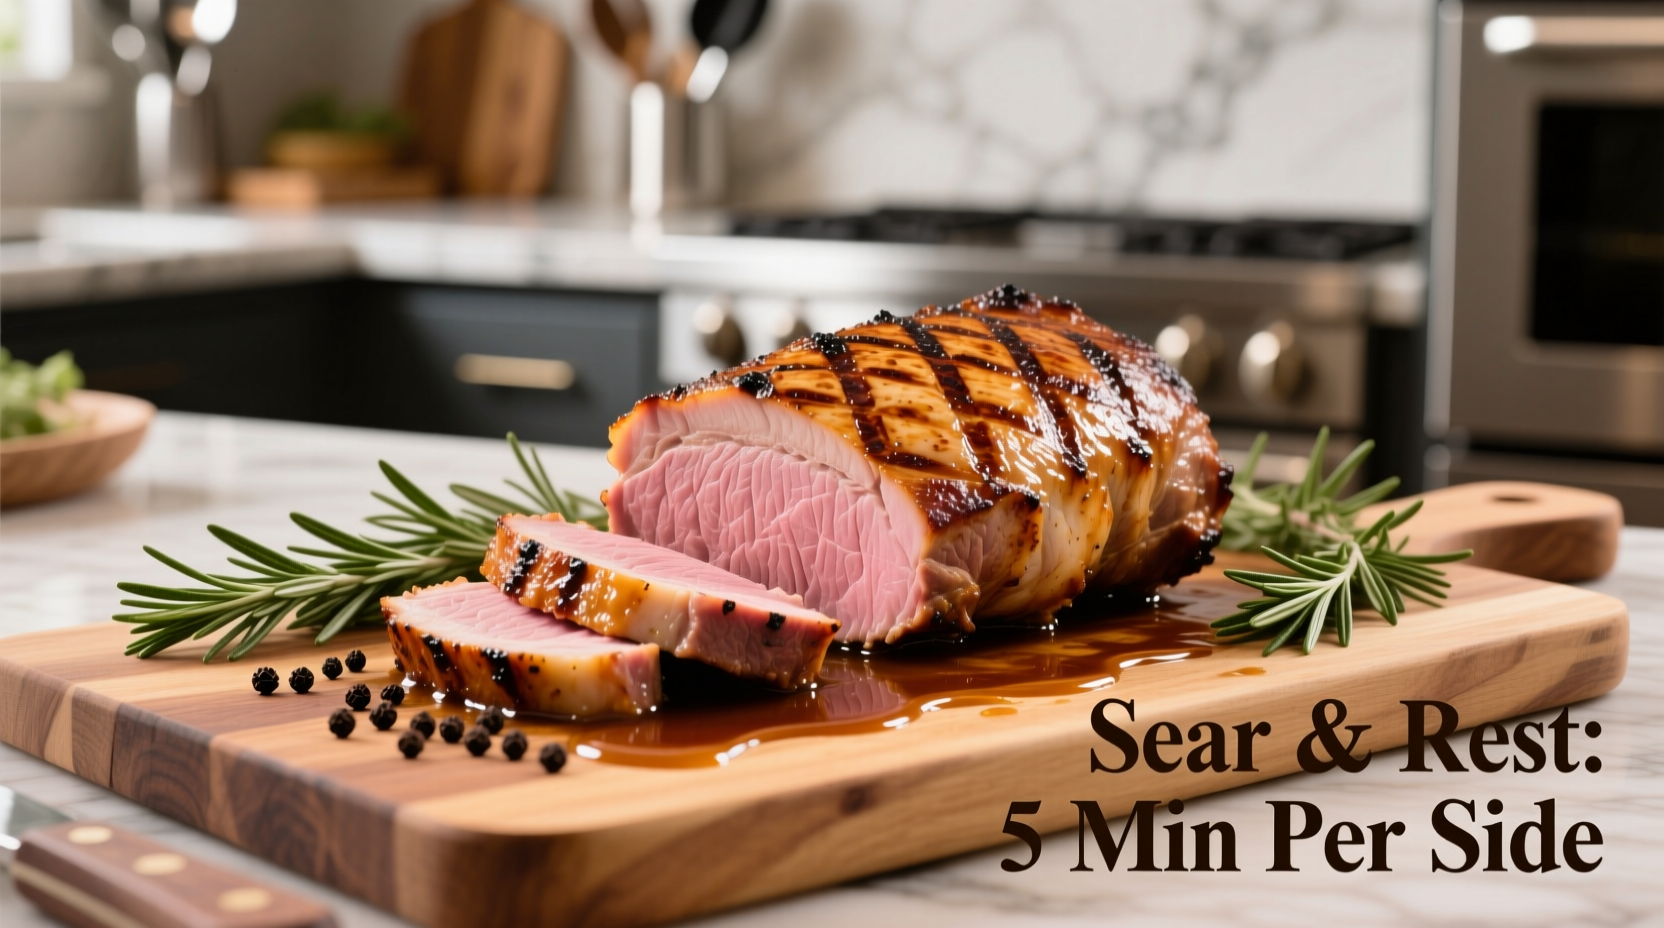
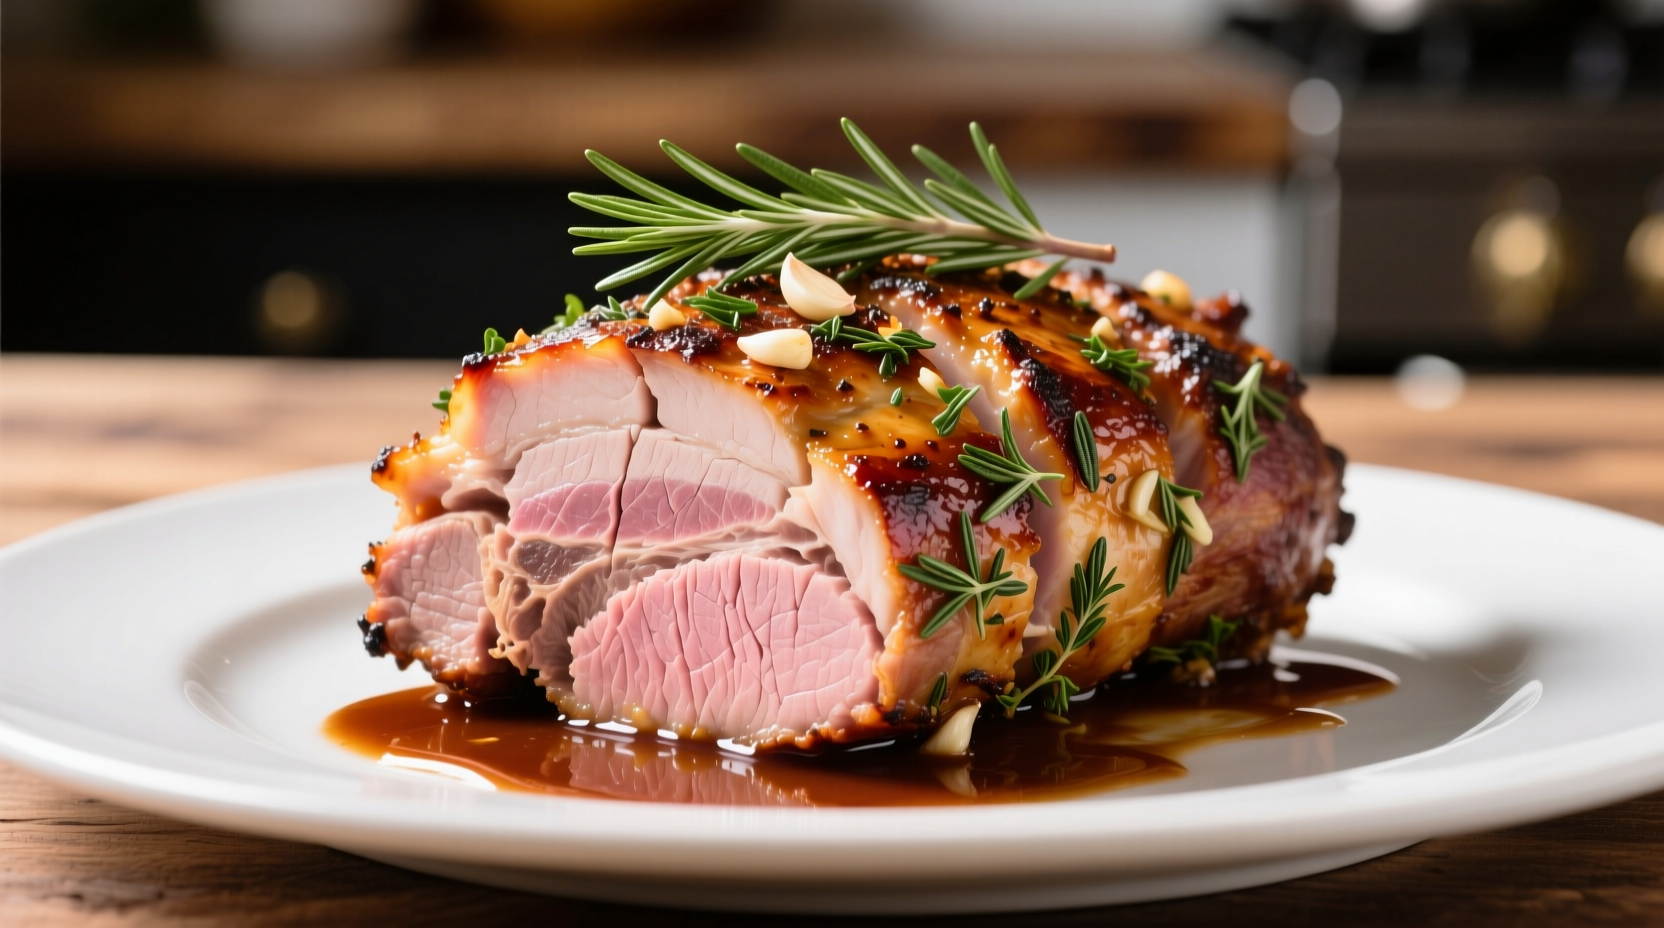
- Remove from oven and let rest—final temperature will rise to 145°F
Reverse Sear (For Perfect Edge-to-Edge Doneness)
This technique, increasingly popular among professional chefs since 2018 according to culinary industry surveys, involves slow-cooking followed by high-heat searing:
- Season roast and place on wire rack over baking sheet
- Cook in 275°F oven until internal temperature reaches 130°F (about 45-60 minutes)
- Rest 10 minutes, then sear in smoking-hot cast iron (90 seconds per side)
- Rest 10 minutes before slicing
| Cooking Method | Approx. Time | Target Temp | Rest Time | Best For |
|---|---|---|---|---|
| Traditional Roast | 20 min/lb | 140°F | 10-15 min | Weeknight dinners |
| Reverse Sear | 1-1.5 hours | 130°F + sear | 10 min | Special occasions |
| Grill (indirect) | 25 min/lb | 140°F | 10 min | Summer cooking |
Critical Temperature Guidelines
Temperature control separates successful pork loin from disappointing results. The USDA updated its recommended safe minimum internal temperature for pork to 145°F with a 3-minute rest period in 2011, a significant shift from the previous 160°F guideline. This change, based on extensive research by meat scientists, allows pork to remain juicy while still eliminating pathogens.
Use an instant-read thermometer inserted into the thickest part of the roast, avoiding bone or fat pockets. Remove the pork loin from heat when it reaches 140°F—the residual heat will carry it to the perfect 145°F during resting. Never skip the resting period; those 10-15 minutes allow juices to redistribute throughout the meat. Cutting too soon releases precious moisture onto your cutting board.
Avoiding Common Mistakes
Even experienced cooks make these critical errors with pork loin:
- Skipping the sear - Proper browning creates complex flavor compounds through the Maillard reaction
- Overcooking - Just 5°F beyond 145°F significantly reduces juiciness in lean cuts
- Cutting too soon - Resting time is non-negotiable for moisture retention
- Using only salt at the last minute - Early seasoning allows penetration
Serving and Storage Tips
Slice against the grain at a 45-degree angle using a sharp carving knife for maximum tenderness. For elegant presentation, cut 1/2-inch thick slices and fan them slightly on a warm platter. Pair with apple-based sauces, roasted root vegetables, or creamy polenta.
Store leftovers in airtight containers within 2 hours of cooking. Properly stored, cooked pork loin remains safe to eat for 3-4 days in the refrigerator. When reheating, use gentle methods like a 250°F oven with a splash of broth to prevent further moisture loss—microwaving often results in rubbery texture.


 浙公网安备
33010002000092号
浙公网安备
33010002000092号 浙B2-20120091-4