

Discover the precise timing needed to transform ordinary bones into nutrient-rich, gelatin-packed bone broth that elevates your cooking. Whether you're using a slow cooker, pressure cooker, or traditional stovetop method, understanding the science behind extraction times ensures you'll never waste ingredients or miss out on maximum flavor again.
The Science Behind Bone Broth Timing
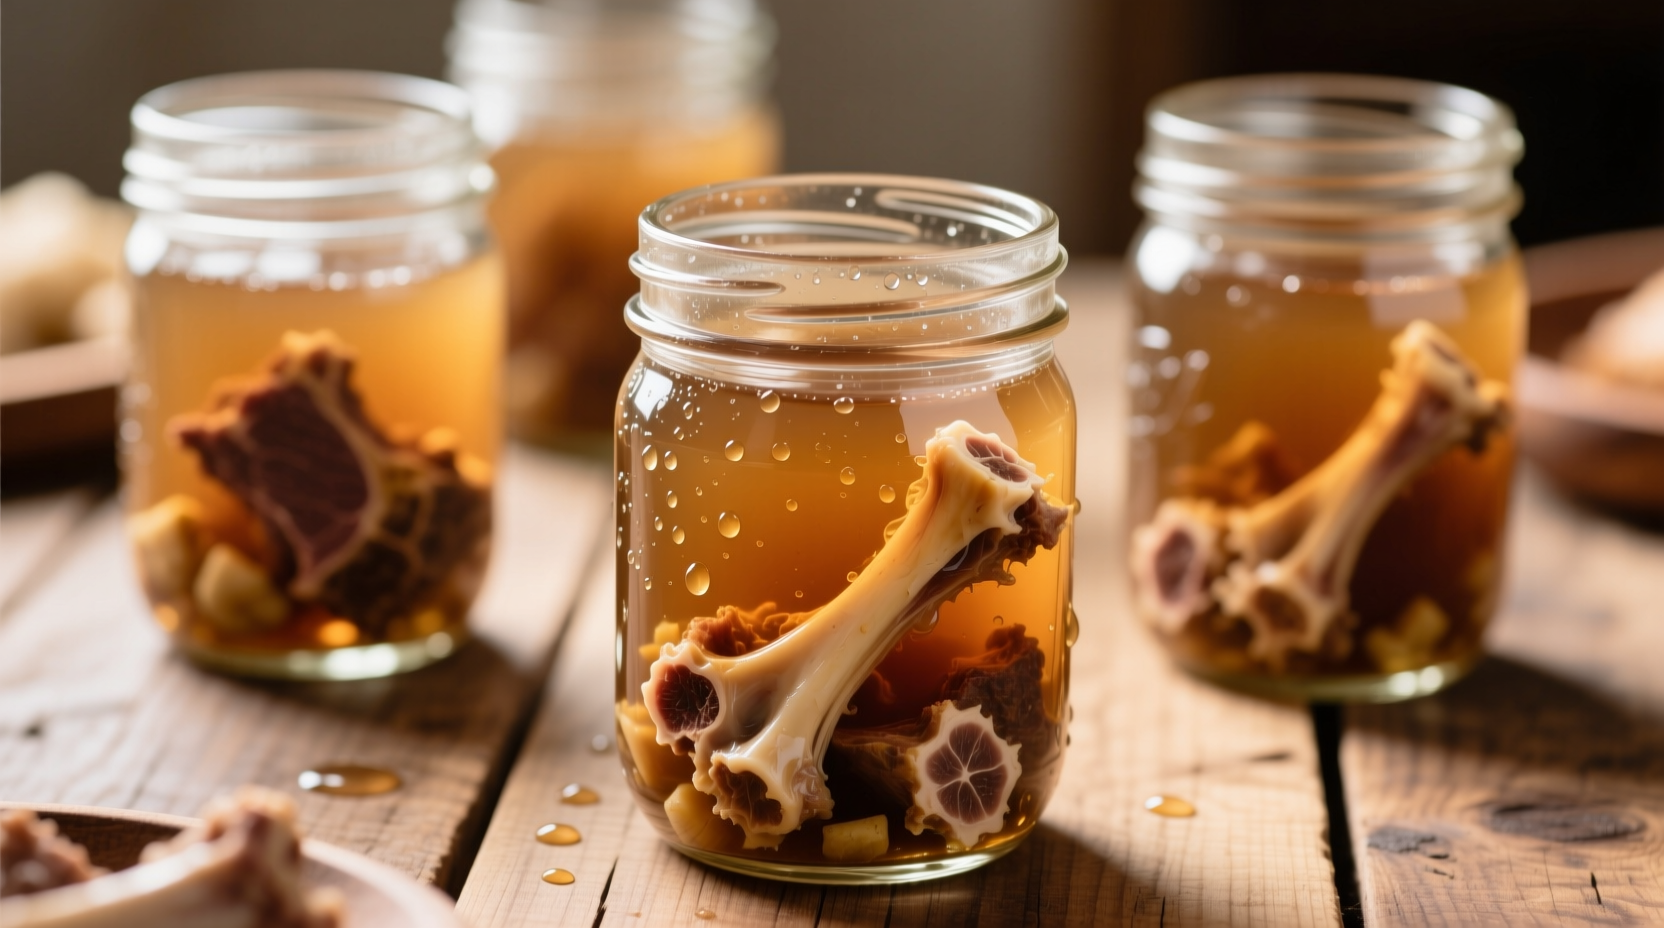
Proper bone broth cooking isn't arbitrary—it's a precise biochemical process. When bones simmer, collagen breaks down into gelatin through hydrolysis, a process that requires both time and consistent temperature. The National Center for Home Food Preservation confirms that collagen conversion begins around 160°F (71°C) but reaches optimal extraction between 180-200°F (82-93°C) over extended periods.
During the first 2-4 hours, water-soluble nutrients like minerals and some amino acids leach into the broth. Between 6-12 hours, collagen fibers gradually unwind and convert to gelatin. After 18 hours, connective tissues fully break down, releasing maximum nutrients while maintaining broth clarity. Cooking beyond 24 hours risks developing off-flavors as proteins begin to degrade.
Optimal Cooking Times by Bone Type
Not all bones behave the same in your pot. Density, marrow content, and connective tissue composition dramatically affect required cooking duration.
| Bone Type | Minimum Time | Optimal Time | Maximum Time | Gelatin Yield |
|---|---|---|---|---|
| Chicken bones | 8 hours | 12-24 hours | 36 hours | Moderate |
| Beef bones | 12 hours | 18-24 hours | 48 hours | High |
| Fish bones | 2 hours | 4-6 hours | 8 hours | Low |
| Pork bones | 10 hours | 15-20 hours | 30 hours | Moderate-High |
Beef marrow bones require the longest cooking due to their dense structure, while delicate fish bones need minimal time to prevent bitterness. The University of California Cooperative Extension notes that larger bones with more connective tissue (like knuckles and feet) significantly increase gelatin content but require additional cooking time.
Cooking Method Adjustments
Your equipment dramatically impacts required timing. Each method has unique thermal properties affecting extraction efficiency:
Stovetop Simmering
Maintain a gentle simmer (small bubbles occasionally breaking surface) for 12-24 hours. Skim foam during first hour for clearer broth. Chicken bones need 12-18 hours, beef bones 18-24 hours. Never boil vigorously as this makes broth cloudy and can cause off-flavors.
Slow Cooker Method
Set to low for 24-48 hours. The gentle, consistent heat works well for extraction but requires extended time due to lower maximum temperature. Add 25% more time compared to stovetop cooking. The USDA Food Safety and Inspection Service recommends keeping slow cookers at or above 140°F (60°C) throughout the process to prevent bacterial growth.
Pressure Cooker Timing
Modern electric pressure cookers dramatically reduce time while maintaining quality. Cook chicken bones 2-3 hours at high pressure, beef bones 3-4 hours. While faster, pressure cooking extracts different flavor compounds—some chefs note slightly less complex flavor profiles compared to traditional methods.
How to Know When Bone Broth is Perfectly Cooked
Timing guidelines provide a framework, but visual and textural cues offer the most reliable indicators:
- Gel test: Chill a spoonful—properly cooked broth should solidify into a firm, jelly-like consistency when cold
- Bone separation: Meat and connective tissue should easily separate from bones
- Color development: Chicken broth turns golden, beef broth develops deep amber tones
- Texture: Broth should coat the back of a spoon with substantial body
Overcooked broth develops a slightly bitter, mineral-heavy taste as proteins break down excessively. Undercooked broth lacks body and appears thin when chilled.
Troubleshooting Common Timing Issues
Even with precise timing, variables can affect your results:
Cloudy Broth Despite Proper Timing
This usually indicates boiling rather than simmering. Maintain temperature below 200°F (93°C) for clear broth. Adding an egg white during last hour can clarify cloudy broth through protein coagulation.
Broth Lacks Gelatinous Texture
If your broth doesn't gel when chilled despite following timing guidelines, you likely didn't use enough connective tissue-rich bones. Add chicken feet, pork hocks, or beef knuckles to increase collagen content. The American Culinary Federation recommends using at least 30% connective tissue bones for optimal gel formation.
Off Flavors After Extended Cooking
Bitterness developing after 24+ hours indicates over-extraction. Immediately strain and chill broth. Adding a small amount of acid (like lemon juice) can sometimes balance bitter notes in finished broth.
Storage and Usage Recommendations
Properly cooked bone broth keeps refrigerated for 5-7 days or frozen for up to 12 months. When freezing, leave 1-inch headspace for expansion. The gelatinous structure breaks down when reheated but reforms upon cooling—this is normal and indicates proper collagen extraction.
Use your finished broth as a nutrient-dense cooking liquid for grains, soups, and sauces. The gelatin content improves mouthfeel and adds valuable amino acids to your dishes. For maximum nutritional benefit, consume within 3 days of preparation.


 浙公网安备
33010002000092号
浙公网安备
33010002000092号 浙B2-20120091-4