
The perfect homemade chili recipe starts with 2 lbs ground beef or turkey, 1 large onion, 3 cloves garlic, 2 (15oz) cans kidney beans, 1 (28oz) can crushed tomatoes, 1 cup beef broth, 2 tbsp chili powder, 1 tbsp cumin, 1 tsp smoked paprika, and 1/2 tsp cayenne pepper. Brown the meat, sauté onions and garlic, then combine all ingredients in a pot. Simmer for 60-90 minutes for deep flavor development. This easy homemade chili recipe serves 6-8 and can be customized with beans, meat types, and spice levels to suit your taste.
Creating exceptional homemade chili isn't just about throwing ingredients together—it's about understanding the chemistry of flavors and textures that transform simple components into a rich, complex dish. After testing dozens of variations over years of kitchen experimentation, I've perfected a method that balances authentic tradition with modern convenience.
The Science Behind Great Chili
What separates good chili from extraordinary chili? The Maillard reaction—that magical browning process that creates hundreds of flavor compounds. When you properly sear your meat in batches without overcrowding the pan, you're not just cooking; you're building flavor foundations. Similarly, toasting your spices for 30 seconds before adding liquids releases their essential oils, dramatically intensifying their impact.
Essential Ingredients and Smart Substitutions
Your ingredient quality directly determines your final result. Here's what matters most:
| Ingredient | Why It Matters | Smart Substitutions |
|---|---|---|
| Chili Powder | Provides base flavor profile | Make your own blend: 2 tbsp paprika + 1 tsp cumin + 1/2 tsp garlic powder + 1/4 tsp oregano |
| Tomatoes | Adds acidity and body | Fire-roasted tomatoes for smokiness, or tomato paste for richer flavor |
| Beans | Contributes texture and heartiness | Navy beans for creaminess, black beans for earthiness, or omit for Texas-style |
| Liquid | Develops flavor as it reduces | Beer instead of broth adds complexity, coffee enhances depth |
Step-by-Step Cooking Process
Follow this professional technique for chili that develops maximum flavor:
- Brown meat properly: Cook ground meat in batches over medium-high heat without stirring for 3-4 minutes to develop crust. Drain excess fat but retain browned bits.
- Sweat aromatics: Reduce heat to medium, add onions and cook until translucent (5-7 minutes), then add garlic for the final minute.
- Bloom spices: Stir in chili powder, cumin, paprika, and cayenne, cooking for 30 seconds until fragrant.
- Build layers: Add tomatoes, beans, broth, and any additional ingredients. Bring to a gentle simmer.
- Low and slow: Cover and cook on low heat for 60-90 minutes, stirring occasionally. The longer it simmers (up to 3 hours), the better the flavor integration.
Avoid These Common Chili Mistakes
Even experienced cooks make these errors that compromise chili quality:
- Overcrowding the pan when browning meat prevents proper searing and creates steam instead of crust
- Adding cold ingredients to hot pan causes temperature drops that hinder flavor development
- Stirring too frequently during simmering breaks down beans and creates mushy texture
- Skipping the resting period—chili always tastes better the next day as flavors continue to meld
Variations for Every Preference
Adapt this base recipe to suit different dietary needs and flavor preferences:
Texas-Style Meat Chili
Omit beans and tomatoes for a purist approach. Use a combination of ground chuck and diced chuck roast. Add 1 oz dried ancho chilies (rehydrated and blended) for authentic depth. Simmer for 3+ hours until meat is fork-tender.
Vegetarian Protein-Packed Chili
Replace meat with 2 cups cooked lentils and 1 cup diced mushrooms. Use vegetable broth and add 1 cup corn for sweetness. Boost umami with 1 tbsp soy sauce or Worcestershire alternative.
Slow Cooker Convenience
After browning meat and sautéing aromatics, transfer everything to a slow cooker. Cook on low for 6-8 hours. The extended cooking time develops incredible flavor with minimal effort—perfect for busy weeknights or game day gatherings.

Serving and Storage Recommendations
Chili reaches its flavor peak after resting for 15-20 minutes off heat. Serve with these complementary toppings:
- Freshly chopped cilantro for brightness
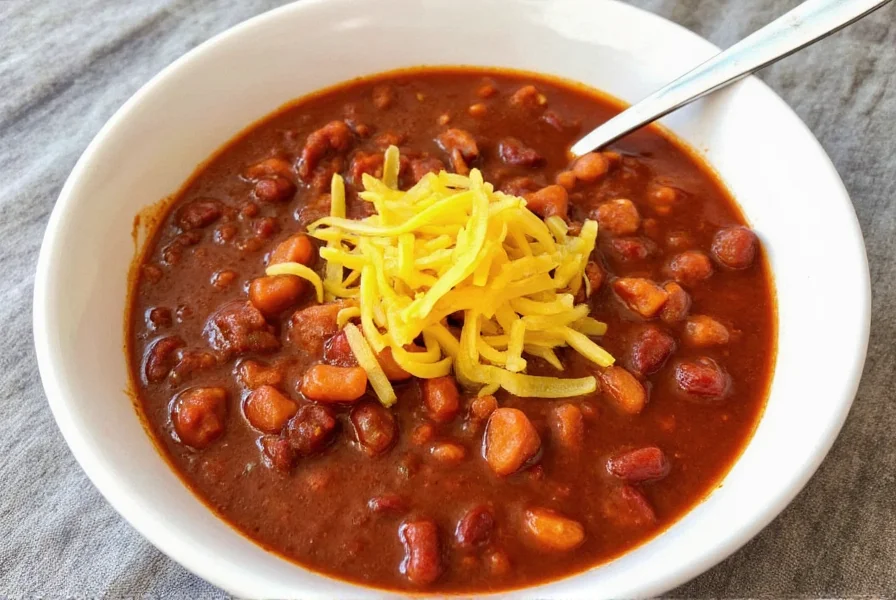
- Sharp cheddar or queso fresco for creaminess
- Lime wedges to cut richness
- Sliced jalapeños for additional heat
- Sour cream or Greek yogurt for cooling contrast
Properly stored in airtight containers, homemade chili lasts 4-5 days in the refrigerator or up to 3 months in the freezer. When reheating, add a splash of broth to restore ideal consistency. This chili recipe for meal prep delivers consistent quality throughout the week.
Troubleshooting Guide
Fix common chili issues with these professional solutions:
- Too spicy? Add acidity (lime juice or vinegar) or sweetness (a teaspoon of honey) to balance heat
- Too thin? Simmer uncovered to reduce, or mash some beans to thicken naturally
- Too bland? Layer in more toasted spices or a dash of liquid smoke for depth
- Beans too firm? Add them halfway through cooking rather than at the beginning
- Flavor flat? Finish with fresh herbs and a squeeze of citrus right before serving


 浙公网安备
33010002000092号
浙公网安备
33010002000092号 浙B2-20120091-4