
Making chili sauce from scratch transforms ordinary meals with vibrant heat and complex flavors you can't find in commercial products. The process takes just 30 minutes with simple ingredients you likely already have in your pantry. This guide provides everything you need to create restaurant-quality chili sauce at home, including professional techniques for balancing flavors and achieving perfect consistency.
Why Homemade Beats Store-Bought
Commercial chili sauces often contain preservatives, artificial colors, and excessive sodium to extend shelf life. When you make easy homemade chili sauce recipe yourself, you control every element:
- Pure ingredients without additives
- Customizable heat level (mild to extreme)
- Fresher, brighter flavor profile
- No hidden sugars or artificial flavors
- Cost-effective compared to premium brands
Professional chefs consistently prefer authentic homemade chili sauce because fresh ingredients create more nuanced flavors that develop beautifully during cooking.
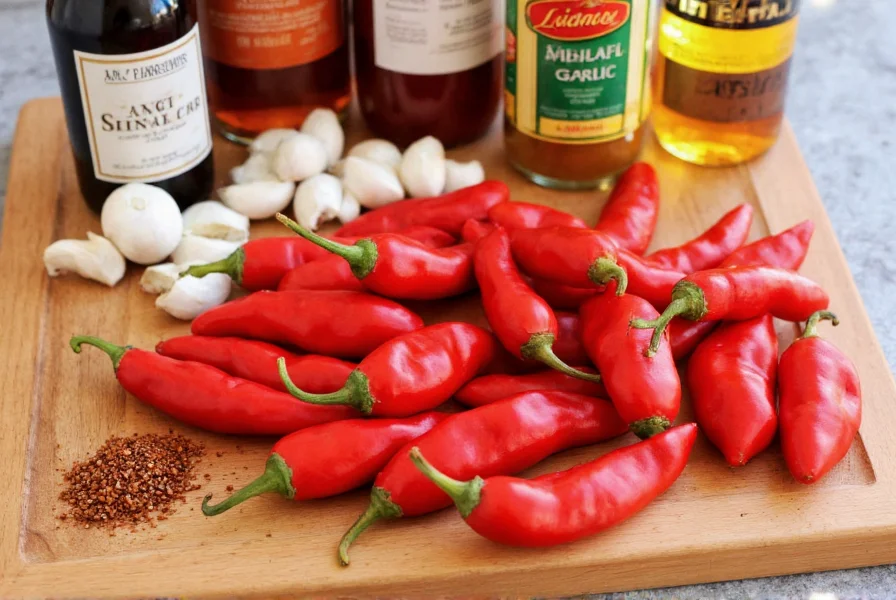
Essential Ingredients and Their Roles
The magic of traditional chili sauce recipe comes from understanding how each component contributes to the final product. Don't substitute randomly—each ingredient serves a specific purpose:
| Ingredient | Function | Best Varieties |
|---|---|---|
| Chili Peppers | Provides heat and base flavor | Serrano (medium), Habanero (hot), Fresno (balanced) |
| Vinegar | Preservation and tangy brightness | Apple cider (fruity), White (clean), Rice (mild) |
| Garlic | Depth and aromatic complexity | Fresh cloves (never powdered) |
| Salt | Flavor enhancer and preservative | Kosher or sea salt |
| Sugar | Balances acidity | Raw cane sugar or honey |
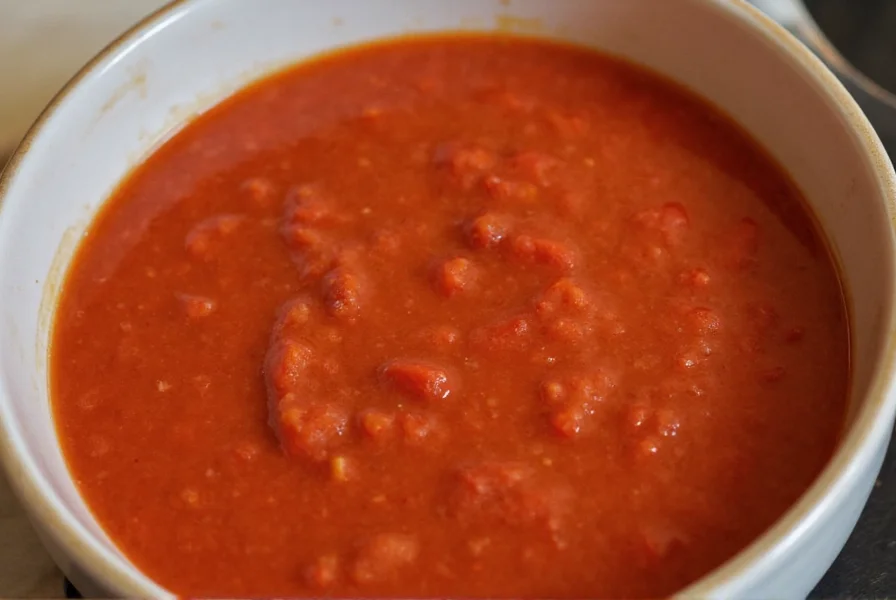
Step-by-Step Preparation Guide
Follow these precise steps for perfect homemade chili sauce every time. This method ensures proper sterilization and flavor development:
- Prepare ingredients: Wear gloves while handling chilies. Remove stems but keep seeds for maximum heat. Roughly chop all vegetables.
- Combine ingredients: In a non-reactive pot, combine 1 cup chopped chilies, ½ cup vinegar, 3 garlic cloves, 1 tsp salt, and 1 tbsp sugar.
- Simmer gently: Cook over medium-low heat for 15 minutes until vegetables soften but don't brown.
- Cool slightly: Let mixture rest for 10 minutes to allow flavors to meld.
- Blend to perfection: Transfer to blender and process until completely smooth (1-2 minutes).
- Strain (optional): For ultra-smooth texture, press through fine-mesh sieve.
- Bottle properly: Pour into sterilized glass bottles while still warm, leaving ½ inch headspace.
- Seal and store: Cool completely before refrigerating. Consume within 4 weeks.
Avoid These Common Mistakes
Even experienced cooks make these errors when preparing spicy homemade chili sauce:
- Using metal pots: Acidic ingredients react with metal, creating off-flavors. Always use glass, ceramic, or stainless steel.
- Over-blending: Excessive blending incorporates air, causing premature separation. Blend just until smooth.
- Skipping the cooling step: Bottling while boiling hot creates vacuum issues and potential spoilage.
- Ignoring pH levels: Proper acidity (below 4.6 pH) prevents bacterial growth. Never reduce vinegar proportions.
Customization Options for Every Palate
One of the greatest advantages of how to make chili sauce from scratch is customization. Try these professional variations:
- Smoky Chipotle: Replace ½ cup fresh chilies with 3-4 rehydrated chipotle peppers in adobo
- Tropical Habanero: Add ¼ cup mango puree and juice of 1 lime for sweet-heat balance
- Garlic Lover's: Double garlic quantity and roast cloves before adding
- Umami Boost: Stir in 1 tsp fish sauce or 2 tbsp soy sauce after blending
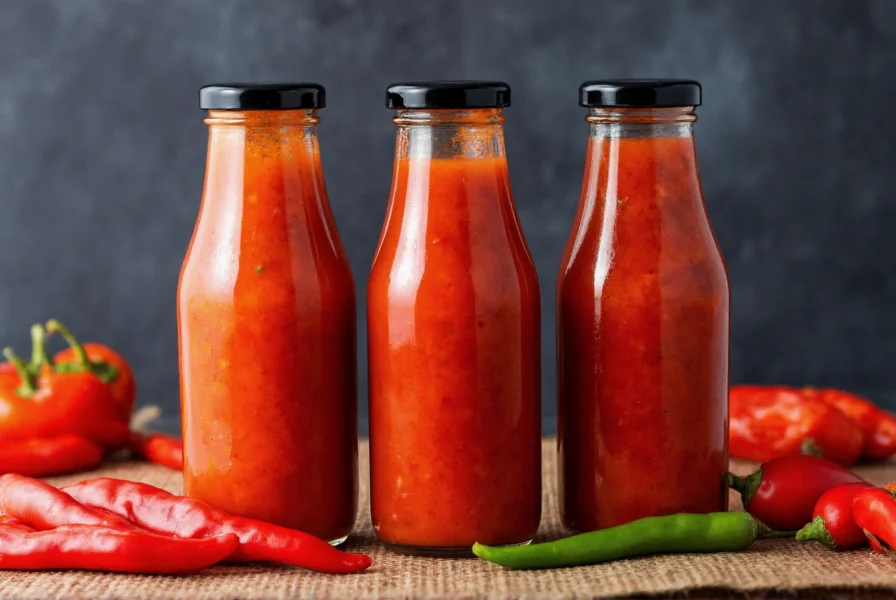
Proper Storage Techniques
Understanding storing homemade chili sauce properly ensures safety and maximum flavor retention:
- Always use sterilized glass containers with tight-sealing lids
- Refrigerate immediately after cooling to room temperature
- Leave ½ inch headspace to allow for expansion
- Wipe bottle rims clean before sealing to prevent contamination
- Consume within 4 weeks for best quality (though safe up to 6 weeks)
- Freeze in ice cube trays for longer storage (up to 6 months)
Never store at room temperature unless properly canned using pressure canning methods—which requires specific equipment and knowledge beyond basic recipe preparation.
Culinary Applications Beyond Dipping
Expand your cooking repertoire with these professional uses for chili sauce for cooking and dipping:
- Marinade base: Combine with oil and citrus for meats
- Soup enhancer: Stir into broths for instant depth
- Mayo mixer: Create signature aiolis (try 2 tbsp per ½ cup mayo)
- Pickling liquid: Add to vinegar brines for vegetables
- Cocktail ingredient: Muddle into Bloody Marys or Micheladas
- Baking addition: Incorporate into cornbread or savory muffins
Troubleshooting Guide
Fix common issues with these expert solutions:
- Too spicy: Add equal parts honey and lemon juice, 1 tsp at a time
- Too thin: Simmer uncovered for 5-10 minutes to reduce
- Separation: Shake well before use or add ¼ tsp xanthan gum while blending
- Muted flavor: Balance with small increments of salt, acid, or sweetener
- Mold development: Discard immediately—never attempt to salvage
Frequently Asked Questions
How long does homemade chili sauce last in the refrigerator?
Properly stored homemade chili sauce remains fresh for 3-4 weeks in the refrigerator. Always use clean utensils when serving to prevent contamination. Discard immediately if you notice any mold, off-odors, or significant color changes. For longer storage, freeze in ice cube trays then transfer to airtight containers for up to 6 months.
Can I adjust the heat level after making chili sauce?
Yes, you can modify heat after preparation. To reduce spiciness, gradually add honey or lemon juice (1 teaspoon at a time) which counteracts capsaicin. For increased heat, incorporate additional fresh chilies that have been finely minced and simmered for 5 minutes. Remember that heat perception intensifies over the first 24 hours as flavors meld, so adjust conservatively.
Why did my homemade chili sauce separate?
Separation occurs naturally in homemade sauces due to ingredient density differences. This happens because we avoid emulsifiers and stabilizers found in commercial products. Simply shake or stir vigorously before use. For permanent emulsification, blend with ¼ teaspoon xanthan gum during processing. Proper vinegar-to-chili ratios (minimum 1:2) also help maintain consistency.
Is it safe to can homemade chili sauce for shelf storage?
Canning requires precise pH levels (below 4.6) and proper equipment to prevent botulism risk. Basic recipes may not achieve sufficient acidity without vinegar adjustments. Unless you have pressure canning experience and a reliable pH meter, refrigeration is the safest storage method. Never attempt water bath canning with standard chili sauce recipes as they typically lack adequate acidity for safe preservation.
What's the best chili variety for beginners making homemade sauce?
Jalapeños provide the most forgiving starting point for beginners making easy homemade chili sauce recipe. They offer moderate heat (2,500-8,000 Scoville units) with bright flavor that's easy to balance. Remove seeds and membranes to reduce heat significantly. As you gain experience, experiment with Serranos (medium-hot) or combine different varieties for complex flavor profiles.


 浙公网安备
33010002000092号
浙公网安备
33010002000092号 浙B2-20120091-4