
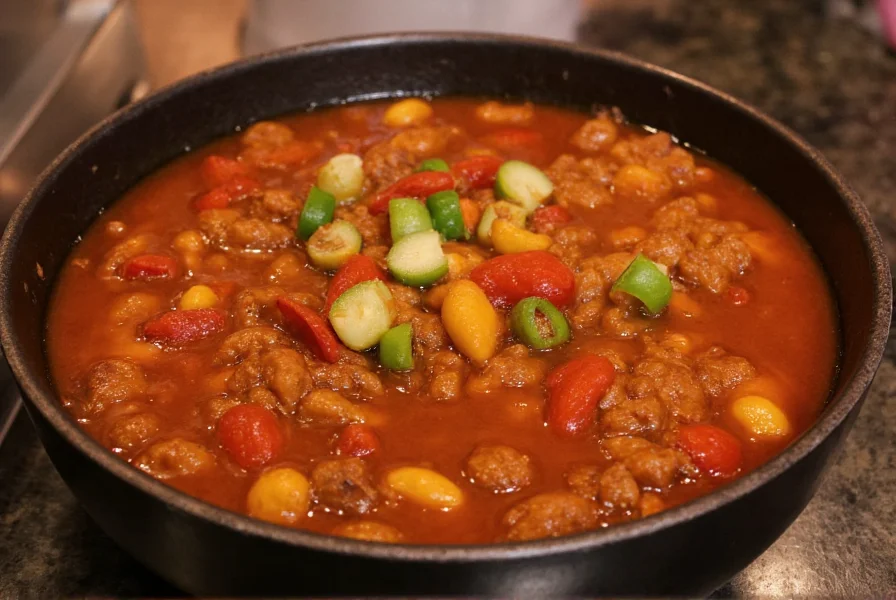
Understanding proper food safety protocols for chili is essential for preventing foodborne illness while maximizing flavor and nutritional value. This comprehensive guide examines evidence-based storage guidelines from food safety authorities including the USDA Food Safety and Inspection Service and the FDA Food Code. Whether you're meal prepping, hosting gatherings, or simply enjoying leftovers, these science-backed recommendations ensure your chili remains both delicious and safe to consume.
Understanding the Food Safety Danger Zone for Chili
Chili, with its combination of protein-rich meats, beans, and vegetables in a liquid base, creates an ideal environment for bacterial growth when improperly stored. The "danger zone" refers to temperatures between 40°F (4°C) and 140°F (60°C), where pathogens like Salmonella, E. coli, and Staphylococcus aureus multiply rapidly.
When chili remains within this temperature range for extended periods, bacteria can reach levels that cause food poisoning. The two-hour rule exists because research shows that most perishable foods, including chili, can safely remain at room temperature for this duration before bacterial counts reach potentially hazardous levels.
Room Temperature Storage Guidelines
Many home cooks wonder how long can cooked chili stay out during meal preparation or serving. The standard recommendation applies here: maximum 2 hours at temperatures below 90°F (32°C). During summer months or in warm climates where temperatures exceed 90°F, this timeframe decreases to 1 hour.
Consider these practical scenarios:
- When preparing chili for a gathering, keep it hot above 140°F using a slow cooker on warm setting
- During buffet service, use chafing dishes with heat sources to maintain safe temperatures
- After cooking, promptly divide large batches into shallow containers for faster cooling
Refrigeration Guidelines for Optimal Chili Preservation
Proper refrigeration extends chili's shelf life while maintaining quality. Follow these evidence-based practices for safe storage time for chili:
| Storage Method | Temperature | Maximum Safe Duration | Quality Considerations |
|---|---|---|---|
| Room Temperature | 70°F (21°C) | 2 hours | Rapid bacterial growth after timeframe |
| Refrigerator | 40°F (4°C) or below | 3-4 days | Flavor intensifies initially, then deteriorates |
| Freezer | 0°F (-18°C) | 4-6 months | Best quality within first 3 months |
For optimal results when refrigerating chili:
- Cool chili rapidly by placing pot in ice water bath before transferring to containers
- Use shallow containers no deeper than 2 inches to promote even cooling
- Leave 1-inch headspace in containers to accommodate expansion
- Label containers with preparation date for easy tracking
Freezing Chili: Best Practices and Timeframes
Freezing represents the most effective method for long-term chili storage temperature guidelines. When properly frozen, chili maintains safety indefinitely, though quality gradually declines after 4-6 months.
Follow these professional freezing techniques:
- Vacuum-seal portions to prevent freezer burn and flavor transfer
- Freeze in meal-sized portions for convenient thawing
- Remove excess air from freezer bags before sealing
- Consider flash-freezing chili in ice cube trays before transferring to containers

Safe Reheating Procedures for Leftover Chili
Proper reheating eliminates potential pathogens that may have developed during storage. Always follow these protocols:
- Thaw frozen chili overnight in the refrigerator, not at room temperature
- Reheat to minimum internal temperature of 165°F (74°C)
- Stir frequently during reheating for even temperature distribution
- Consume reheated chili within 2 hours or return to refrigerator
When reheating in a microwave, cover the container and rotate periodically for even heating. For stovetop reheating, add small amounts of liquid if chili has thickened during storage.
Recognizing When Chili Has Spoiled
Understanding when to throw out chili prevents foodborne illness. Watch for these spoilage indicators:
- Visible mold growth (any color) on surface or within chili
- Sour, unpleasant, or "off" odors not characteristic of fresh chili
- Texture changes including sliminess or excessive separation
- Bubbling or foaming not present during initial preparation
- Discoloration beyond normal darkening from storage
When in doubt, throw it out. Do not taste questionable chili to determine safety, as even small amounts of certain pathogens can cause illness.
Special Considerations for Different Chili Varieties
Various chili formulations require specific attention to chili shelf life after cooking:
- Meat-based chili: Follow standard guidelines (3-4 days refrigerated)
- Vegetarian chili: May last slightly longer (4-5 days) due to lower fat content
- Seafood chili: Consume within 2 days due to seafood's faster spoilage rate
- Dairy-enhanced chili (with sour cream or cheese): Consume within 2 days
Chili containing acidic ingredients like tomatoes may maintain quality slightly longer than non-acidic varieties, but safety guidelines remain consistent across formulations.
Food Safety Best Practices for Chili Preparation and Service
Implement these professional food handling techniques to maximize safety:
- Wash hands thoroughly before and after handling ingredients
- Use separate cutting boards for raw meats and vegetables
- Cook ground meats to minimum internal temperature of 160°F (71°C)
- Cool large batches rapidly by dividing into smaller containers
- Use food thermometers to verify proper cooking and storage temperatures
When serving chili at events, maintain hot holding temperatures above 140°F (60°C) using warming trays or slow cookers. Discard any chili that has remained in the danger zone for more than the recommended timeframes.




 浙公网安备
33010002000092号
浙公网安备
33010002000092号 浙B2-20120091-4