

Table of Contents
- Oven-Braised Brisket: The Truth About Cooking Time and Flavor Development
- Spice Storage & Usage Hacks for Maximum Flavor
- Step-by-Step: How to Make Perfect Oven Brisket (12-14 Hour Method)
- Buying Guide: Best Tools and Ingredients
- Frequently Asked Questions (FAQs)
- Conclusion
Oven-Braised Brisket: The Truth About Cooking Time and Flavor Development
Brisket requires patience—there's no shortcut to transforming this tough cut into tender, flavorful meat. If you've been searching for "25-minute brisket" recipes, you should know that properly cooked brisket needs 12-14 hours of low-and-slow cooking to break down collagen and connective tissues. This guide explains why the slow process is essential and provides professional techniques for achieving restaurant-quality results in your oven.

The misconception about "quick" brisket comes from misunderstanding preparation versus cooking time. While you can prepare your spice rub and trim the meat in about 25 minutes, the actual cooking process requires proper time for the magic to happen. This guide separates fact from fiction and delivers the most reliable oven brisket method backed by food science.
Spice Storage & Usage Hacks for Maximum Flavor
Before we dive into the brisket recipe, let's talk about one of the most underrated kitchen skills: spice management. A well-stocked spice rack is your secret weapon when it comes to flavor-packed dishes like brisket.
How to Store Spices Properly
Did you know that some spices lose their potency within six months if stored incorrectly?
| Spice Type | Shelf Life (Proper Storage) | Storage Tips |
|---|---|---|
| Whole Spices (e.g., peppercorns, cloves) | 3–4 years | Store in airtight containers away from light and heat |
| Ground Spices (e.g., paprika, garlic powder) | 2–3 years | Keep in cool, dry places; avoid direct sunlight |
| Fragile Herbs (e.g., basil, oregano) | 1–2 years | Use vacuum-sealed jars or spice tins |

Spice Blending Basics
Creating your own rubs can elevate your brisket from good to unforgettable. Here's a simple yet powerful brisket rub you can mix at home:
- 1 tbsp smoked paprika
- 1 tbsp brown sugar
- 1 tsp garlic powder
- 1 tsp onion powder
- 1 tsp black pepper
- ½ tsp cumin
- ½ tsp chili powder
Pro Tip: Use Freshly Ground Spices
Grinding whole spices right before use unlocks more volatile oils and aromas. For example, freshly ground black pepper has a punchier bite than pre-ground stuff. Invest in a manual or electric spice grinder to take your brisket game up a notch.
Step-by-Step: How to Make Perfect Oven Brisket (12-14 Hour Method)
You don't need fancy equipment to make restaurant-quality brisket. Here's the scientifically-proven method for achieving tender results in your very own kitchen.
What You'll Need
- 1 (12–14 lb) whole beef brisket
- Homemade brisket rub (see above)
- Apple cider vinegar (for spritzing)
- Beef broth or water
- Cooking twine or butcher's string
- Roasting pan or Dutch oven

Step 1: Trim and Prep the Brisket
Trim excess fat down to about ¼ inch thickness. This helps the rub penetrate and prevents greasy flavors. Pat the brisket dry with paper towels so the spices stick better.
Step 2: Apply the Rub Generously
Rub both sides of the brisket thoroughly. Wrap in plastic wrap and refrigerate for at least 8 hours — ideally overnight — to let the flavors penetrate the meat.
Step 3: Preheat Your Oven
Set your oven to 250°F (120°C). Low temperature ensures the collagen breaks down slowly, giving you that melt-in-your-mouth texture.
Step 4: Roast the Brisket
Place the brisket in a roasting pan or Dutch oven. Add ½ cup beef broth or water to the bottom to keep things moist. Cover tightly with foil and roast for 1 hour per pound — so roughly 12–14 hours total.
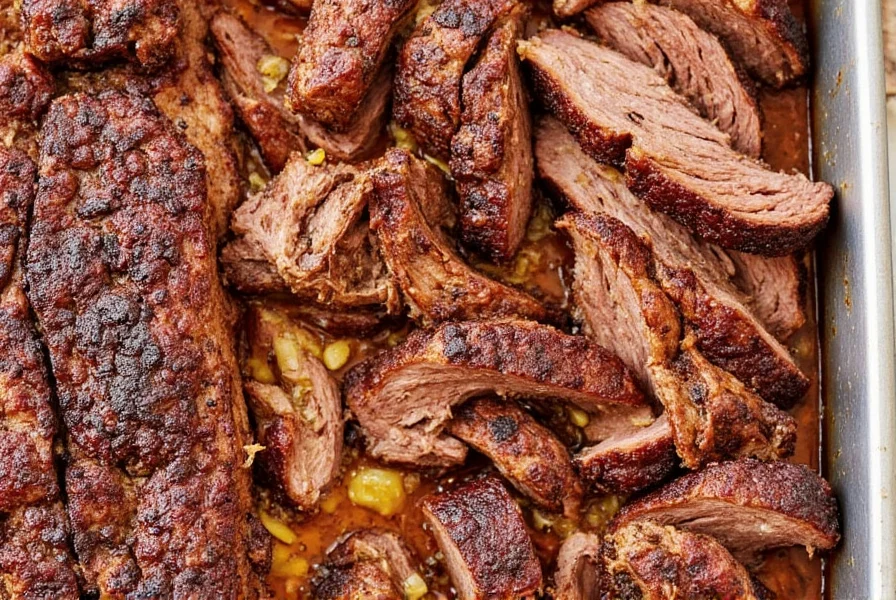
Step 5: Rest and Slice
Let the brisket rest for at least 30 minutes before slicing against the grain. This allows juices to redistribute and prevents dry bites.

Pro Hack: Use a Meat Spritzer
Every few hours, open the oven and mist the brisket with apple cider vinegar. It adds tangy depth and keeps the surface from drying out.
Variation Ideas
- Add a layer of sliced onions or garlic under the brisket for extra aroma
- Wrap the brisket in peach paper during the last few hours for bark retention
- Slather with BBQ sauce during the final hour for a sticky finish
Buying Guide: Best Tools and Ingredients
To make oven-baked brisket like a pro, here are some must-have tools and products. These recommendations are based on performance, durability, and real-world usage by chefs and home cooks alike.
1. Smoker Box for Indoor Use

- Best for: Adding smoky flavor indoors
- Features: Durable stainless steel, easy to load with wood chips
- Use case: Place in oven alongside brisket for a touch of smoke
2. Digital Meat Thermometer

- Best for: Precise internal temperature monitoring
- Features: Instant-read, long probe, auto-shutoff
- Target temp: 195–205°F for optimal tenderness
3. Dutch Oven

- Best for: Even heat distribution and moisture retention
- Features: Enameled cast iron, oven-safe up to 500°F
- Use case: Ideal for braising, roasting, and searing
4. Spice Grinder
- Best for: Grinding fresh spices on demand
- Features: Adjustable grind settings, durable ceramic blade
- Recommended for: anyone serious about spice quality
5. Beef Brisket (Quality Cut)

- Best for: Making oven brisket from scratch
- Features: Marbled meat, even thickness, minimal trimming needed
- Occasions: Holiday meals, Sunday roasts, gatherings
Frequently Asked Questions (FAQs)
Why does brisket require 12-14 hours to cook properly?
Brisket contains abundant connective tissue (collagen) that requires prolonged exposure to low heat (250°F) to transform into gelatin. This process, called hydrolysis, typically begins around 160°F and continues until the internal temperature reaches 195-205°F. Rushing this process results in tough, chewy meat that hasn't properly tenderized.
Are there any genuinely quick methods to make brisket?
Traditional whole brisket cannot be properly cooked in less than 12 hours. While pressure cookers can reduce cooking time to 6-8 hours, there is no scientifically valid method to properly cook a whole brisket in under 4 hours. The connective tissues simply require extended low-temperature exposure to break down properly.
Can I cook brisket faster at a higher temperature?
You could, but the result will likely be tough and chewy. Brisket benefits from low-and-slow cooking to break down connective tissues. Higher temperatures cause muscle fibers to contract too quickly, squeezing out moisture before the connective tissues have time to break down.
Should I wrap my brisket in foil?
Yes! Wrapping in foil (or using the Texas crutch method) helps retain moisture and speeds up cooking time toward the end. This is particularly useful during the "stall" phase when evaporation cools the meat and slows temperature rise.
How do I reheat leftover brisket without drying it out?
Wrap slices in foil and warm in a 250°F oven until heated through. Add a splash of broth or BBQ sauce to keep it juicy. For best results, reheat at the same low temperature used for cooking.
Can I freeze cooked brisket?
Absolutely. Slice and portion before freezing in vacuum-sealed bags with cooking juices. Thaw in the refrigerator for 24-48 hours and reheat as described above for optimal texture retention.
Do I need to use a meat thermometer?
Yes, for reliable results. Internal temperature is the only accurate way to determine when brisket has properly tenderized. The "fork-tender" test is subjective and often leads to undercooked results. Target 195-205°F for perfect tenderness.
Conclusion
Making brisket in the oven requires understanding the science behind the slow cooking process. By respecting the necessary cooking time and following these evidence-based techniques, you'll achieve consistently tender results that impress even experienced barbecue enthusiasts. Proper spice management, accurate temperature control, and patience are the true "hacks" that separate good brisket from exceptional brisket.
Remember: there are no legitimate shortcuts for properly cooked brisket. The 12-14 hour process isn't just tradition—it's food science in action. Invest the time, follow these methods, and you'll be rewarded with melt-in-your-mouth results that make the wait worthwhile.


 浙公网安备
33010002000092号
浙公网安备
33010002000092号 浙B2-20120091-4