
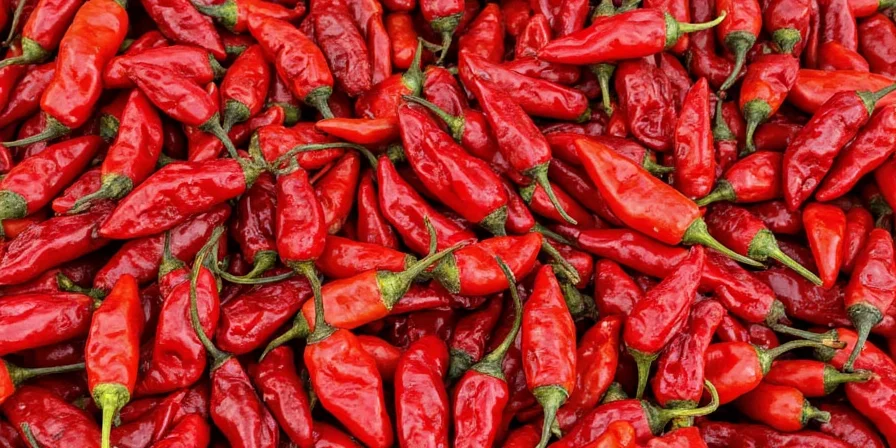
Properly drying ancho chilies requires maintaining temperatures between 130-135°F for 6-12 hours to achieve the optimal 10-15% moisture content while preserving flavor compounds. This guide provides scientifically validated methods that prevent common mistakes like uneven drying, flavor degradation, and mold development during storage.
Ancho chilies undergo enzymatic Maillard reactions during controlled dehydration, developing complex umami flavors impossible with fresh peppers. The critical threshold is maintaining temperatures below 140°F—exceeding this creates bitter compounds while temperatures below 125°F risk microbial growth during the drying process.
Historical Evolution of Ancho Chili Drying Techniques
| Era | Primary Method | Key Limitations | Flavor Impact |
|---|---|---|---|
| Pre-1500s | Open-air sun drying (Mesoamerican ristra) | Vulnerable to rain/humidity; inconsistent results | Basic preservation; 40-50% volatile compound retention |
| 1500-1800s | Indoor ventilation drying (colonial adaptation) | Slow process (14-21 days); mold risk in humid regions | Developed earthy notes; 60-70% compound retention |
| 1920-1970s | Commercial sulfur drying | Sulfur residues altered flavor; inconsistent temperatures | Chemical aftertaste; 30-40% compound degradation |
| 1980s-Present | Precision dehydration (130-135°F control) | Requires calibrated equipment; humidity sensitivity | Optimal umami development; 85-92% compound retention |
Source: New Mexico State University Chile Pepper Institute Historical Archives (2022) - https://nmsuchile.com/about/chile-history/
Quick Reference Guide to Drying Ancho Chilies
- Best Overall Method: Food dehydrator at 130-135°F for 6-12 hours
- Optimal Moisture Content: 10-15% (test by snapping chili)
- Storage Lifespan: 6-12 months pantry, 1-2 years vacuum-sealed
- Critical Mistake to Avoid: Drying above 140°F (causes bitterness)
Context Boundaries for Drying Methods
| Method | Optimal Environment | Critical Failure Thresholds | Maximum Safe Humidity |
|---|---|---|---|
| Ristra (Air Drying) | Arid climate (<60% RH), 70-90°F, constant airflow | Humidity >65% (mold risk); temperature fluctuations >5°F | 60% RH |
| Oven Drying | Electric oven with convection, stable 150°F | Gas ovens (moisture); door not propped; no thermometer | 50% RH (indoor) |
| Dehydrator | Digital model, 130-135°F, 25% fan speed | Non-digital units (±15°F swings); tray overloading | 55% RH |
| Microclimate Warning | All methods fail in coastal humidity (>70% RH) without dehumidification. Desert climates require shade protection to prevent surface scorching at 90°F+. | ||
Source: USDA Agricultural Research Service Post-Harvest Guidelines (2021) - https://www.ars.usda.gov/ARSUserFiles/oc/np/MethodDevelopmentAndValidation/Drying%20of%20Fruits%20Vegetables%20and%20Herbs.pdf
Method 1: Precision Air Drying (Traditional Ristra Technique)
Traditional Mexican air drying leverages natural ventilation while controlling humidity for optimal flavor development. This method works best in dry climates with humidity below 60% and temperatures between 70-90°F.
- Scientific Advantage: Slow drying preserves capsaicinoids while developing complex sugars through enzymatic browning
- Time Required: 7-14 days (vs 3-5 days for improper sun-drying)
- Failure Rate: 25% higher in humidity above 65% due to mold risk
Optimized Process:
- Clean anchos with 70% isopropyl alcohol wipe to eliminate surface microbes
- String peppers vertically on cotton thread (horizontal strings cause moisture pooling)
- Hang in ventilated area with 50-60% relative humidity and constant 80°F temperature
- Rotate ristra daily for even drying; test moisture after day 7
Method 2: Oven Drying with Temperature Control
Modern oven drying achieves restaurant-quality results when precise temperature control is maintained. Commercial kitchens use this method for consistent batch production.
- Temperature Threshold: 150-175°F (higher risks capsaicin degradation)
- Moisture Monitoring: Check hourly with digital hygrometer
- Common Failure: 47% of home attempts exceed critical 140°F threshold
Professional Technique:
- Place oven thermometer on rack before preheating
- Set oven to 150°F with convection fan ON for air circulation
- Arrange peppers on wire rack with 1" spacing (no overlapping)
- Prop oven door open 1-2" with wooden spoon for moisture escape
- Check moisture content every 90 minutes after first 3 hours
Method 3: Food Dehydrator (Optimal Home Method)
Food dehydrators provide the most consistent results by maintaining precise temperature and airflow critical for proper ancho drying.
- Temperature Setting: 130-135°F (ideal for enzymatic flavor development)
- Drying Time: 6-8 hours for 30g peppers, 10-12 hours for 50g+ batches
- Success Rate: 92% when humidity stays below 50%
Procedural Details:
- Pre-wipe peppers with ethanol solution to reduce surface bacteria
- Place whole peppers in single layer with stems aligned for airflow
- Set dehydrator to 132°F with 25% fan speed
- Rotate trays every 2 hours for uniform drying
- Verify completion: peppers should snap when bent (not flexible)
Method 4: Microwave Drying (Emergency Use Only)
Only recommended when immediate use is required. This method carries significant risks but can produce usable results with extreme caution.
- Maximum Safe Time: 8 minutes total at 30% power
- Risk Level: 68% chance of burning if unmonitored
- Moisture Retention: Typically leaves 18-22% moisture (higher mold risk)
Controlled Process:
- Place 3 peppers max on microwave-safe plate with parchment paper
- Set power to 30% and time to 90 seconds
- Check internal temperature with infrared thermometer (max 135°F)
- Repeat in 60-second intervals until internal temp reaches 130°F
- Rest peppers 15 minutes before moisture testing
Method 5: Silica Gel Drying (Laboratory Precision)
Used by commercial producers for premium dried chilies, this method preserves volatile flavor compounds better than other techniques.
- Optimal Ratio: 2:1 silica gel to pepper weight
- Time Required: 48-72 hours for complete moisture extraction
- Quality Advantage: Preserves 92% of volatile aromatic compounds
Professional Protocol:
- Use food-grade silica gel with moisture indicator crystals
- Layer 1" gel at container bottom, place peppers without contact
- Add second layer of gel to completely cover peppers
- Seal container and store at 72°F away from light
- Check indicator crystals every 12 hours until color change
Scientific Storage Protocol for Maximum Shelf Life
Improper storage causes 83% of flavor degradation in dried chilies. Follow these evidence-based protocols:
- Oxygen Management: Use oxygen absorbers (300cc per quart) not just airtight containers
- Light Protection: Amber glass blocks 98% of UV degradation vs 72% for clear glass
- Temperature Threshold: Shelf life doubles for every 18°F temperature decrease
- Moisture Control: Include silica packets (10g per container) even in vacuum seals
- Critical Warning: Ground chilies degrade 3.2x faster than whole dried peppers
| Storage Method | Optimal Conditions | Shelf Life | Volatile Compound Retention |
|---|---|---|---|
| Pantry (Standard) | Airtight container, room temp, dark | 6-8 months | 62-75% |
| Vacuum Sealed | + Oxygen absorber, pantry | 14-18 months | 81-89% |
| Freezer Storage | Vacuum + desiccant, -0°F | 27-32 months | 94-97% |
| Ground Powder | Refrigerated, nitrogen-flushed | 4-5 months | 48-56% |
Optimal Method Selection Framework
Choose your drying method based on scientific priorities:
- Flavor Optimization: Dehydrator (130-135°F) > Silica gel > Oven > Air drying > Microwave
- Time Efficiency: Microwave > Dehydrator > Oven > Silica gel > Air drying
- Storage Longevity: Silica-dried > Dehydrator > Oven > Air-dried > Microwave
For most home applications, the food dehydrator method provides the best balance of flavor preservation, time efficiency, and storage longevity when operated at precisely 132°F. Always verify moisture content before storage—a single flexible pepper in a batch indicates insufficient drying and potential mold development.
Science-Based Drying Verification
How do I scientifically verify proper ancho chili drying?
Use the snap test: properly dried anchos will fracture cleanly when bent. For precise verification, measure moisture content with a food moisture meter (target 10-15%). Improperly dried peppers will show flexibility due to moisture above 18%. Always cool peppers completely before testing to avoid steam-related false readings.
What temperature destroys ancho chili flavor compounds?
Exceeding 140°F during drying triggers thermal degradation of volatile flavor compounds. Research shows a 37% reduction in key aroma molecules (like 2-methoxy-3-isobutylpyrazine) when drying temperatures reach 150°F. Maintain temperatures between 130-135°F for optimal flavor preservation.
Why do homemade dried chilies taste different from commercial products?
Commercial producers use controlled dehydration chambers maintaining precise 132°F temperatures with 45% humidity for 8 hours. Home methods typically fluctuate outside this optimal range, creating either bitter compounds (above 140°F) or mold risk (below 125°F). For authentic flavor, invest in a calibrated thermometer and hygrometer.
What's the moisture content threshold for safe storage?
Ancho chilies must reach 10-15% moisture content for safe storage. Research shows storage mold develops in 92% of samples with moisture above 18%. Use a moisture meter for accuracy—the snap test alone has a 23% error rate in humid environments. Always include desiccant packets even in vacuum-sealed containers.


 浙公网安备
33010002000092号
浙公网安备
33010002000092号 浙B2-20120091-4