
Table of Contents
- Introduction
- Why Ferment Your Pickles?
- What You'll Need
- Step-by-Step Guide to Making Fermented Dill Pickles
- Spice Tips for Maximum Flavor
- Buying Guide: Choosing the Best Ingredients
- Storing & Serving Your Pickles
- Troubleshooting Common Issues
- Conclusion
Ready to Make the Best Fermented Dill Pickles Ever?
If you’ve ever bitten into a store-bought dill pickle and thought, “This just doesn’t taste like the real deal,” you’re not alone. The magic lies in natural fermentation — the old-school way of pickling that enhances flavor, boosts probiotics, and gives you that legendary tangy crunch.
In this article, we’ll walk you through our top-rated fermented dill pickle recipe, packed with spice insights, practical tips, and everything you need to know to make restaurant-quality pickles at home. Let’s get pickling!
Why Ferment Your Pickles?
Fermentation isn’t just a buzzword thrown around by hip foodies. It’s an ancient method of preservation that uses beneficial bacteria to transform sugars and starches into lactic acid, which naturally preserves vegetables while enhancing their nutritional profile and flavor complexity.
- Naturally rich in gut-friendly probiotics
- Enhanced umami and depth of flavor
- No vinegar required — just salt, water, and time
- Crunchier texture compared to quick-pickled versions
This process is called lacto-fermentation, and it’s the key to unlocking the true essence of traditional dill pickles.
What You'll Need for the Best Fermented Dill Pickles
Gathering the right ingredients is half the battle. Here's your shopping list:
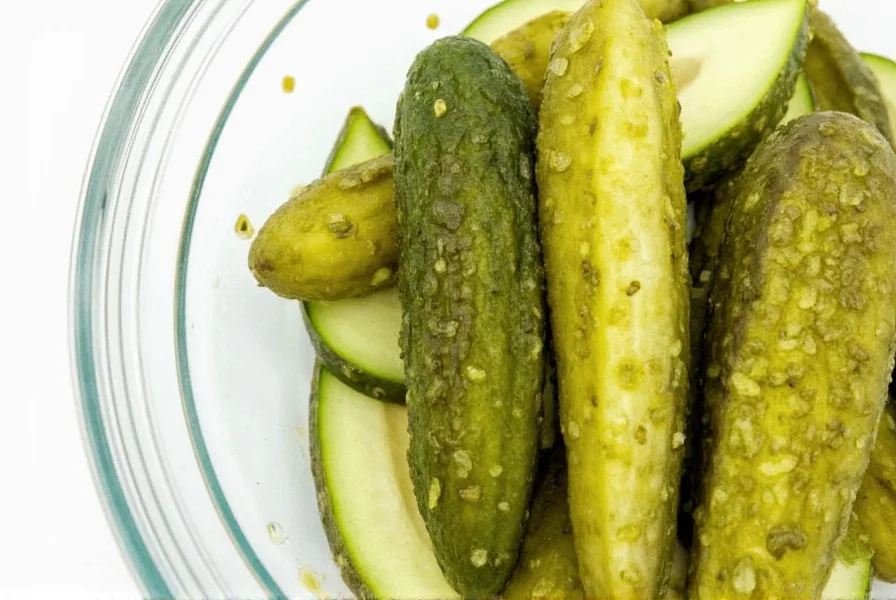
- Cucumbers: Kirby or pickling cucumbers are ideal (see our buying guide below)
- Water: Filtered or spring water — chlorine can inhibit fermentation
- Salt: Non-iodized salt (e.g., sea salt or pickling salt)
- Dill: Fresh dill fronds (or dried dill seeds if fresh isn’t available)
- Garlic: A few cloves per quart jar for that extra kick
- Spices (optional): Mustard seeds, peppercorns, bay leaves, or chili flakes
Step-by-Step Guide to Making Fermented Dill Pickles
Let’s dive into the actual pickling process. Don’t worry — it’s simpler than it sounds!
- Wash and prep cucumbers: Rinse thoroughly and trim the blossom end to prevent softness.
- Prepare brine: Mix 3–5 tablespoons of non-iodized salt per quart of filtered water until dissolved.
- Pack the jar: Place spices and herbs on the bottom, add cucumbers upright, and pour brine over them.
- Add weight: Use a fermentation weight or small ziplock bag filled with brine to keep cucumbers submerged.
- Seal and ferment: Cover the jar with a lid or coffee filter secured with a rubber band. Keep at room temperature (65–75°F).
- Wait patiently: Let sit for 5–10 days. Taste after day 5 to check readiness.
- Refrigerate: Once pickled to your liking, seal tightly and store in the fridge for up to 6 months.
Spice Tips for Maximum Flavor
One of the joys of fermentation is customizing your flavors. Here are some spice pairings that elevate your pickles from good to unforgettable:
| Spice | Flavor Profile | Best Used With |
|---|---|---|
| Mustard Seeds | Earthy, slightly bitter, nutty | Dill, garlic |
| Coriander Seeds | Citrusy, warm, spicy | Lime zest, bay leaf |
| Peppercorns (black/white) | Sharp, woody, earthy | All classic combinations |
| Bay Leaf | Herbal, woodsy | Dill, mustard seed |
| Chili Flakes | Hot, bright | Lime zest, garlic, coriander |
Buying Guide: Choosing the Best Ingredients
Quality ingredients make all the difference. Here’s what to look for when sourcing each component:
Cucumbers
- Kirby Cucumbers: Firm, bumpy skin, ideal size for pickling
- Pickling Cucumbers: Smaller than slicing cucumbers; less moisture = crisper pickles
- Avoid: Slicing or English cucumbers — too watery and thin-skinned
Salt
- Sea Salt: Adds mineral richness; more expensive but worth it
- Pickling Salt: Pure sodium chloride; affordable and widely available
- Avoid: Iodized table salt — contains anti-caking agents that cloud brine
Water
- Spring Water: Free from chlorine and fluoride
- Filtered Water: Reverse osmosis or charcoal-filtered is fine
- Avoid: Tap water unless boiled and cooled to remove chlorine
Spices & Herbs
- Fresh Dill: Look for vibrant green fronds; avoid wilted or yellow bunches
- Garlic: Firm cloves without sprouts; organic preferred for purity
- Whole Spices: Better flavor release than ground; fresher aroma
Storing & Serving Your Pickles
Once your pickles reach the desired level of tanginess, move them to the refrigerator to slow fermentation. Here are some pro storage and serving tips:
- Store pickles in sealed jars in the fridge for up to 6 months
- Use the leftover brine as a base for salad dressings or Bloody Mary mix
- Serve pickles on charcuterie boards, alongside sandwiches, or straight out of the jar
- For added flair, try topping with sesame oil or chili oil before serving
Troubleshooting Common Issues
Ran into a problem during fermentation? Don’t worry — here’s how to fix common issues:
| Issue | Possible Cause | Solution |
|---|---|---|
| Mold on surface | Exposure to air or unclean equipment | Skim off mold, ensure vegetables stay submerged |
| Soft pickles | High temperature, poor cucumber quality | Use smaller cucumbers, ferment in cooler area |
| Too salty | Too much salt or under-fermented | Rinse pickles lightly or dilute future brines |
| Not sour enough | Fermentation time too short | Leave pickles out longer before refrigerating |
| Bad smell | Contamination or spoilage | Discard batch and sterilize equipment next time |
Your New Secret Weapon: Homemade Fermented Dill Pickles
You now have everything you need to master the art of fermented dill pickles. Whether you're new to fermentation or a seasoned kitchen scientist, these tangy, crunchy delights will soon become a staple in your pantry — and probably your favorite snack.
So grab those cucumbers, dust off your spice rack, and start fermenting. Trust us — once you go homemade, there’s no going back!


 浙公网安备
33010002000092号
浙公网安备
33010002000092号 浙B2-20120091-4