
Creating realistic pepper drawings requires understanding both the structural anatomy of peppers and the technical drawing methods to represent them accurately. Whether you're a beginner artist or refining your botanical illustration skills, this comprehensive guide provides actionable techniques used by professional illustrators. The key to successful pepper sketching lies in observing the subtle transitions between light and shadow that define the pepper's three-dimensional form.
Understanding Pepper Anatomy for Accurate Drawing
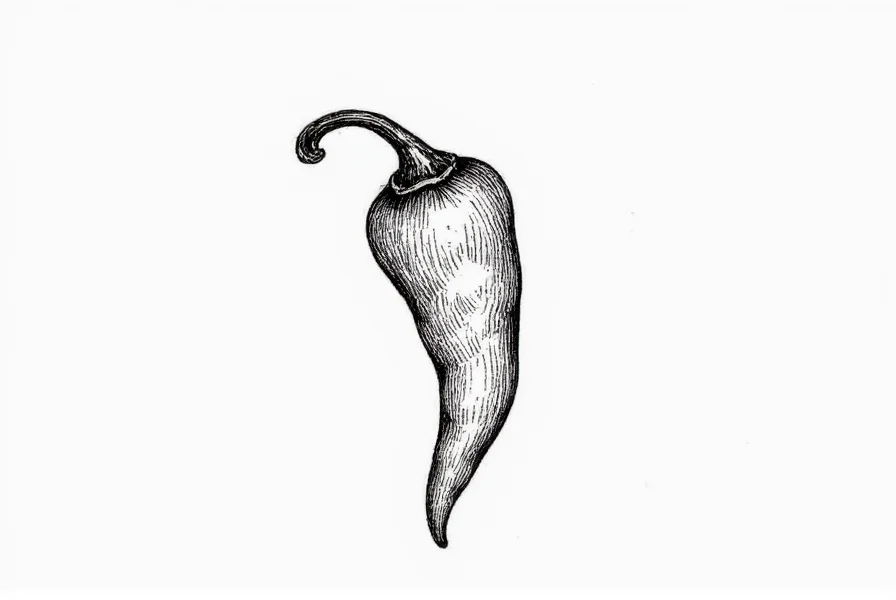
Before putting pencil to paper, study the specific pepper variety you're drawing. Bell peppers, chili peppers, and jalapeños each have unique structural characteristics. Bell peppers typically feature four distinct lobes at the top, a smooth transition to the stem, and subtle ridges running vertically. Chili peppers often have a more tapered shape with smoother surfaces. Pay attention to these details as they form the foundation of your pepper drawing technique.
Essential Materials for Professional Pepper Drawing
You don't need expensive equipment to create impressive pepper drawings. A basic setup includes:
| Material | Recommended Options | Purpose |
|---|---|---|
| Pencils | H, HB, 2B, 4B, 6B | Varying hardness for different shading effects |
| Paper | 90-140 lb drawing paper | Adequate tooth for layering graphite |
| Erasers | Kneaded and precision erasers | Correcting mistakes and creating highlights |
| Reference | Fresh pepper or high-quality photo | Accurate observation of form and texture |
Step-by-Step Pepper Drawing Process
Follow this professional approach to create realistic pepper illustrations:
1. Basic Shape Construction
Begin with light construction lines using an H pencil. For bell peppers, start with a vertical center line, then add horizontal guidelines marking the widest point and base. Sketch the overall shape using simple geometric forms—typically an inverted teardrop or modified sphere. This foundational step in pepper sketching for beginners prevents proportion errors that become difficult to correct later.
2. Defining Contours and Details
Refine your initial sketch by adding the distinctive features of your pepper variety. For bell peppers, carefully draw the four lobes at the top, ensuring they're evenly distributed. Add the stem connection point and any visible ridges. At this stage, focus on accurate outlines rather than shading—this is crucial for developing proper pepper drawing techniques.
3. Creating Realistic Texture and Surface Details
Peppers have distinctive waxy surfaces with subtle texture variations. Use a combination of hatching and stippling techniques to represent these characteristics. Bell peppers show gentle undulations where the lobes meet, while chili peppers often have smoother surfaces with occasional dimples. Study your reference carefully to determine where to place these subtle details in your botanical illustration of peppers.
4. Mastering Value Transitions
The most challenging aspect of pepper drawing is capturing the smooth value transitions that create three-dimensionality. Start with the lightest areas using an H pencil, gradually building up to darker tones with 2B-6B pencils. Remember that peppers rarely have hard edges—their waxy surface creates soft transitions between light and shadow. This technique for realistic pepper drawings separates amateur attempts from professional-quality illustrations.
Common Pepper Drawing Mistakes to Avoid
Many artists struggle with these frequent errors when attempting pepper sketching:
- Overcomplicating the basic shape - Start with simple geometric forms before adding details
- Ignoring the light source consistency - Establish one clear light direction before beginning
- Using excessive detail too early - Build up details gradually after establishing proper values
- Misrepresenting the pepper's reflective quality - Peppers have a subtle sheen that affects highlight placement
Advanced Techniques for Professional Results
Once you've mastered basic pepper drawing, try these advanced methods:
For botanical illustration of peppers, incorporate colored pencils to capture the vibrant hues of different varieties. Start with light layers of color, building up gradually while maintaining the underlying graphite structure. When drawing red peppers, begin with light pink tones before adding deeper reds in shadowed areas. For green peppers, use multiple shades of green with subtle yellow undertones in highlight areas.
Consider creating a series showing the same pepper from multiple angles—this comprehensive approach to pepper drawing develops spatial understanding that benefits all your still life work. Professional illustrators often create detailed studies of a single subject from various perspectives before producing final compositions.
Practice Exercises to Improve Your Pepper Drawing Skills
Develop your abilities with these targeted exercises:
- Gesture drawings - Complete 30-second sketches focusing only on the overall shape
- Value studies - Create monochromatic drawings using only three values (light, mid, dark)
- Texture focus - Spend 15 minutes drawing only the surface texture of a small pepper section
- Comparative drawing - Draw three different pepper varieties side by side, noting structural differences
Regular practice with these pepper sketching techniques for beginners will significantly improve your overall drawing abilities. Remember that mastery comes from consistent, focused practice rather than occasional marathon sessions. Set aside 20-30 minutes daily for targeted drawing exercises rather than infrequent longer sessions.
Conclusion
Pepper drawing offers an excellent subject for developing fundamental artistic skills applicable to countless other subjects. By following this step-by-step pepper drawing tutorial and practicing the techniques outlined, you'll build confidence in your ability to render complex organic forms. The patience and observation skills developed through botanical illustration of peppers transfer directly to all areas of artistic creation. Keep your reference pepper fresh during drawing sessions to observe how light changes affect its appearance throughout the day—this practice enhances your understanding of form and value in realistic pepper drawings.
Frequently Asked Questions
What's the best pencil hardness for pepper drawing?
Start with an H pencil for light construction lines, then use HB for initial outlines. Progress to 2B-4B for mid-tones and 6B for the darkest shadows. This range of pencil hardness allows for smooth value transitions essential in realistic pepper drawings.
How do I capture the shiny surface of peppers in drawings?
Peppers have a subtle waxy sheen, not a mirror-like shine. Represent this by placing small, soft highlights where the light directly hits the surface, but keep them slightly diffused. Avoid hard-edged highlights, which make peppers look plastic rather than organic in botanical illustration.
What's the most common mistake beginners make in pepper sketching?
The most frequent error is making value transitions too abrupt. Peppers have smooth, gradual shifts between light and shadow due to their waxy surface. Beginners often create hard edges between light and dark areas, resulting in drawings that look flat rather than three-dimensional in pepper drawing techniques.
How can I improve my pepper drawing proportions?
Use the sight-size method: hold your pencil at arm's length, close one eye, and compare the height-to-width ratio of your subject to your drawing. For bell peppers, the width is typically 75-80% of the height. Regularly step back from your work to view it from a distance, which helps identify proportion issues in your step-by-step pepper drawing process.


 浙公网安备
33010002000092号
浙公网安备
33010002000092号 浙B2-20120091-4