
Have you ever wondered why some gardeners consistently produce thriving vegetable gardens while others struggle with spotty germination and weak seedlings? The secret often lies in proper indoor seed starting techniques. Whether you're growing tomatoes, peppers, or delicate flowers, mastering the art of starting seeds indoors transforms your gardening success rate and extends your harvest season significantly.
Why Start Seeds Indoors: The Strategic Advantage
Starting seeds indoors isn't just for professional gardeners. Home growers who implement these techniques typically see 25-40% higher germination rates than those who direct sow, according to research from the University of Minnesota Extension. The controlled environment protects vulnerable seedlings from unpredictable spring weather, pests, and diseases during their most fragile stage.
| Vegetable Type | Weeks Before Last Frost | Soil Temperature | Germination Time |
|---|---|---|---|
| Tomatoes, Peppers | 6-8 weeks | 70-80°F (21-27°C) | 5-14 days |
| Broccoli, Cauliflower | 6-8 weeks | 65-80°F (18-27°C) | 4-10 days |
| Lettuce, Spinach | 4-6 weeks | 60-70°F (15-21°C) | 7-14 days |
| Cucumbers, Squash | 2-3 weeks | 70-95°F (21-35°C) | 3-10 days |
The Indoor Seed Starting Timeline: From Sowing to Transplanting
Successful indoor seed starting follows a precise timeline that mimics natural growing conditions while providing optimal protection. Understanding this progression prevents common timing mistakes that lead to leggy seedlings or transplant shock.
Phase 1: Planning and Preparation (4-12 Weeks Before Last Frost)
Determine your local last frost date using the USDA Plant Hardiness Zone Map. Most vegetables require 4-12 weeks of indoor growth before transplanting. Cool-season crops like broccoli need more time (6-8 weeks) while warm-season crops like tomatoes need 5-7 weeks. Create a seed starting calendar specific to your region's frost dates.
Phase 2: Sowing Seeds (Timing Varies by Crop)
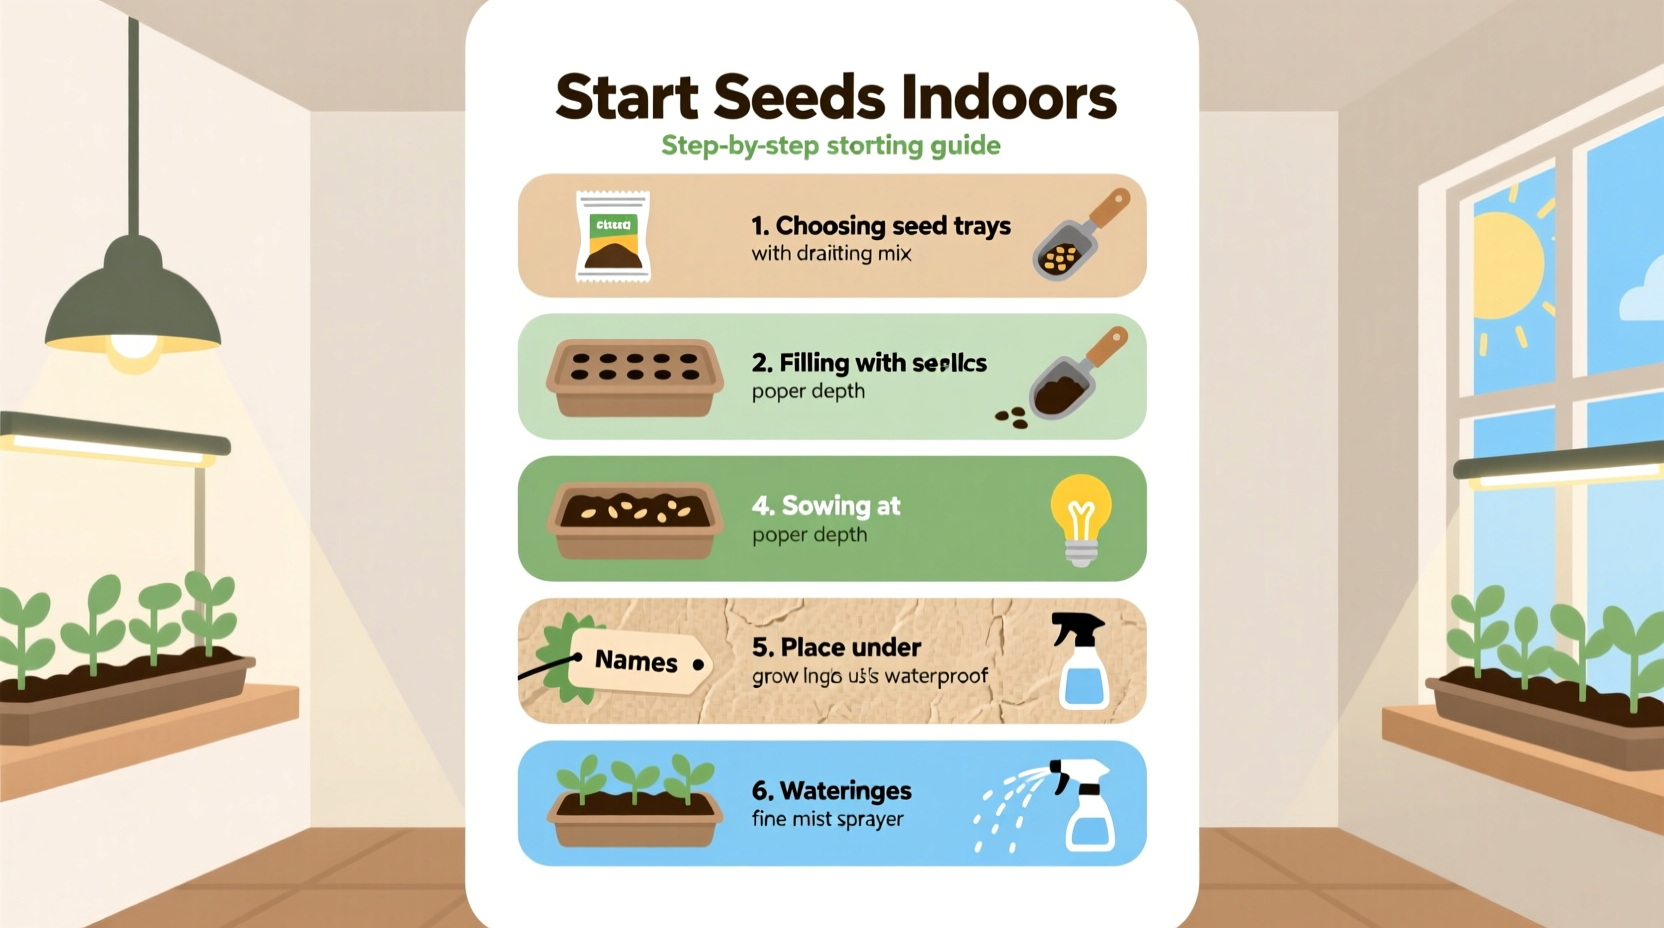
Use containers with drainage holes—recycled yogurt cups, seed trays, or biodegradable pots work well. Fill with sterile seed starting mix (never garden soil), moisten thoroughly, then sow seeds at the proper depth (typically 2-3 times the seed's diameter). Cover with plastic wrap to maintain humidity until germination.

Phase 3: Germination and Early Growth (First 1-2 Weeks)
Maintain consistent soil temperature using a heat mat—most seeds germinate best between 65-75°F (18-24°C). Once seedlings emerge, remove the plastic covering and provide 14-16 hours of light daily. A south-facing window often provides insufficient light, causing leggy plants. Instead, use fluorescent or LED grow lights positioned 2-4 inches above seedlings.
Phase 4: Seedling Care (2-8 Weeks After Germination)
Water seedlings when the top inch of soil feels dry, preferably from below to prevent damping off disease. Begin fertilizing with a quarter-strength liquid fertilizer when the first true leaves appear. Thin crowded seedlings by snipping weaker plants at soil level. Maintain air circulation with a small fan to strengthen stems.
Phase 5: Hardening Off (7-10 Days Before Transplanting)
This critical transition phase acclimates indoor-grown seedlings to outdoor conditions. Start by placing plants in a shaded, sheltered location for 1-2 hours on day one, gradually increasing exposure to sunlight and wind over 7-10 days. By the end of the hardening-off period, seedlings should be spending full days outdoors.
Essential Equipment Checklist for Success
- Containers: 3-4 inch pots or cell trays with drainage holes
- Seed starting mix: Sterile, soilless mix specifically formulated for seedlings
- Lighting: Grow lights providing 14-16 hours of light daily (1,500-2,500 lumens per square foot)
- Heat source: Seedling heat mat maintaining 65-75°F (18-24°C) soil temperature
- Watering tools: Spray bottle for initial moisture, bottom watering tray
- Fertilizer: Balanced liquid fertilizer at quarter-strength
Common Mistakes and How to Avoid Them
Even experienced gardeners sometimes stumble with indoor seed starting. Here's how to sidestep the most frequent pitfalls:
Planting Too Early
Starting seeds too early creates leggy, stressed plants that struggle after transplanting. Calculate your ideal start date by counting backward from your local last frost date based on each crop's requirements. The University of Florida Gardening Solutions provides a frost date calculator by ZIP code to determine precise timing.
Using Garden Soil Instead of Seed Starting Mix
Garden soil compacts in containers, restricting root growth and potentially introducing diseases. Seed starting mixes provide the perfect balance of aeration, moisture retention, and sterility. Create your own mix using equal parts peat moss or coconut coir, perlite, and vermiculite.
Inconsistent Watering Practices
Both overwatering and underwatering cause seedling death. Maintain consistent moisture without saturation. Bottom watering prevents disturbing delicate roots and reduces fungal disease risk. Check soil moisture daily by feeling the top inch of the mix.
Neglecting the Hardening-Off Process
Skip hardening off, and your carefully nurtured seedlings will likely suffer transplant shock. This gradual acclimation process strengthens cell walls and prepares plants for outdoor conditions. Never move seedlings directly from indoor conditions to full sun exposure.
Advanced Techniques for Exceptional Results
Once you've mastered the basics, these professional techniques will elevate your seed starting success:
Seed Priming for Faster Germination
Soak seeds in room-temperature water for 12-24 hours before planting (except for tiny seeds like lettuce). This process hydrates the seed and initiates germination processes, reducing time to sprouting by 20-30%. Discard any floating seeds, as they're likely nonviable.
Optimal Light Spectrum Management
Blue light spectrum (5,000-7,500K) promotes compact, stocky growth during early stages, while red spectrum encourages flowering later. Use full-spectrum LED grow lights and position them 2-4 inches above seedlings, raising the lights as plants grow to maintain this distance.
Temperature Differential Technique
Mimic natural conditions by providing slightly warmer temperatures during the day (70-75°F/21-24°C) and cooler at night (60-65°F/15-18°C). This temperature fluctuation encourages stronger stem development and reduces legginess.
When Not to Start Seeds Indoors
Not all plants benefit from indoor starting. Root vegetables like carrots, radishes, and beets prefer direct sowing as their taproots suffer when transplanted. Similarly, plants with sensitive root systems like cucumbers, squash, and beans often establish better when sown directly outdoors after soil has warmed. Consult specific crop requirements before investing time in indoor starting for these varieties.
Measuring Your Success: What Healthy Seedlings Look Like
Successful indoor seed starting produces seedlings with these characteristics:
- Sturdy stems approximately the thickness of a pencil lead
- 3-5 sets of true leaves (not just cotyledons)
- Vibrant green color without yellowing or spotting
- Roots visible at drainage holes but not circling the container
- Height appropriate for the plant type (typically 3-6 inches for most vegetables)


 浙公网安备
33010002000092号
浙公网安备
33010002000092号 浙B2-20120091-4