
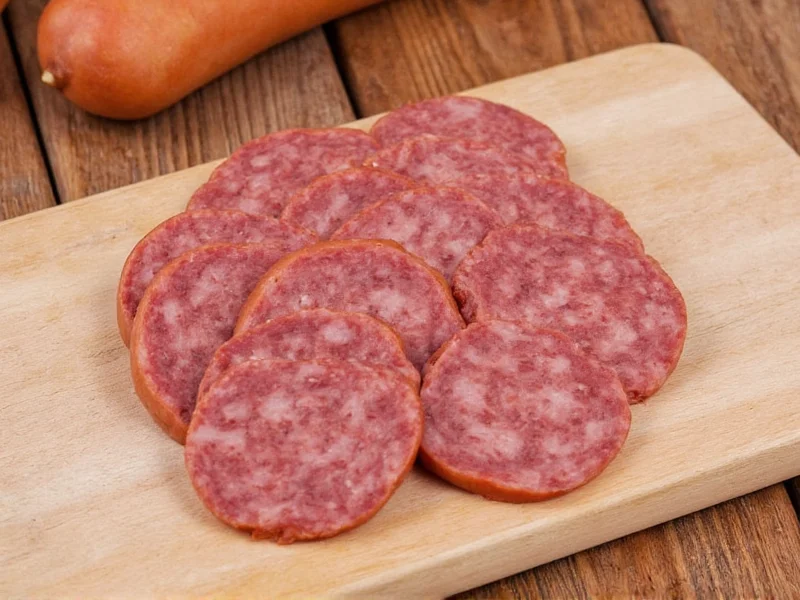
The Complete Guide to Crafting Homemade Summer Sausage
Summer sausage has been a staple of European and American food traditions for centuries, prized for its long shelf life without refrigeration. This semi-dry fermented sausage gets its name because it was traditionally made in late fall and could be stored through summer months. Creating authentic summer sausage at home requires attention to detail, proper equipment, and strict adherence to food safety practices that ensure a delicious, safe final product.
Why Make Your Own Summer Sausage?
Homemade summer sausage offers significant advantages over store-bought varieties. You control the quality of ingredients, avoid unnecessary preservatives, and can customize flavors to your preference. When properly made, your homemade version will have superior texture and more complex flavors than most commercial options. The process connects you with traditional food preservation methods while yielding a versatile product perfect for charcuterie boards, sandwiches, or as a protein-rich snack.
Essential Equipment Checklist
Before beginning your summer sausage制作, gather these critical tools. Professional results depend on having the right equipment for each stage of the process. Investing in quality tools pays off in consistent results and food safety.
| Equipment | Minimum Requirements | Professional Recommendation |
|---|---|---|
| Meat Grinder | Manual grinder with coarse plate | 3/4 HP electric grinder with 3 plate sizes |
| Sausage Stuffer | Hand-crank stuffer | Vacuum stuffer attachment |
| Thermometer | Digital instant-read | Wireless probe thermometer |
| Smoking Setup | Oven with smoke generator | Dedicated smoker with temp control |
| Casings | 32-35mm natural hog casings | Pre-flushed collagen casings |
Ingredient Selection and Proportions
The foundation of exceptional summer sausage lies in your ingredient selection. For traditional flavor and texture, use a 70% lean to 30% fat ratio. The fat content is non-negotiable for proper texture and mouthfeel. Many home sausage makers achieve excellent results with a 60% beef (round or chuck) and 40% pork (shoulder) blend, though venison or other game meats work well too.
For a standard 10-pound batch, you'll need:
- 7 pounds lean meat, cubed and chilled
- 3 pounds fatty trimmings, cubed and chilled
- 4 ounces curing salt (Prague Powder #1)
- 3 tablespoons non-iodized curing salt
- 2 tablespoons freshly ground black pepper
- 2 tablespoons mustard seed
- 1 tablespoon garlic powder
- 1 tablespoon coriander
- 1 cup red wine or water
- 1 packet sausage starter culture (optional but recommended)
When selecting meats for your homemade summer sausage recipe, ensure all components are fresh and properly chilled. Meat temperature should never exceed 35°F during preparation to prevent fat smearing, which ruins texture. The precise summer sausage smoking temperature progression is critical for food safety and proper fermentation.
Step-by-Step Production Process
Preparation and Grinding
Chill all equipment and ingredients overnight. Cut meat into 1-inch cubes and return to refrigerator. Grind through coarse plate (8-10mm) into a chilled bowl over ice. For authentic texture, perform a second grind through medium plate (4.5-6mm) with ice surrounding the collection tray. Maintain meat temperature below 35°F throughout grinding.
Seasoning and Mixing
Add all dry ingredients to ground meat. Mix thoroughly for 3-5 minutes until sticky and paste-like ("tacky" stage). This develops proteins that bind the sausage. Gradually incorporate liquid ingredients while mixing. Properly mixed sausage should adhere to your hands. Refrigerate mixture for 12-24 hours for flavors to meld—this crucial step in the summer sausage curing process develops complex flavors.
Stuffing Technique
Soak natural casings in lukewarm water for 30 minutes. Rinse inside and out. Load stuffer with meat, eliminating air pockets. Begin stuffing at medium speed, keeping slight tension on casing as it fills. Fill casings firmly but not tightly—overstuffing causes bursting during smoking. Twist into 6-8 inch links, leaving 2 inches between links for tying. Prick any air bubbles with sausage needle.
Smoking and Drying Schedule
The summer sausage smoking temperature progression follows these critical stages:
- Drying phase: 100°F with 85% humidity for 1 hour (forms pellicle)
- Smoke phase: 120°F with light hickory smoke for 2 hours
- Cooking phase: Gradually increase to 160°F over 3 hours
- Final phase: Hold at 160°F until internal temperature reaches 160°F
Use a reliable thermometer to monitor both chamber and internal temperatures. The entire process typically takes 6-8 hours. Never rush the temperature progression—this is where most homemade summer sausage attempts fail. The proper summer sausage smoking temperature curve ensures food safety while developing flavor.
Food Safety Essentials
Summer sausage production involves significant food safety considerations. The curing process must reduce water activity sufficiently to prevent pathogen growth. Always use precise measurements of curing salts—never estimate. The critical control points are:
- Internal temperature must reach 160°F for pork-containing sausages
- pH should drop to 5.0-5.3 during fermentation (use pH strips)
- Final water activity should be below 0.92
- Never skip the 12-24 hour cure period before smoking
Improperly made summer sausage can harbor dangerous bacteria like Listeria or Clostridium botulinum. When following a traditional summer sausage recipe, never eliminate curing ingredients or shorten processing times. If making dry summer sausage without smoker capabilities, consider using a dedicated curing chamber with precise humidity control.
Troubleshooting Common Problems
Even experienced sausage makers encounter issues. Here's how to address frequent challenges:
- Dry, crumbly texture: Insufficient fat content or over-drying. Maintain 30% fat ratio and monitor humidity during drying phase.
- Too salty: Incorrect curing salt measurement. Always weigh curing ingredients—volume measurements are unreliable.
- Gray color: Inadequate smoke or temperature too high initially. Start smoking at lower temperatures with clean smoke.
- Soft texture: Undercooked or insufficient drying. Verify internal temperature reached 160°F and allow proper cooling time.
- Mold growth: Humidity too high during drying. Maintain 75-80% humidity during final drying phase.
Flavor Variations and Customization
Once you've mastered the traditional summer sausage ingredients, experiment with these popular variations:
- Pepperoni-style: Add 2 tablespoons paprika, 1 tablespoon crushed red pepper
- Garlic-herb: Double garlic, add 2 tablespoons fresh rosemary and thyme
- Wine-infused: Replace water with full-bodied red wine and add 1 tablespoon juniper berries
- Spicy jalapeño: Add 4 ounces finely diced jalapeños and 1 tablespoon cayenne
When developing your own summer sausage recipe variations, change only one variable at a time to understand its impact on final product. Keep detailed notes on each batch to refine your technique.
Proper Storage and Serving
After production, cool sausages rapidly in ice water bath until internal temperature drops below 70°F. Pat dry and refrigerate for 24 hours before consumption to allow flavors to fully develop. For storage:
- Refrigerated: 3-4 weeks in vacuum-sealed packaging
- Room temperature: 6 weeks if properly dried (water activity <0.92)
- Frozen: 6-12 months
Before serving, bring to room temperature for best texture and flavor release. Slice thinly against the grain for optimal eating experience. Summer sausage pairs beautifully with sharp cheeses, grainy mustard, and crusty bread. For an authentic experience, serve with pickled vegetables and rye crackers.
Frequently Asked Questions
Can I make summer sausage without a smoker?
Yes, you can make summer sausage without a smoker using your oven with a smoke generator box or by using liquid smoke in the seasoning mix. However, the authentic flavor profile requires real wood smoke. For best results without a smoker, use a dedicated curing chamber for the drying phase and finish in oven at precise temperatures.
How long does homemade summer sausage last?
Properly made and stored summer sausage lasts 3-4 weeks refrigerated in vacuum-sealed packaging, 6 weeks at room temperature if fully dried (water activity below 0.92), and 6-12 months frozen. Always check for signs of spoilage like off odors, slimy texture, or unusual mold before consuming.
Why did my summer sausage turn out dry?
Dry summer sausage typically results from insufficient fat content (should be 30%), over-drying during the smoking process, or inadequate mixing that didn't develop proper protein binding. Ensure you maintain the correct meat-to-fat ratio, monitor humidity during drying, and mix the meat thoroughly until tacky before stuffing.
What's the minimum internal temperature for safe summer sausage?
The minimum safe internal temperature for summer sausage containing pork is 160°F. For all-beef versions, 155°F is sufficient, but most experts recommend reaching 160°F for all varieties to ensure complete pathogen elimination. Always verify with a calibrated instant-read thermometer in multiple spots.
Can I use wild game meat for summer sausage?
Yes, venison, elk, or other game meats work excellent for summer sausage but require additional fat (typically pork back fat) since game is very lean. Use a 60% game meat to 40% pork fat ratio for best results. Game meats often benefit from additional seasoning to balance their distinctive flavors.


 浙公网安备
33010002000092号
浙公网安备
33010002000092号 浙B2-20120091-4