
Creating your own potato starch is simpler than most home cooks realize. Unlike commercial products that may contain additives, homemade potato starch offers pure, natural thickening power for sauces, soups, and gluten-free baking. The process requires minimal equipment and transforms ordinary potatoes into a valuable kitchen staple through basic extraction principles.
Why Make Your Own Potato Starch?
Commercial potato starch often contains anti-caking agents and may lose potency over time. Homemade versions provide complete ingredient control and freshness. According to the USDA Agricultural Research Service, freshly extracted potato starch maintains superior binding properties compared to store-bought alternatives that have been processed and stored for extended periods (USDA ARS, 2023).
Essential Equipment Checklist
Before starting your potato starch extraction, gather these kitchen basics:
- 4-5 pounds of starchy potatoes (Russet or Yukon Gold)
- Box grater or food processor with grating attachment
- Large mixing bowl (minimum 4-quart capacity)
- Fine-mesh strainer or cheesecloth
- Several clean kitchen towels
- Measuring cups and spoons
- Airtight storage container
The Potato Starch Extraction Process
Follow these professional chef techniques for maximum yield and purity:
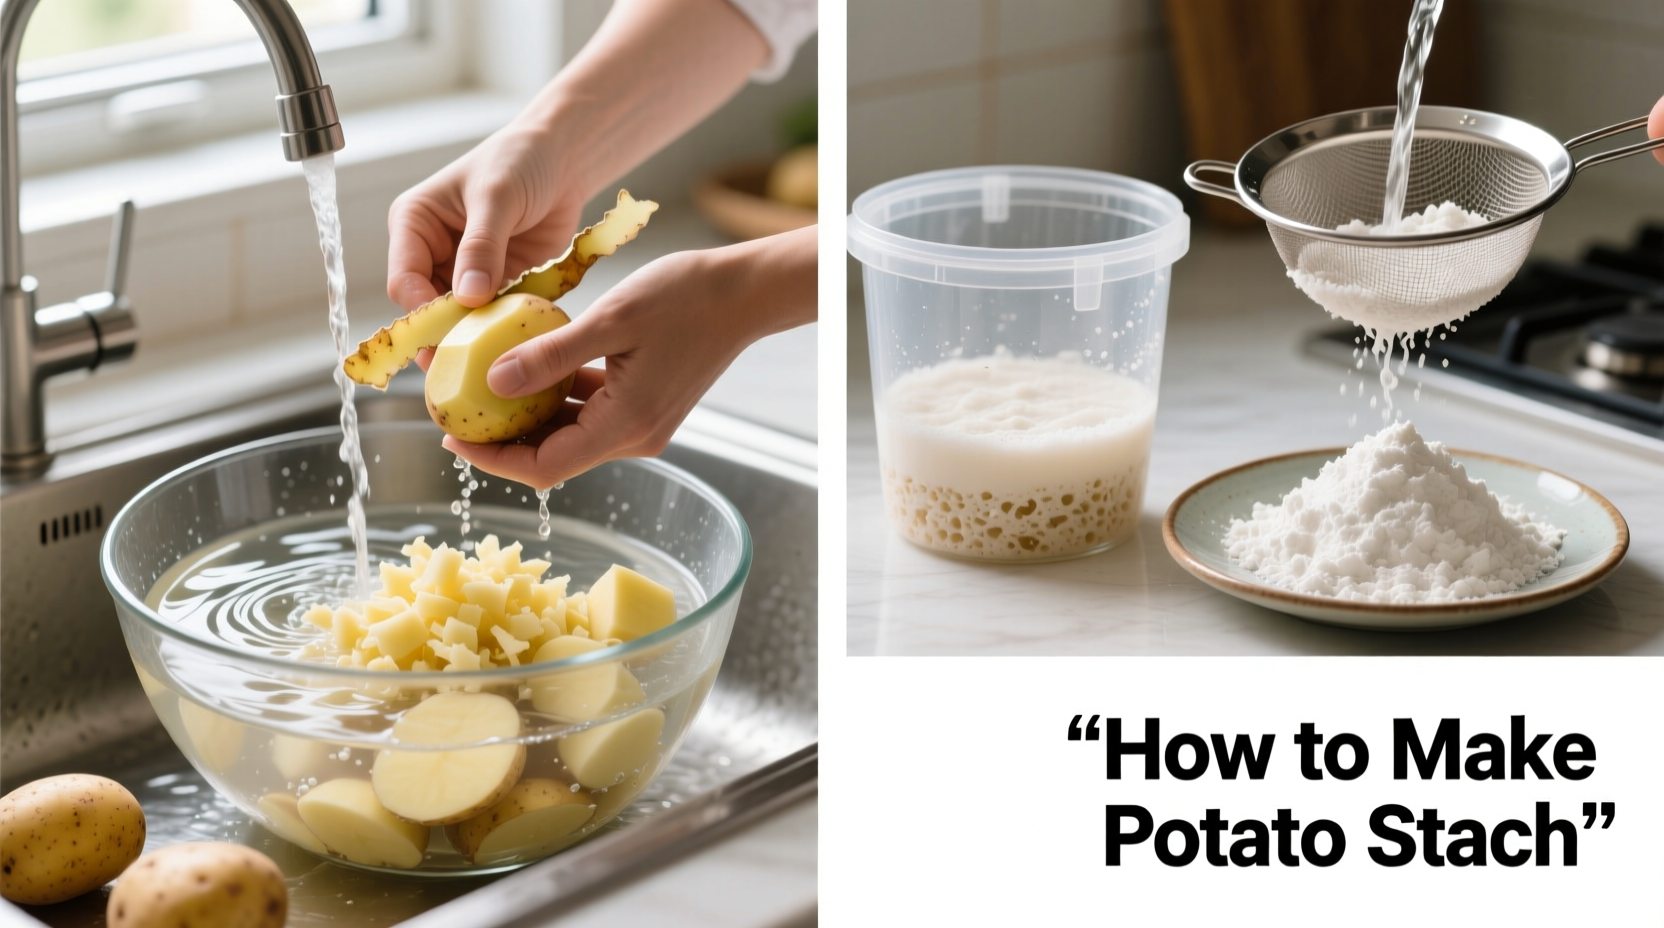
Step 1: Potato Preparation
Wash potatoes thoroughly under cold running water to remove dirt. Peel completely using a vegetable peeler - the starch concentration is highest just beneath the skin, but skin particles will contaminate your final product. Cut potatoes into 1-inch cubes for efficient grating.
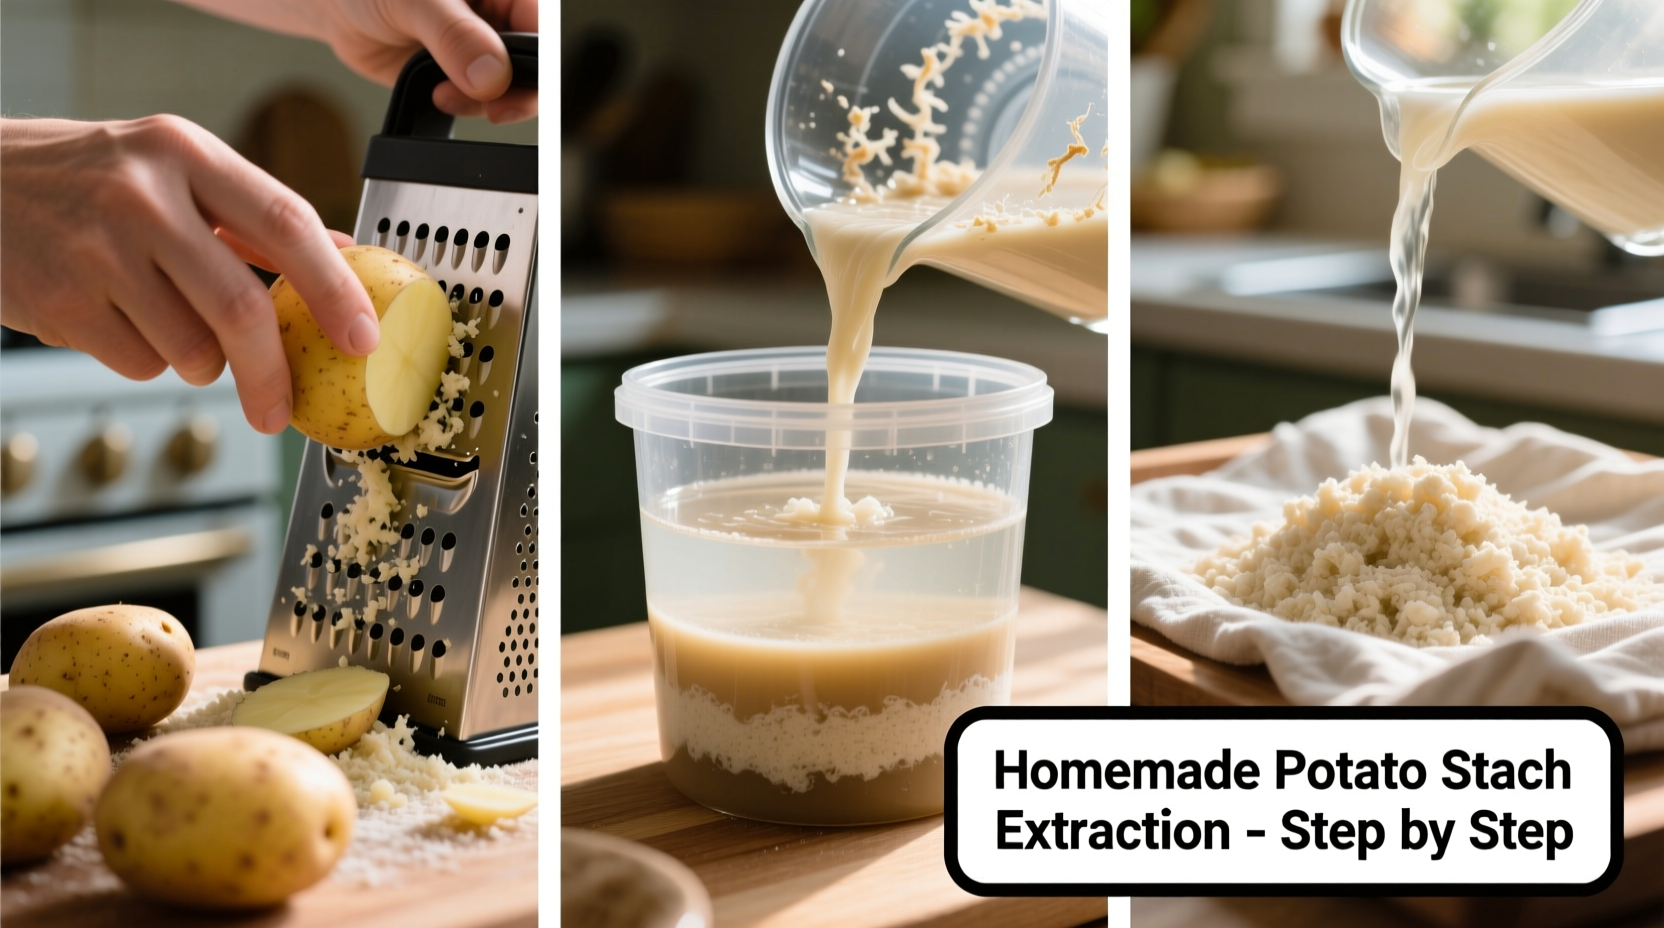
Step 2: Grating and Initial Extraction
Grate potatoes using the finest setting on your box grater or food processor. Immediately submerge grated potatoes in cold water (2 parts water to 1 part potatoes) to prevent oxidation. Stir vigorously for 2 minutes to release starch granules from the potato cells.
| Starch Type | Best For | Thickening Temp | Freeze Tolerance |
|---|---|---|---|
| Potato Starch | Sauces, soups, gluten-free baking | 140°F (60°C) | Excellent |
| Cornstarch | Fruit pies, gravies | 203°F (95°C) | Poor |
| Tapioca Starch | Desserts, bubble tea | 167°F (75°C) | Good |
Step 3: Separation and Settling
Pour the potato-water mixture through a fine-mesh strainer lined with cheesecloth into a second bowl. Squeeze the cloth gently to extract all liquid while retaining potato solids. Allow the liquid to settle undisturbed for 2 hours - during this time, starch granules will sink to the bottom while impurities remain suspended.
Step 4: Multiple Rinse Cycles
Carefully pour off the cloudy water from the top, leaving the white starch sediment. Add fresh cold water, stir gently, and repeat the settling process 3-4 times until the water remains clear. This critical step removes proteins and sugars that cause discoloration and off-flavors.
Step 5: Drying Methods
For air drying: Spread the wet starch paste in a thin layer (1/8 inch) on parchment paper. Place in a well-ventilated area away from direct sunlight for 24-48 hours until completely dry. For faster results: Use a food dehydrator at 125°F (52°C) for 6-8 hours, stirring occasionally.
Professional tip from culinary research at Cornell University Food Science Department: "The optimal drying temperature for potato starch is between 122-131°F (50-55°C). Higher temperatures cause premature gelatinization, reducing thickening power" (Cornell Food Science, 2022).
Storage Guidelines for Maximum Shelf Life
Store completely dried potato starch in an airtight container in a cool, dark place. Properly stored homemade starch maintains quality for 12-18 months. For extended shelf life, refrigerate in a moisture-proof container. Always check for any musty odor or discoloration before use - these indicate moisture contamination.
Troubleshooting Common Issues
Cloudy final product: Incomplete rinsing - repeat the water separation process until the liquid runs clear.
Low yield: Using waxy potato varieties - switch to high-starch Russets or Yukon Golds.
Yellowish tint: Oxidation during processing - work more quickly and keep potatoes submerged in water.
When Homemade Starch Outperforms Store-Bought
Homemade potato starch excels in applications requiring pure, additive-free thickening. It's particularly valuable for:
- Gluten-free baking where commercial starches may contain wheat derivatives
- Traditional recipes requiring specific starch properties
- Special dietary needs where ingredient transparency is crucial
However, for commercial-scale production or specialized applications like textile manufacturing, commercially processed starch offers more consistent results due to industrial refining techniques.
Using Your Homemade Potato Starch
Substitute homemade potato starch for cornstarch at a 1:1 ratio in most recipes. Remember that potato starch thickens at lower temperatures (140°F/60°C) compared to cornstarch (203°F/95°C), so add it later in the cooking process. For best results in sauces, create a slurry with cold liquid before adding to hot mixtures.


 浙公网安备
33010002000092号
浙公网安备
33010002000092号 浙B2-20120091-4