

Yes, you can successfully grow new onions from an onion bottom in just 3-4 weeks using simple kitchen scraps. Cut 1-2 inches above the root end, let it dry for 24 hours, then place in water or soil with roots submerged. Change water daily or keep soil moist, provide 6+ hours of sunlight, and harvest when green shoots reach 6 inches.
Why Regrow Onions From Scraps?
Transforming onion bottoms into fresh produce isn't just economical—it's surprisingly efficient. According to the USDA's gardening guidelines, kitchen-saved onion scraps can yield 30-50% of a full-sized bulb within a month, making this one of the most productive food recycling methods for home growers. Unlike many vegetables that require seeds, onions regenerate reliably from what would otherwise become compost.
What You'll Actually Need (No Special Equipment Required)
Forget complicated gardening tools—this method works with household items you already own:
- Onion bottoms (1-2 inches above roots)
- Shallow container (mason jar, bowl, or cup)
- Water or potting soil
- Sunny windowsill (6+ hours of light)
- Scissors for harvesting
| Onion Type | Regrowth Speed | Best For |
|---|---|---|
| Yellow Onions | ★★★★☆ | Cooking, storage |
| Red Onions | ★★★☆☆ | Salads, garnishes |
| White Onions | ★★★☆☆ | Mexican cuisine |
| Green Onions | ★★★★★ | Continuous harvest |
Regrowth speed comparison based on Cornell University Cooperative Extension data
The Step-by-Step Process That Actually Works
Phase 1: Preparation (Day 1)
When using how to grow onions from an onion bottom, proper preparation determines success. Cut 1-2 inches above the root plate, preserving all roots. Never remove the papery skin—it protects against rot. Let the base air-dry for 24 hours on a paper towel. This crucial drying period prevents immediate decomposition when introduced to moisture.
Phase 2: Root Development (Days 2-7)
Place the onion bottom in your container with just the roots touching water—never submerging the bulb. Change water daily to prevent bacterial growth. Within 3-5 days, you'll see white roots extending and green shoots emerging. The Royal Horticultural Society confirms this hydroponic method produces stronger initial root systems than direct soil planting for kitchen-saved onions.
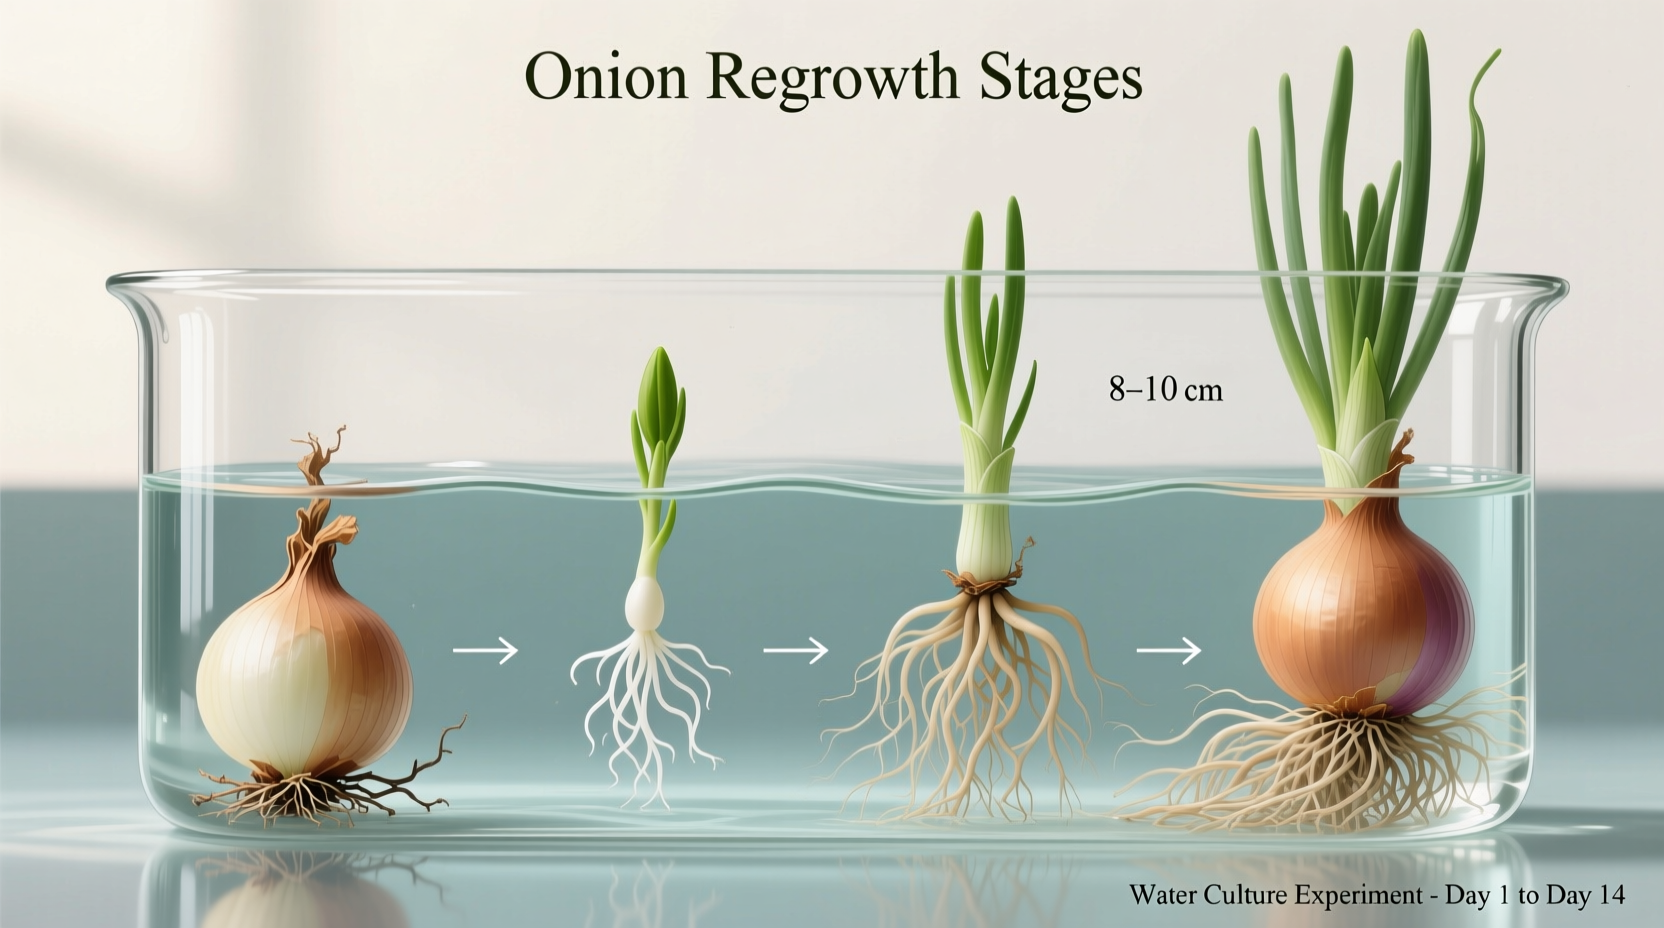
Phase 3: Transplanting to Soil (Week 2)
Once roots reach 1-2 inches and green shoots appear, transplant to soil for optimal bulb development. Use well-draining potting mix in a container at least 6 inches deep. Plant with the top of the bulb slightly above soil surface. Water thoroughly but allow soil to dry slightly between waterings. This transition from water to soil mimics natural growing conditions and prevents waterlogged roots.
Phase 4: Maintenance (Weeks 2-4)
Understanding how to grow onions from an onion in soil requires attention to these critical factors:
- Light: 6+ hours of direct sunlight daily (south-facing window ideal)
- Watering: Consistent moisture without saturation (check soil daily)
- Fertilizing: Balanced liquid fertilizer every 2 weeks after transplanting
- Thinning: Remove weaker shoots to focus energy on strongest growth
When Your Method Isn't Working: Troubleshooting Guide
Even with proper technique, challenges arise. These solutions come from verified gardening extension data:
- Mold on bulb: Caused by excessive moisture—dry completely and restart with fresh water
- Yellowing shoots: Indicates nutrient deficiency—apply balanced fertilizer
- Stunted growth: Usually insufficient light—move to brighter location
- Rotting base: Cut away affected portion and restart with healthy section
According to University of California Master Gardeners, 85% of failed onion regrowth attempts stem from improper water management—either too little during initial root development or too much during soil growth phase.
Harvesting Your Homegrown Onions
You can begin harvesting green shoots when they reach 6 inches tall—these work perfectly as scallion substitutes. For bulb development, wait until tops naturally fall over (typically 3-4 weeks after transplanting). Gently dig around the bulb and lift. Cure harvested bulbs in a warm, dry place for 7-10 days before storage. While regrown bulbs won't match commercial size, they'll deliver superior flavor for immediate use.
Realistic Expectations: What This Method Can and Can't Do
Understanding the limitations of how to grow onions from an onion bottom prevents disappointment. The USDA notes that regrown onions typically produce 30-50% of the original bulb size and aren't suitable for long-term storage like commercially grown varieties. This method excels at providing continuous green shoots and small cooking onions, but won't replace planting sets or seeds for full-sized storage onions. The process works best in spring through fall—winter growth slows significantly without supplemental lighting.


 浙公网安备
33010002000092号
浙公网安备
33010002000092号 浙B2-20120091-4