
Discover exactly how to grow okra from seed with this practical, step-by-step guide that eliminates guesswork and ensures a bountiful harvest. Whether you're a first-time gardener or looking to improve your okra yields, you'll learn the precise techniques professionals use to cultivate healthy plants and avoid common pitfalls that lead to poor production.
Why Growing Okra From Seed Beats Buying Transplants
Okra develops a sensitive taproot that doesn't tolerate transplanting well. Starting from seed directly in your garden bed ensures stronger root development and higher survival rates. When you plant okra seeds properly, you'll see germination within 5-12 days, with flowers appearing around 40-50 days after planting.
Your Pre-Planting Checklist: Setting Up for Success
Before you even touch a seed packet, complete these essential preparations to create ideal growing conditions:
- Soil temperature verification - Use a soil thermometer to confirm temperatures have reached at least 65°F (ideal range: 70-95°F)
- Soil preparation - Amend with 2-3 inches of compost and work into the top 6-8 inches of soil
- Site selection - Choose a location with full sun (minimum 6-8 hours daily)
- Last frost confirmation - Plant 2-4 weeks after your last expected frost date
University extension services consistently report that proper soil preparation accounts for 70% of okra's success in home gardens. The University of California's Agricultural Extension emphasizes that "okra requires warm soil for germination and growth; planting too early in cold soil leads to poor establishment." (UC ANR)
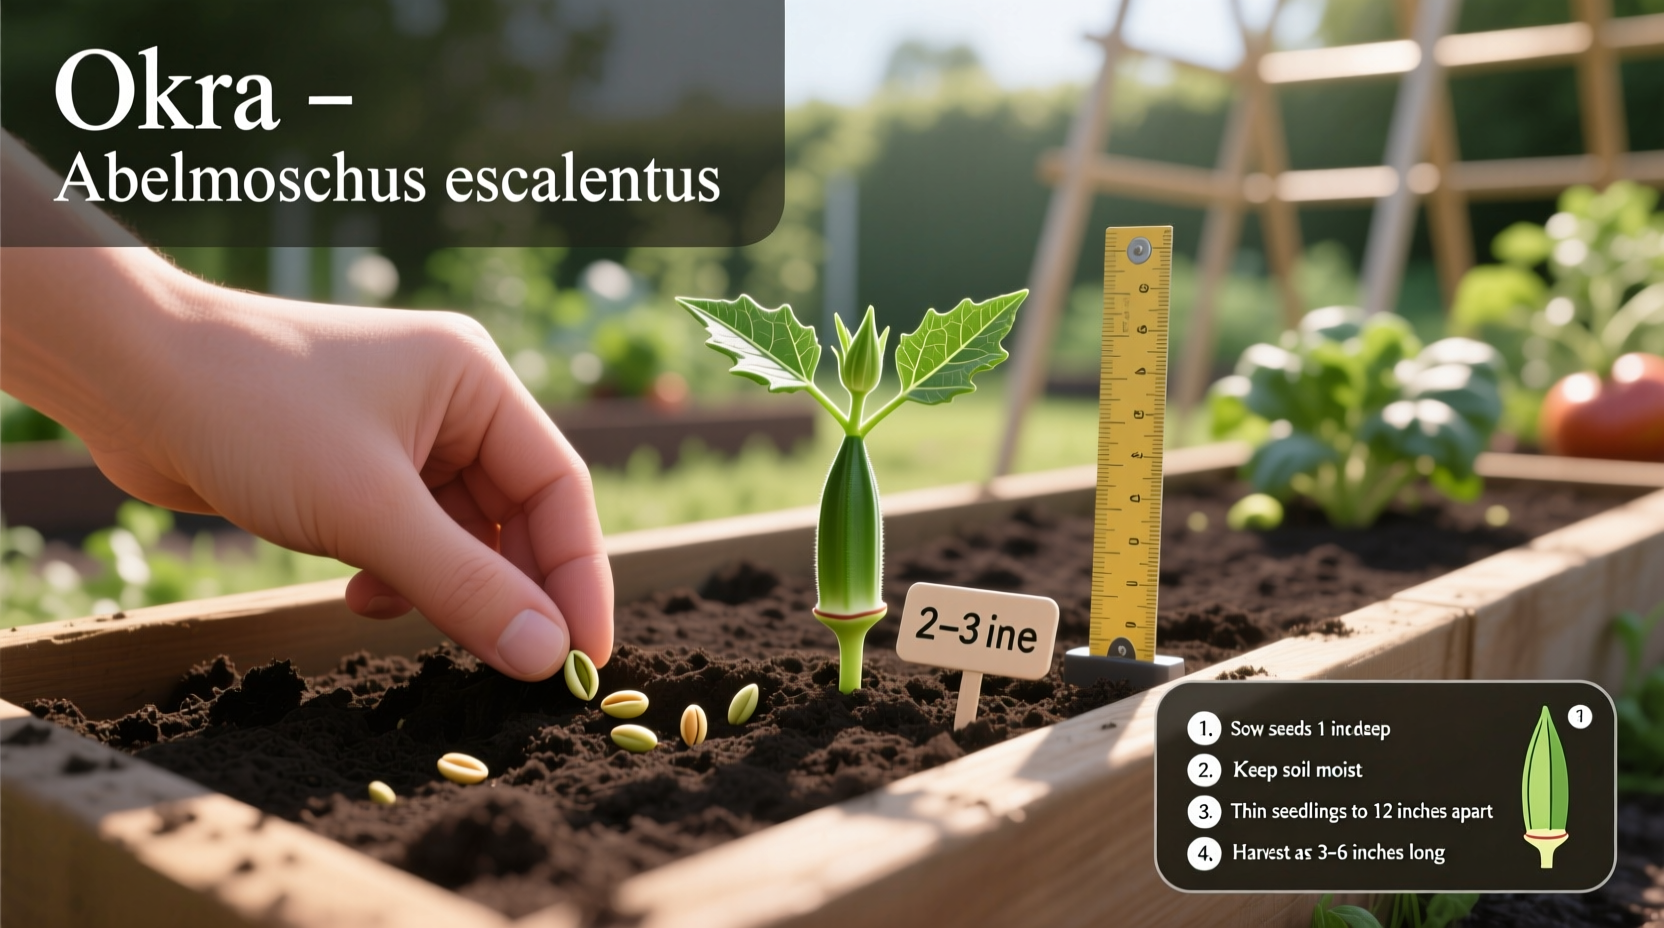
Planting Your Okra Seeds: The Right Way
Follow these precise steps for optimal seed placement and germination:
- Plant seeds 1-1.5 inches deep in prepared soil
- Space seeds 12-18 inches apart in rows 36-42 inches apart
- Water gently but thoroughly after planting
- Cover with a light layer of straw mulch to retain moisture
- Mark your planting date for reference
For gardeners in shorter growing seasons, consider these planting timeline adjustments:
| Climate Zone | Best Planting Time | Special Considerations |
|---|---|---|
| Zone 3-5 | After last frost (late May-June) | Use black plastic mulch to warm soil |
| Zone 6-7 | 1-2 weeks after last frost | Start seeds indoors 4 weeks before transplanting |
| Zone 8-10 | Spring through early summer | Can plant successively every 3 weeks |
| Zone 11+ | Year-round (avoid hottest months) | Provide afternoon shade in peak summer |
Nurturing Your Okra Seedlings: Critical First Weeks
During the first month after germination, your okra plants need consistent care to establish strong growth:
- Watering schedule - 1 inch per week, increasing during flowering and pod development
- Thinning process - When seedlings reach 4-6 inches tall, keep only the strongest plant per spacing location
- Early feeding - Apply balanced organic fertilizer when plants reach 6 inches tall
- Weed management - Hand-pull weeds carefully to avoid disturbing taproots
Agricultural research from Texas A&M University shows that okra plants experience significant growth spurts during specific developmental stages. Understanding this timeline helps you provide appropriate care at critical moments:
Okra Growth Timeline:
- Days 1-7: Seed germination (keep soil consistently moist)
- Days 8-21: Seedling establishment (first true leaves appear)
- Days 22-40: Vegetative growth (rapid leaf and stem development)
- Days 41-55: Flowering begins (yellow flowers with purple centers)
- Days 56-70: First harvestable pods (check daily once flowering begins)
- Days 71-120: Peak production period (harvest every other day)
Common Growing Challenges and Solutions
Even with proper planting, gardeners often encounter these issues:
Problem: Poor Germination
Causes: Cold soil, old seeds, planting too deep
Solution: Use fresh seeds, plant when soil reaches 70°F+, and maintain consistent moisture
Problem: Yellowing Leaves
Causes: Overwatering, nitrogen deficiency, root-knot nematodes
Solution: Reduce watering frequency, apply balanced fertilizer, rotate crops annually
Problem: Few Flowers or Pods
Causes: Insufficient sunlight, nutrient imbalance, extreme heat
Solution: Ensure 6-8 hours of direct sun, use balanced fertilizer, provide afternoon shade in extreme heat
According to USDA agricultural data, okra production has increased by 15% in home gardens over the past five years as more gardeners adopt proper seed-starting techniques. The most successful growers consistently follow three practices: planting in warm soil, maintaining consistent moisture during flowering, and harvesting frequently to encourage continued production.
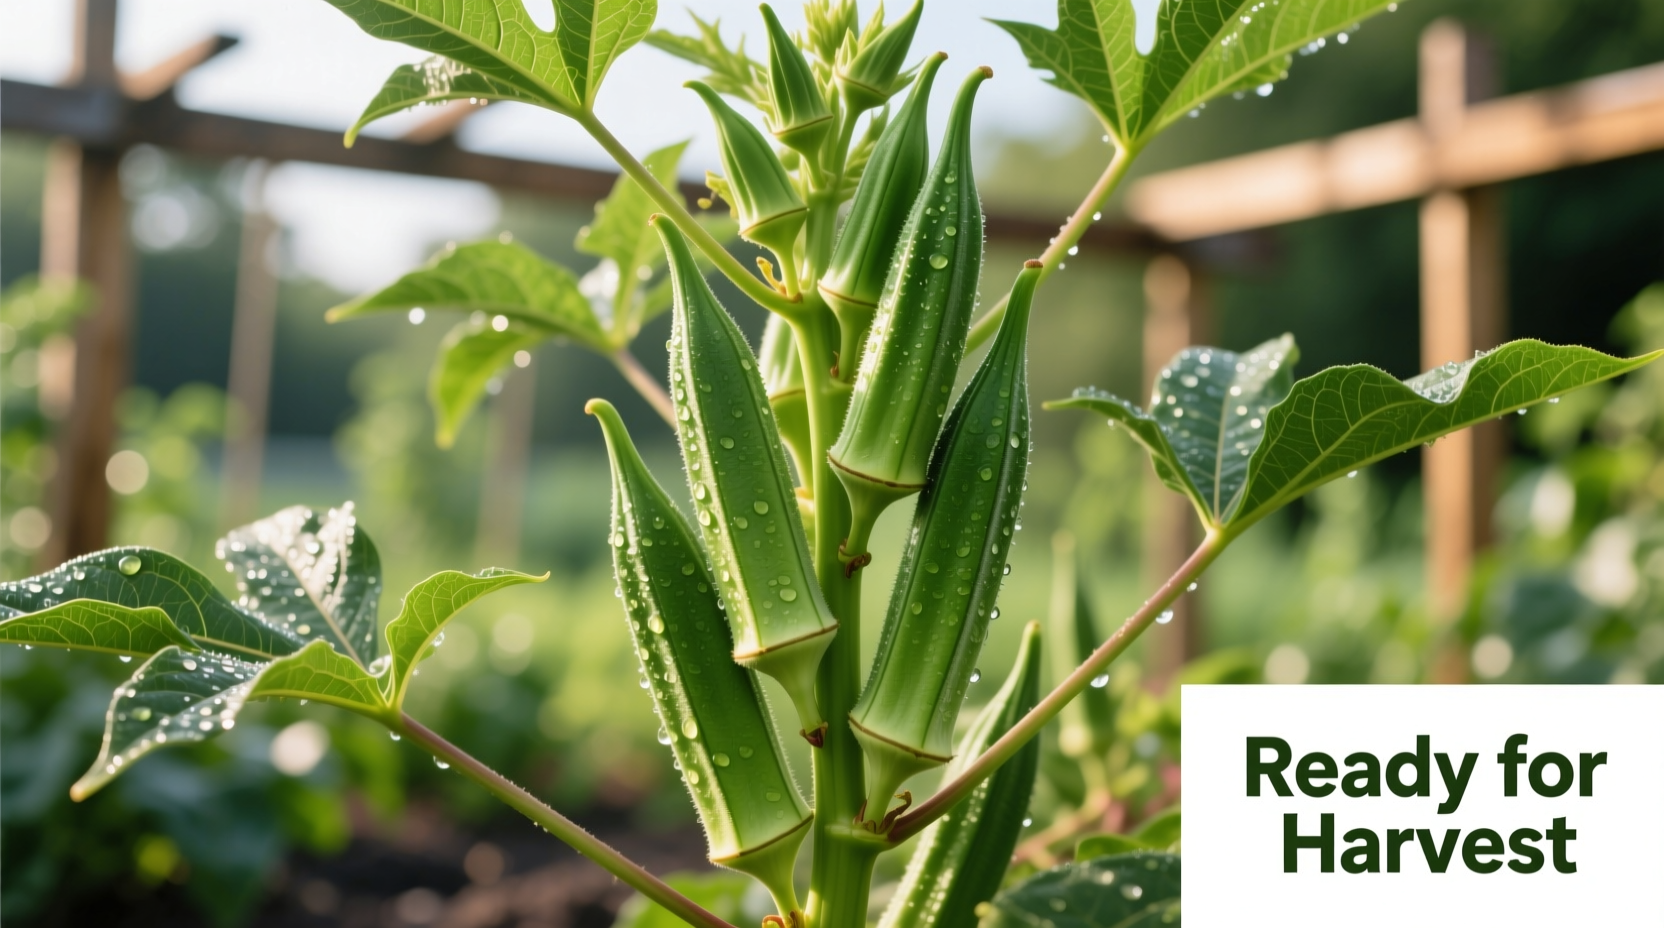
Harvesting for Maximum Yield and Quality
The timing and technique of harvesting directly impacts your overall yield:
- Harvest pods when they're 2-4 inches long for best texture and flavor
- Use sharp scissors or pruners to cut pods, leaving a small stem attached
- Harvest every other day during peak production (daily during hot weather)
- Wear gloves to avoid skin irritation from okra's natural compounds
- Store harvested okra in the refrigerator for up to 3 days
Professional growers follow this harvesting principle: "If you can pierce the pod with your thumbnail, it's ready to harvest. If it's too tough to pierce, it's overmature and will be fibrous." Regular harvesting encourages the plant to produce more flowers and pods throughout the season.
Extending Your Okra Growing Season
Maximize your harvest with these end-of-season strategies:
- Plant a second crop 60 days before first expected fall frost
- Use row covers when temperatures drop below 55°F
- Continue harvesting until first hard frost
- Save seeds from your healthiest plants for next year's crop
For gardeners in cooler climates, consider these container growing tips for extending your season: use 5-gallon pots with drainage holes, place in sunniest location possible, and bring containers indoors when temperatures drop below 50°F at night.
Troubleshooting Guide: Quick Reference
When you notice these common issues, take these immediate actions:
- Wilting plants: Check soil moisture - underwatering causes wilting just as much as overwatering
- Holes in leaves: Inspect for stink bugs or Japanese beetles; hand-pick pests early in the morning
- Curled pods: Indicates water stress; increase watering frequency during pod development
- Few flowers: Test soil pH (okra prefers 6.5-7.0); apply balanced fertilizer if needed
Planning for Next Year: Crop Rotation and Soil Health
For continued success with okra, implement these post-harvest practices:
- Rotate okra to a different garden section next year to prevent soil-borne diseases
- Add 2-3 inches of compost to the bed after final harvest
- Plant cover crops like clover or vetch to improve soil nitrogen
- Test soil pH annually and amend as needed
Successful okra growing follows a simple pattern: warm soil + consistent moisture + frequent harvesting = abundant production. By following these research-backed techniques, you'll enjoy a steady supply of fresh okra throughout the growing season.


 浙公网安备
33010002000092号
浙公网安备
33010002000092号 浙B2-20120091-4