
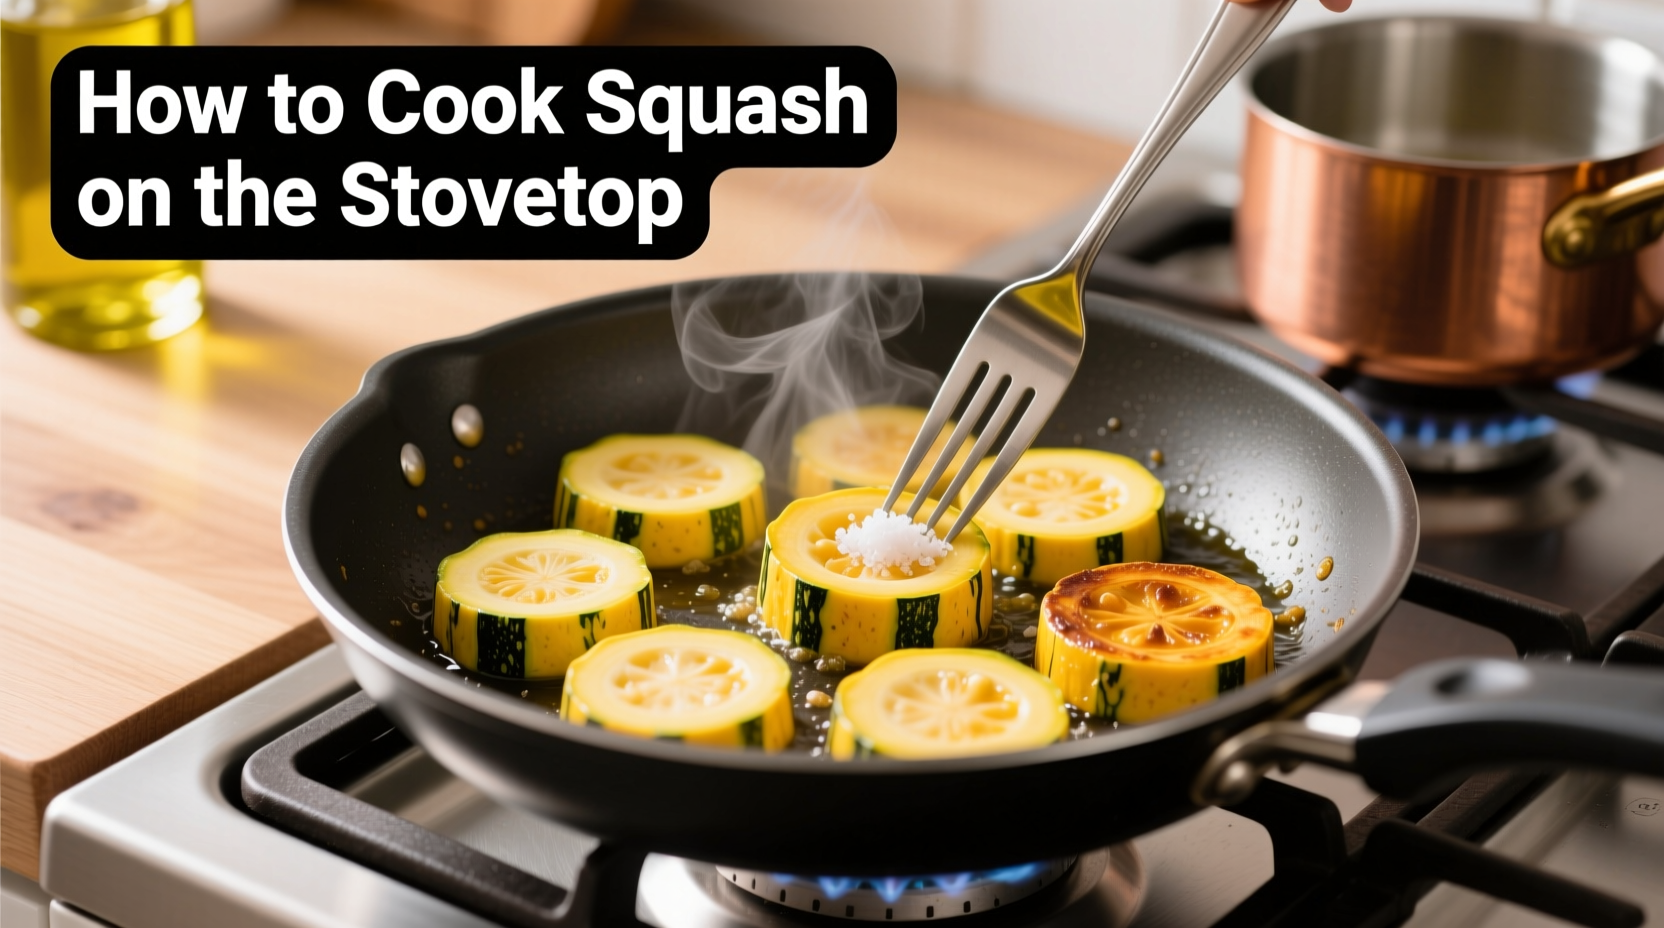
Stovetop squash cooking takes just 15-20 minutes with proper technique. Select firm squash, cut into even pieces, heat oil in a skillet over medium-high heat, and cook 8-12 minutes until tender-crisp while stirring occasionally. This method preserves nutrients better than boiling and creates beautifully caramelized edges impossible to achieve in the oven.
Why Stovetop Squash Beats Other Cooking Methods
When you're craving tender squash with perfectly caramelized edges in minimal time, your stovetop delivers results no oven can match. Professional kitchens rely on this technique because direct heat creates complex flavor compounds through the Maillard reaction while preserving more nutrients than boiling. According to USDA cooking guidelines, stovetop methods retain up to 25% more vitamin C in summer squash compared to boiling.
| Cooking Method | Time Required | Nutrient Retention | Flavor Development |
|---|---|---|---|
| Stovetop Sautéing | 15-20 minutes | High (minimal water contact) | Excellent caramelization |
| Roasting | 25-35 minutes | Moderate | Good caramelization |
| Boiling | 10-15 minutes | Low (nutrients leach into water) | Minimal flavor development |
Your Squash Selection Checklist
Not all squash varieties work equally well for stovetop cooking. Choose summer squash varieties like zucchini, yellow squash, or pattypan that have thin skins and high water content. Winter squash like butternut requires pre-cooking before stovetop finishing. When selecting squash, look for firm specimens with smooth, unblemished skin and no soft spots. The FDA recommends choosing smaller squash (6-8 inches long) as they tend to be less bitter and have fewer seeds.
Step-by-Step Stovetop Squash Perfection
Preparation: Setting Yourself Up for Success
Proper preparation prevents common cooking disasters. Start by washing squash thoroughly under cool running water. For summer squash, you typically don't need to peel—just trim the ends. Cut into uniform ½-inch slices or half-moons for even cooking. If using larger zucchini, consider salting slices and letting them rest for 10 minutes to draw out excess moisture, then pat dry with paper towels. This simple step prevents soggy results, as recommended by the American Culinary Federation's cooking guidelines.
The Cooking Process: Heat Management is Everything
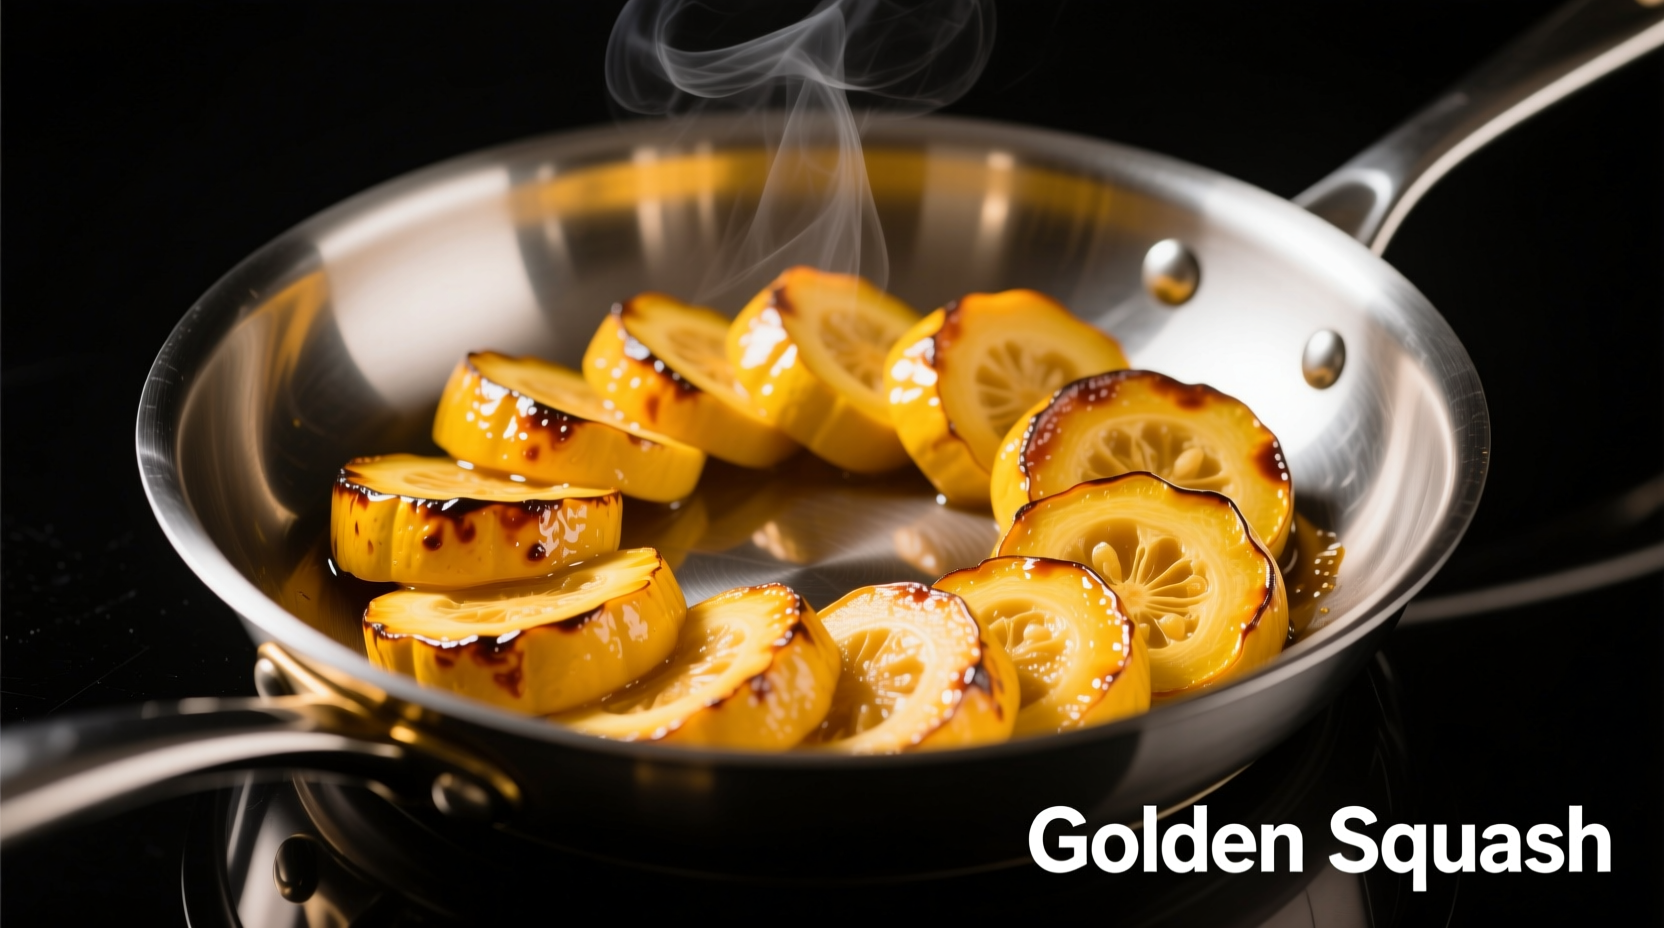
Heat management separates good squash from great squash. Use a heavy-bottomed skillet (cast iron or stainless steel works best) and preheat it over medium-high heat for 2-3 minutes. Add 1-2 tablespoons of high smoke-point oil like avocado or grapeseed oil—never olive oil as it burns at high temperatures. Wait until the oil shimmers but doesn't smoke before adding squash.
Arrange squash in a single layer without crowding the pan—this is crucial. Overcrowding causes steaming instead of searing. Cook undisturbed for 3-4 minutes to develop that beautiful golden crust, then flip and continue cooking 4-6 minutes more until tender-crisp. Stirring too frequently prevents proper caramelization. The ideal internal temperature for perfectly cooked squash is 185-195°F (85-90°C), as verified by food safety standards from the National Center for Home Food Preservation.
Flavor Enhancement Techniques from Professional Kitchens
Add seasonings at the right moment for maximum impact. Salt draws out moisture, so add it after the initial sear when flipping the squash. For garlic lovers, add minced garlic during the last 2 minutes of cooking to prevent burning. Finish with fresh herbs like basil or thyme right before serving. A splash of acid—lemon juice or vinegar—brightens flavors and balances richness. This technique aligns with flavor chemistry principles documented by the Culinary Institute of America's research on vegetable preparation.
Avoid These 3 Common Stovetop Squash Mistakes
Mistake #1: Using Low Heat
Many home cooks err on the side of caution with heat, but medium-high is essential for proper caramelization without overcooking. Low heat causes squash to release water and steam instead of sear.
Mistake #2: Overcrowding the Pan
When squash pieces touch, they create steam that prevents browning. Cook in batches if necessary—this professional kitchen technique makes all the difference.
Mistake #3: Adding Seasonings Too Early
Salt draws out moisture immediately. Wait until after the initial sear to add salt, and add delicate herbs at the very end to preserve their flavor and color.
Serving and Storage Tips You'll Actually Use
Serve immediately for best texture and flavor. Squash continues cooking from residual heat, so remove it from the pan when slightly firmer than your desired doneness. Pair with grilled proteins or as part of a vegetable medley. For leftovers, store in an airtight container in the refrigerator for up to 3 days. Reheat gently in a skillet rather than the microwave to restore texture. The National Center for Home Food Preservation confirms properly stored cooked squash maintains quality for 3-4 days when cooled quickly and stored below 40°F.
Troubleshooting Your Squash Results
Soggy squash? You overcrowded the pan or didn't heat it sufficiently before adding oil. Next time, cook in batches and ensure proper preheating.
Burnt edges but raw center? Your heat was too high. Reduce to medium and give squash more time to cook through.
Lacking flavor? You likely added seasonings too early or used insufficient salt. Try finishing with flaky sea salt and fresh herbs.


 浙公网安备
33010002000092号
浙公网安备
33010002000092号 浙B2-20120091-4