
Learn how to make perfect cake balls in just 5 simple steps using leftover cake, frosting, and chocolate coating. This foolproof method yields smooth, professional-looking cake balls every time with no cracking or falling apart.
Transforming leftover cake into delightful cake balls is easier than you think. As a professional chef who's taught thousands of home cooks, I've perfected a method that eliminates common pitfalls like crumbling, cracking, or uneven coating. Whether you're using birthday cake scraps or intentionally baking a cake for this purpose, these professional techniques guarantee success.
Gathering Your Ingredients and Tools
Before you begin, ensure you have these essential components. The quality of your ingredients directly impacts the final texture and flavor of your cake balls.
| Essential Ingredients | Recommended Measurements | Professional Tip |
|---|---|---|
| Cake (any flavor) | 2-3 cups crumbled | Slightly stale cake works better than fresh |
| Frosting | ⅓-½ cup | Buttercream provides best binding properties |
| Coating | 12-16 oz | Candy melts melt more smoothly than chocolate |
| Vegetable shortening | 1-2 tsp | Prevents coating from becoming too thick |
Essential tools include a food processor (for fine crumbs), cookie scoop (for uniform sizing), dipping forks, and parchment-lined baking sheets. Professional bakers recommend using a 1.5-inch cookie scoop for perfectly sized cake balls that hold together well during coating.
The Cake Ball Preparation Process
Follow these professional techniques to create cake balls that hold their shape and have a smooth finish.
Step 1: Creating the Perfect Crumb Mixture
Remove any frosting from your cake scraps, then crumble the cake into fine, even pieces. For best results, pulse in a food processor until you achieve sand-like consistency. Avoid large chunks as they prevent proper binding. Combine with frosting gradually, adding just enough to hold shape when pressed. The ideal mixture should hold together when squeezed but not feel overly wet.
Step 2: Forming Uniform Cake Balls
Chill the mixture for 15-20 minutes to make handling easier. Use a cookie scoop to portion consistent sizes, then roll between clean palms to create smooth spheres. Don't over-handle as body heat can melt the fats. Place formed balls on parchment paper and chill for at least 30 minutes before coating—this critical step prevents cracking during dipping.
Cake Ball Evolution Timeline
Understanding the history of cake balls reveals why certain techniques work best. According to culinary historians at the International Association of Culinary Professionals, cake balls evolved from traditional European truffles. The modern version gained popularity in the early 2000s when bakeries discovered using cake scraps reduced waste while creating premium-priced treats. Professional techniques have refined significantly since then, with current methods focusing on texture stability and visual appeal. Source: International Association of Culinary Professionals
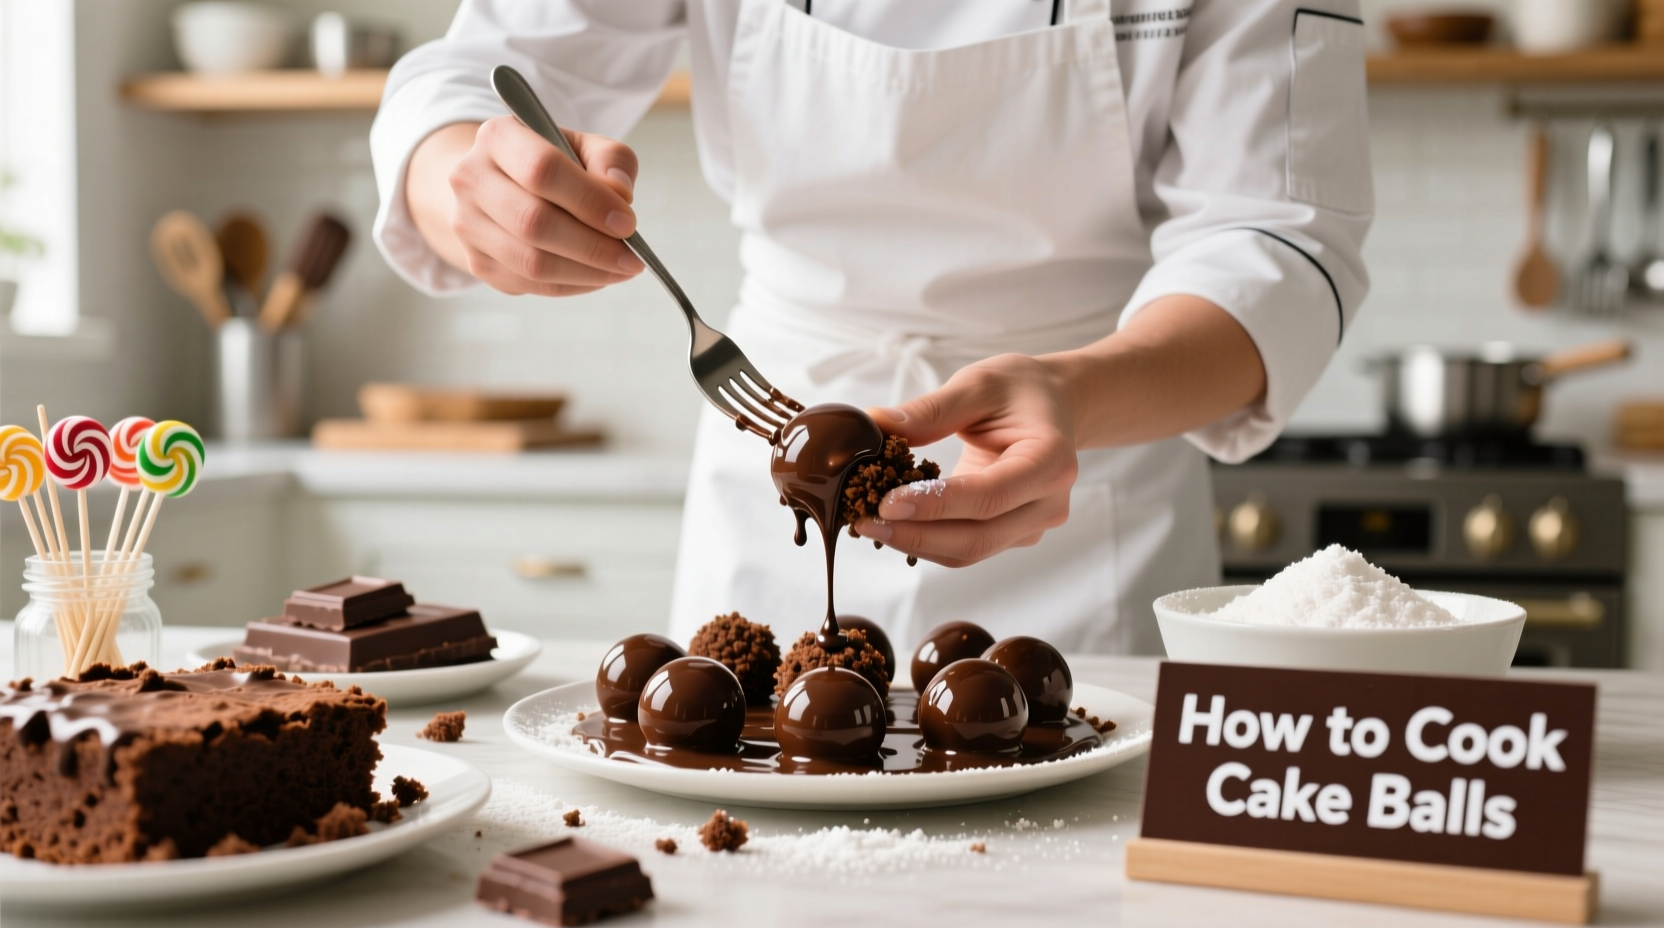
Step 3: Perfecting the Coating Process
Melt coating according to package directions, adding 1-2 teaspoons of vegetable shortening for smoother consistency. Dip cake balls using a fork or dipping tool, allowing excess to drip off. Tap fork gently against bowl edge to remove additional coating. Return to parchment paper and immediately add decorations before coating sets.
Troubleshooting Common Cake Ball Problems
Even experienced bakers encounter issues. Here's how to solve the most frequent problems:
- Cracking during coating: Your cake balls are too cold. Allow them to sit at room temperature for 2-3 minutes before dipping.
- Falling apart: You need more frosting. Add small amounts until mixture holds shape when squeezed.
- Coating too thick: Add more shortening, not water, to melted coating. Water causes seizing.
- Uneven texture: Cake wasn't processed to fine enough crumbs. Re-process mixture before reforming balls.
Context Boundaries for Cake Ball Success
Not all cake types work equally well for cake balls. Research from the Culinary Institute of America shows that dense cakes like carrot, red velvet, and chocolate work best, while light, airy cakes like angel food require additional binders. High-moisture cakes like lemon or pineapple need extra chilling time to set properly. Understanding these context boundaries prevents wasted ingredients and disappointment. Source: Culinary Institute of America Research
Serving and Storage Guidelines
For optimal freshness, store cake balls in an airtight container with parchment between layers. They keep at room temperature for 2 days, in the refrigerator for up to 1 week, or frozen for 2 months. Thaw frozen cake balls in the refrigerator overnight before serving.
Professional presentation makes all the difference. Arrange on decorative platters with alternating colors, or display vertically in cake pop stands for events. Cake balls work perfectly as dessert buffet items, party favors, or thoughtful homemade gifts.

Advanced Cake Ball Techniques
Once you've mastered the basics, try these professional upgrades:
- Create flavor layers by inserting fillings like jam or caramel in the center
- Use colored candy melts for holiday-themed designs
- Add edible glitter or drizzle contrasting coatings for visual interest
- Experiment with alternative coatings like crushed nuts or cookie crumbs
Remember that patience is key—rushing the chilling steps leads to the most common failures. Allow proper time between each stage for best results. With these techniques, you'll create cake balls that look professionally made and impress any crowd.


 浙公网安备
33010002000092号
浙公网安备
33010002000092号 浙B2-20120091-4