
Ever wonder how those humble potatoes transform from small seed pieces into your favorite side dish? Understanding the potato plant's growth process isn't just fascinating biology—it's essential knowledge for anyone wanting to grow their own spuds successfully. Whether you're planning a backyard garden or simply curious about where your food comes from, this guide reveals exactly how potato plants develop from planting to harvest, with practical insights you can apply immediately.
The Complete Potato Growth Cycle: From Seed to Harvest
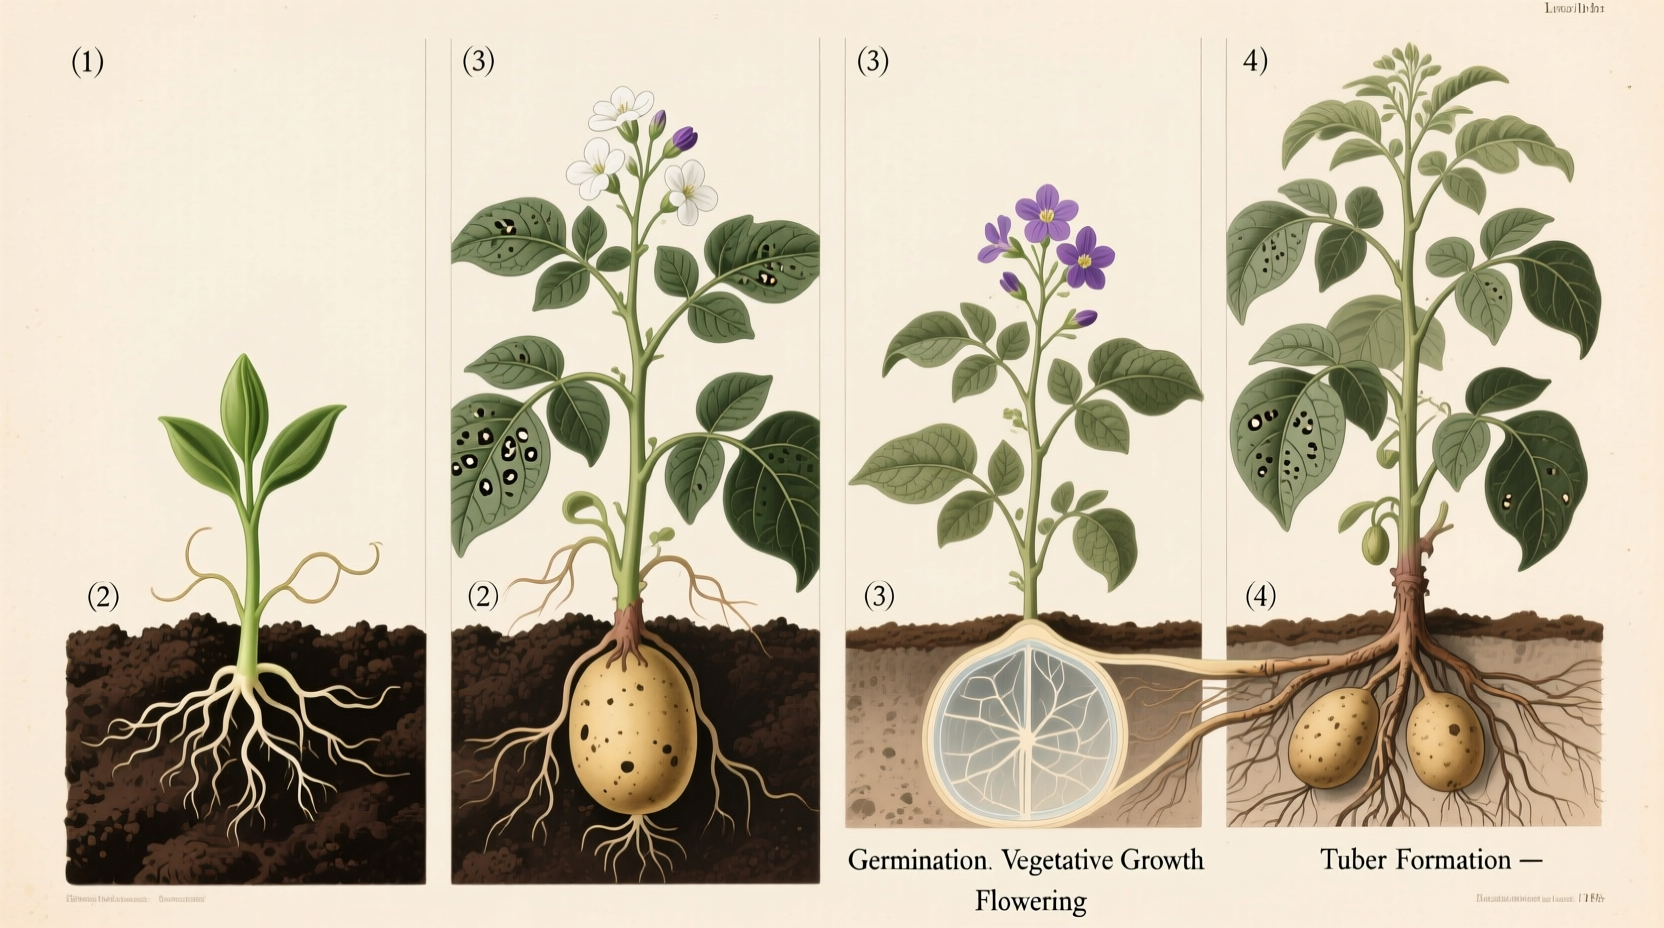
Unlike many vegetables that grow from seeds, potatoes develop from "seed potatoes"—small tubers or pieces of larger tubers that contain "eyes" (dormant buds). This vegetative propagation method ensures the new plants maintain the exact characteristics of the parent plant. The growth process unfolds in six distinct phases, each with specific requirements and visible indicators that help gardeners track progress.
Stage 1: Sprouting and Emergence (7-21 Days After Planting)
When you plant seed potatoes 4-6 inches deep in well-prepared soil, the dormant eyes begin to awaken. Cool soil temperatures (45-55°F) trigger sprout development, with roots growing downward while shoots push toward the surface. This critical germination phase requires consistent moisture but not waterlogged conditions.
During this underground development period, you won't see any visible growth above ground. Patience is key—rushing to dig and check progress can damage delicate emerging sprouts. The University of Minnesota Extension confirms that proper soil temperature monitoring during this stage significantly improves emergence rates and overall yield.
Stage 2: Vegetative Growth (21-45 Days)
As the first green shoots break through the soil surface, the plant enters its rapid growth phase. Stems multiply, leaves expand, and the root system establishes itself more deeply. This is when photosynthesis kicks into high gear, converting sunlight into energy that will eventually feed tuber development.
Proper hilling (mounding soil around the base of growing stems) becomes crucial during this stage. According to Cornell University's College of Agriculture and Life Sciences, hilling protects developing tubers from sun exposure (which causes greening and solanine production) while encouraging additional stolon formation. Most gardeners hill when plants reach 6-8 inches tall, repeating the process as they continue growing.
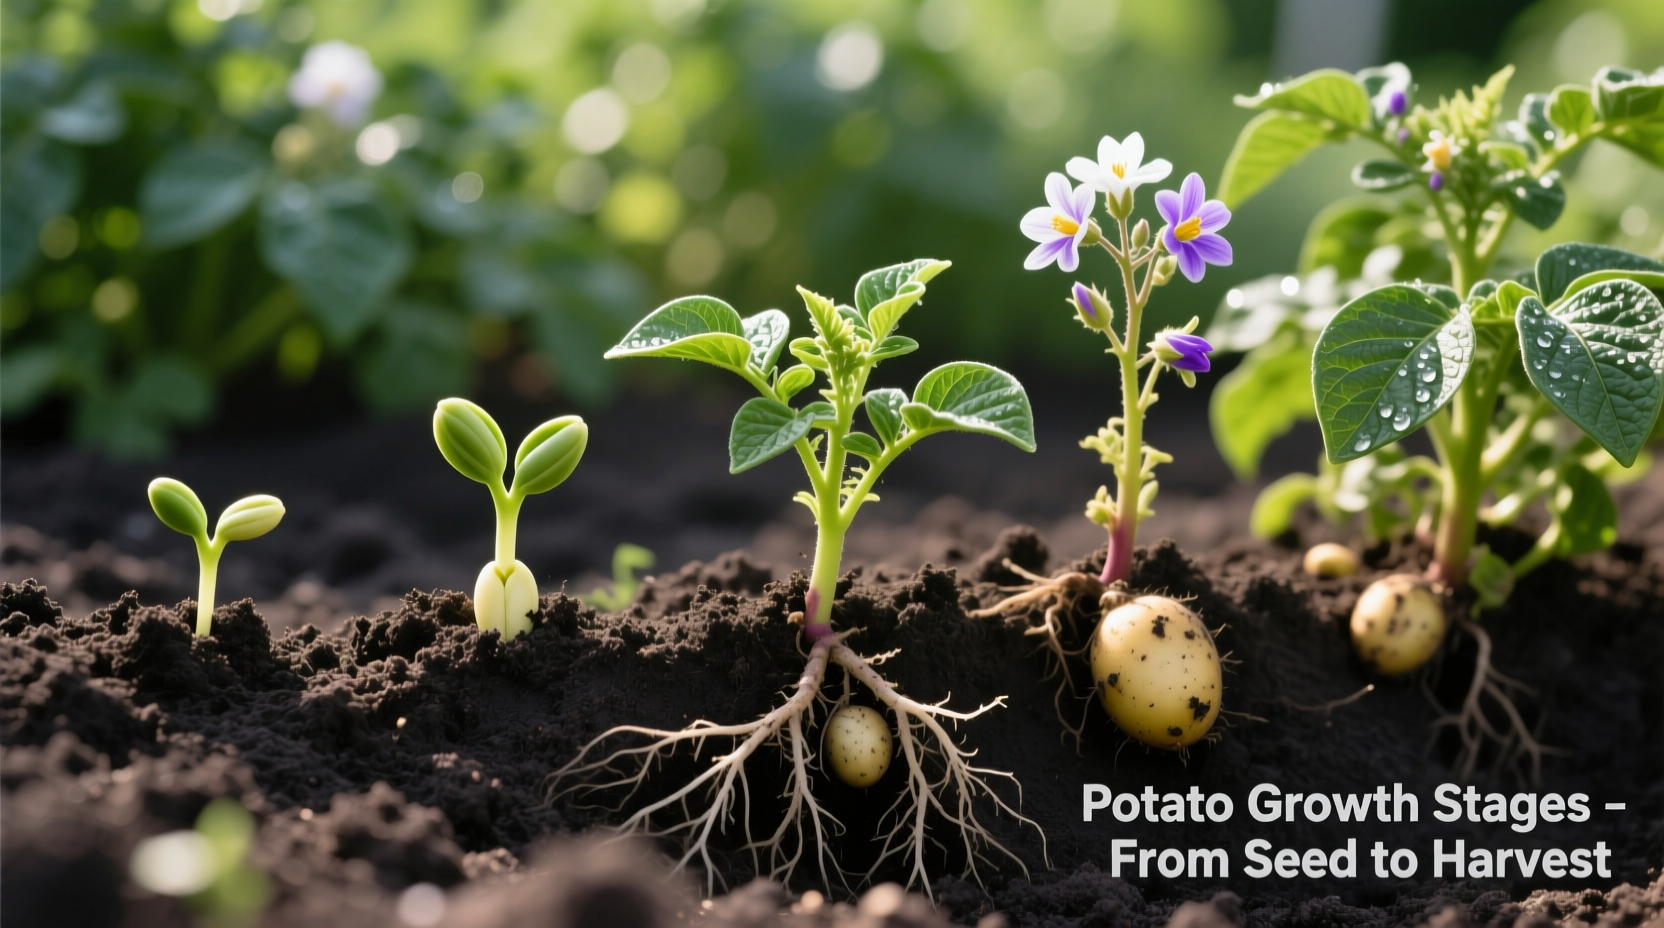
Stage 3: Tuber Initiation (40-60 Days)
This biological transition marks the shift from leafy growth to tuber production. Underground, specialized stems called stolons thicken at their tips to form new tubers. This critical phase depends heavily on environmental conditions:
| Factor | Optimal Condition | Suboptimal Condition |
|---|---|---|
| Soil Temperature | 60-65°F (15-18°C) | Above 80°F (27°C) reduces tuber formation |
| Day Length | 12-14 hours of daylight | Very long days delay tuberization in some varieties |
| Nitrogen Levels | Moderate after initial growth | Excess promotes foliage over tubers |
During tuber initiation, maintaining consistent soil moisture becomes critical. Fluctuations between dry and wet conditions can cause tuber deformities or cracking. The USDA Agricultural Research Service notes that this stage represents the plant's most sensitive period for environmental stressors.
Stage 4: Tuber Bulking (60-90 Days)
This is the potato plant's most productive phase, where tubers rapidly increase in size through starch accumulation. The plant channels most of its energy into underground development while maintaining sufficient foliage for photosynthesis. Water requirements peak during this stage—potatoes need about 1-2 inches of water per week, either from rainfall or irrigation.
Commercial growers often monitor soil moisture with tensiometers to maintain optimal conditions. Home gardeners can use the simple "screwdriver test"—if a screwdriver easily penetrates the soil to 6 inches, moisture levels are adequate. The Cooperative Extension System emphasizes that inconsistent watering during bulking produces misshapen tubers and reduces overall yield.
Stage 5: Maturation (90-120 Days)
As daylight decreases and temperatures cool in late summer, the plant naturally begins preparing for dormancy. Foliage turns yellow, then brown, and eventually dies back completely. This senescence process signals that tubers have stopped growing and are beginning to mature their skins.
For storage potatoes, many growers practice "killing" the foliage 2-3 weeks before harvest. This technique, documented by the University of Idaho Extension, allows tuber skins to thicken properly, reducing damage during harvest and improving storage life. New potatoes can be harvested earlier, when tubers reach marble to egg size, but won't store well.
Stage 6: Dormancy and Post-Harvest Handling
After harvest, potatoes enter a natural dormancy period that prevents sprouting. This physiological state varies by variety—from 30 days for new potatoes to 6-8 months for russets. Proper curing (holding harvested potatoes at 50-60°F with high humidity for 10-14 days) heals minor wounds and thickens skins, significantly extending storage life.
Understanding this dormancy cycle explains why grocery store potatoes sometimes sprout—they've emerged from dormancy and are responding to favorable conditions. The Agricultural Marketing Resource Center recommends storing potatoes at 38-40°F with 90-95% humidity for maximum shelf life.
Environmental Factors That Impact Potato Growth
While the growth stages remain consistent, several environmental factors dramatically affect potato development:
Soil Requirements
Potatoes thrive in loose, well-drained soil with a slightly acidic pH (5.0-6.0). Heavy clay soils produce misshapen tubers, while sandy soils may require more frequent watering. Incorporating organic matter improves soil structure and provides essential nutrients. The optimal soil temperature for growth ranges between 60-70°F (15-21°C).
Water Management
Consistent moisture is more important than total quantity. Potatoes need approximately 1-2 inches of water per week, distributed evenly. Critical watering periods include:
- Tuber initiation (when tubers first form)
- Tuber bulking (when tubers rapidly increase in size)
- Avoid overwatering as harvest approaches to prevent rot
Climate Considerations
Potatoes grow best in cool climates with moderate temperatures. Extreme heat (above 85°F/29°C) during tuber initiation significantly reduces yield. In warmer regions, planting early spring or late summer crops helps avoid peak summer temperatures. Some varieties like 'Kennebec' and 'Yukon Gold' perform better in warmer conditions than traditional russets.
Common Potato Growing Challenges and Solutions
Even with proper care, potato growers may encounter these common issues:
Pest Management
Colorado potato beetles, aphids, and flea beetles can damage foliage. The most effective prevention combines crop rotation (avoid planting potatoes in the same spot for 3-4 years), companion planting with marigolds or nasturtiums, and regular monitoring. For severe infestations, the Extension Toxicology Network recommends insecticidal soaps or neem oil as lower-impact options.
Disease Prevention
Early blight, late blight, and scab are common potato diseases. Prevention strategies include:
- Using certified disease-free seed potatoes
- Maintaining proper plant spacing for air circulation
- Avoiding overhead watering to keep foliage dry
- Removing and destroying infected plants immediately
Growth Abnormalities
Common tuber issues and their causes:
- Cracked tubers: Inconsistent watering
- Green spots: Sun exposure during growth
- Hollow heart: Rapid growth followed by stress
- Knobby growth: Temperature fluctuations
Practical Tips for Successful Potato Growing
Whether you're planting in traditional garden beds, containers, or straw bales, these proven techniques will improve your harvest:
Planting Methods That Work
Hilled rows: Plant seed pieces 4-6 inches deep, then mound soil around stems as they grow. This traditional method provides excellent drainage and easy harvest.
Straw mulch: Place seed potatoes on prepared soil and cover with 8-12 inches of straw. This method reduces weeding and produces clean, easy-to-harvest tubers.
Container growing: Use large pots (at least 5 gallons) filled with potting mix. Add more soil as plants grow to encourage additional tuber formation.
Harvest Timing Guide
Knowing when to harvest makes all the difference:
- New potatoes: Harvest 2-3 weeks after plants flower; tubers will be small with thin skins
- Main crop: Wait until foliage dies back completely; cure for 10-14 days before storage
- Storage varieties: Harvest when skins resist rubbing off with your thumb
Succession Planting for Continuous Harvest
Plant early, mid-season, and late varieties two weeks apart for a continuous harvest throughout the growing season. Early varieties mature in 70-90 days, while late varieties take 110-130 days but store better.


 浙公网安备
33010002000092号
浙公网安备
33010002000092号 浙B2-20120091-4