
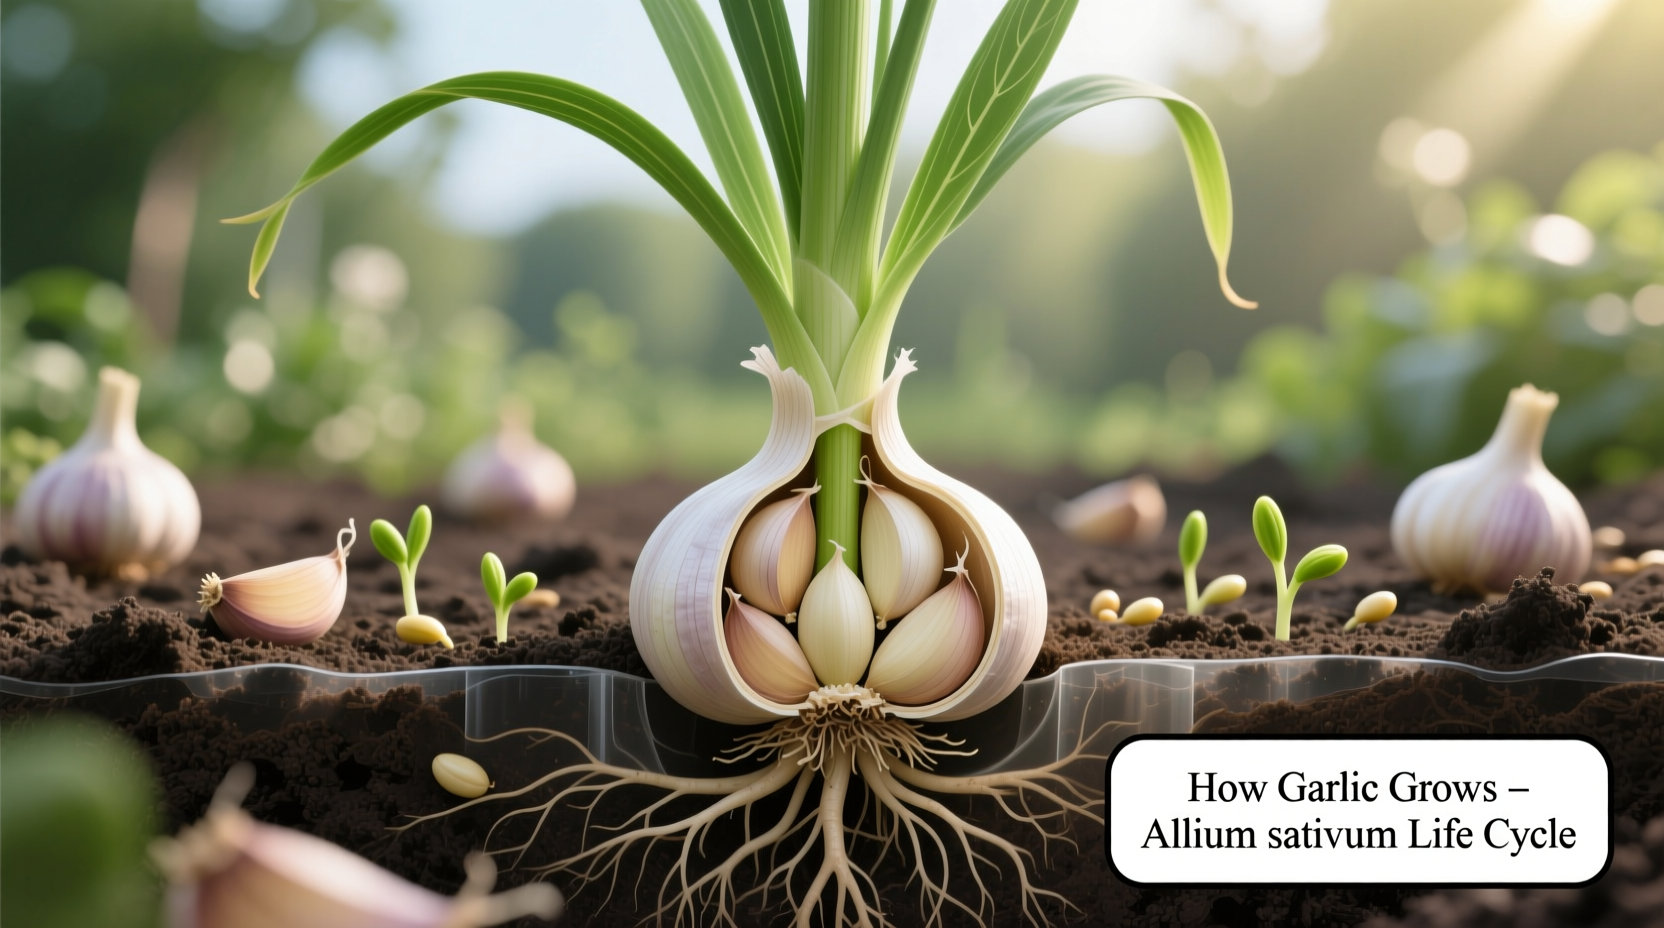
Understanding how garlic develops from a single clove to a mature bulb isn't just gardening knowledge—it's the key to harvesting plump, flavorful bulbs perfect for your kitchen. Whether you're a first-time gardener or looking to improve your harvest, this guide walks you through each critical phase of garlic cultivation with actionable steps you can implement immediately.
The Complete Garlic Growth Timeline
Garlic follows a precise seasonal rhythm that determines its success. Unlike many garden plants, garlic requires this specific timeline to develop properly:
| Season | Key Growth Stage | Critical Actions |
|---|---|---|
| Fall (Sept-Nov) | Root development | Plant cloves 2-4" deep, 6" apart; mulch after first frost |
| Winter | Dormancy & vernalization | Maintain 4-6" mulch layer; monitor for rodent activity |
| Early Spring | Leaf emergence | Remove mulch when shoots appear; begin regular watering |
| Late Spring | Bulb formation | Stop watering 2-3 weeks before harvest; remove scapes |
| Mid-Summer | Maturity & harvest | Harvest when 1/3 leaves yellow; cure properly |
This timeline isn't arbitrary—garlic requires a cold period (vernalization) of at least 40 days below 40°F (4°C) to trigger proper bulb formation, according to research from the Oregon State University Extension Service. Skipping this critical phase results in small, underdeveloped bulbs regardless of other care factors.
Planting Fundamentals: Setting Up for Success
The foundation of successful garlic growth begins with proper planting technique. Many gardeners make critical mistakes at this stage that compromise their entire harvest.
Choosing the right cloves: Select the largest, healthiest cloves from your bulb—these produce the biggest harvest. Avoid using grocery store garlic, which may be treated to prevent sprouting. Instead, source seed garlic from reputable growers like those listed in the USDA National Agricultural Library database.
Planting depth matters: Plant cloves pointy-end up at a depth of 2-4 inches, depending on your soil type. In sandy soils, plant deeper (4 inches); in clay soils, plant shallower (2 inches). Space cloves 6 inches apart in rows 12-18 inches apart to allow proper bulb development.
Environmental Requirements: Creating the Ideal Conditions
Garlic thrives under specific conditions that many gardeners overlook. Understanding these limitations prevents wasted effort:
Soil requirements: Garlic demands well-draining soil with pH between 6.0-7.5. Heavy clay soils cause cloves to rot, while pure sand drains too quickly. Amend your soil with 3-4 inches of compost before planting—this improves drainage in clay soils and water retention in sandy soils.
Critical limitation: Garlic cannot grow properly in waterlogged conditions. According to Cornell University's Department of Horticulture, even 48 hours of standing water during bulb formation can ruin your entire crop. Raised beds (6-8 inches high) solve this problem in problematic soils.
Sun exposure: Plant garlic in full sun locations receiving at least 6-8 hours of direct sunlight daily. While garlic tolerates some partial shade, reduced sunlight directly correlates with smaller bulb size.
Seasonal Care: What to Do at Each Growth Stage
Successful garlic cultivation requires different care at each growth phase. Follow this practical guide to maximize your harvest:
Fall Planting Through Winter
After planting in fall, water thoroughly once, then apply 4-6 inches of straw or leaf mulch after the ground cools (typically after first hard frost). This mulch layer serves three critical functions:
- Protects cloves from extreme temperature fluctuations
- Prevents heaving from freeze-thaw cycles
- Suppresses early weed growth
Spring Growth Phase
As temperatures warm in early spring:
- Gently remove mulch when green shoots reach 2-3 inches tall
- Begin regular watering (1-2 inches per week)
- Apply nitrogen-rich fertilizer when leaves reach 6 inches tall
- Remove flower stalks (scapes) from hardneck varieties when they curl
Removing scapes redirects energy to bulb development, increasing bulb size by 20-30% according to University of Vermont Extension research.
Pre-Harvest Preparation
Three weeks before expected harvest:
- Gradually reduce watering
- Stop watering completely when lower leaves begin yellowing
- Check bulb development by gently brushing soil from top
Harvesting and Curing: The Final Critical Steps
Many gardeners ruin their harvest at the final stage. Harvest when 1/3 of leaves have turned brown but 2/3 remain green—this timing ensures proper bulb development while allowing enough leaf material for curing.
To harvest:
- Carefully loosen soil around plants with a garden fork
- Lift bulbs gently, avoiding bruising
- Brush off excess soil (don't wash)
- Cure in a warm, dry, shaded location with good air circulation for 3-4 weeks
Properly cured garlic stores for 6-8 months. Softneck varieties typically store longer than hardneck varieties.
Troubleshooting Common Garlic Growing Problems
Even with proper care, challenges arise. Here's how to address the most frequent issues:
- Yellowing leaves: Could indicate overwatering, nutrient deficiency, or pests. Check soil moisture first—garlic prefers slightly moist but never soggy conditions.
- Small bulbs: Usually caused by planting too late, insufficient cold period, or overcrowding. Ensure cloves experience 40+ days below 40°F (4°C).
- Mold or rot: Results from poor drainage or excessive moisture. Improve soil structure with compost and consider raised beds.
- Poor sprouting: May indicate damaged cloves or planting too shallow. Always plant cloves with pointed end up at proper depth.
Maximizing Your Garlic Harvest: Pro Tips
Seasoned garlic growers employ these techniques to boost yield and quality:
- Rotate planting locations annually to prevent disease buildup
- Apply 2-inch compost layer when green shoots emerge in spring
- Use drip irrigation instead of overhead watering to keep foliage dry
- Test soil pH annually and amend as needed with lime (to raise pH) or sulfur (to lower pH)
- Save your largest bulbs for next season's seed stock
Remember that garlic growing success varies by region. What works in USDA Zone 5 may need adjustment in Zone 8. Consult your local cooperative extension service for region-specific recommendations—they maintain databases of varieties proven to thrive in your specific climate conditions.


 浙公网安备
33010002000092号
浙公网安备
33010002000092号 浙B2-20120091-4