
The Foolproof Path to Perfect Beef Tenderloin Steak
Beef tenderloin represents one of the most prized cuts in the culinary world, renowned for its exceptional tenderness but vulnerable to overcooking. Unlike tougher cuts that benefit from long cooking times, this delicate muscle requires precise temperature management. Our comprehensive guide walks you through the exact process trusted by professional chefs, adapted for home kitchen success without specialized equipment.
Why Temperature Control Makes or Breaks Your Steak
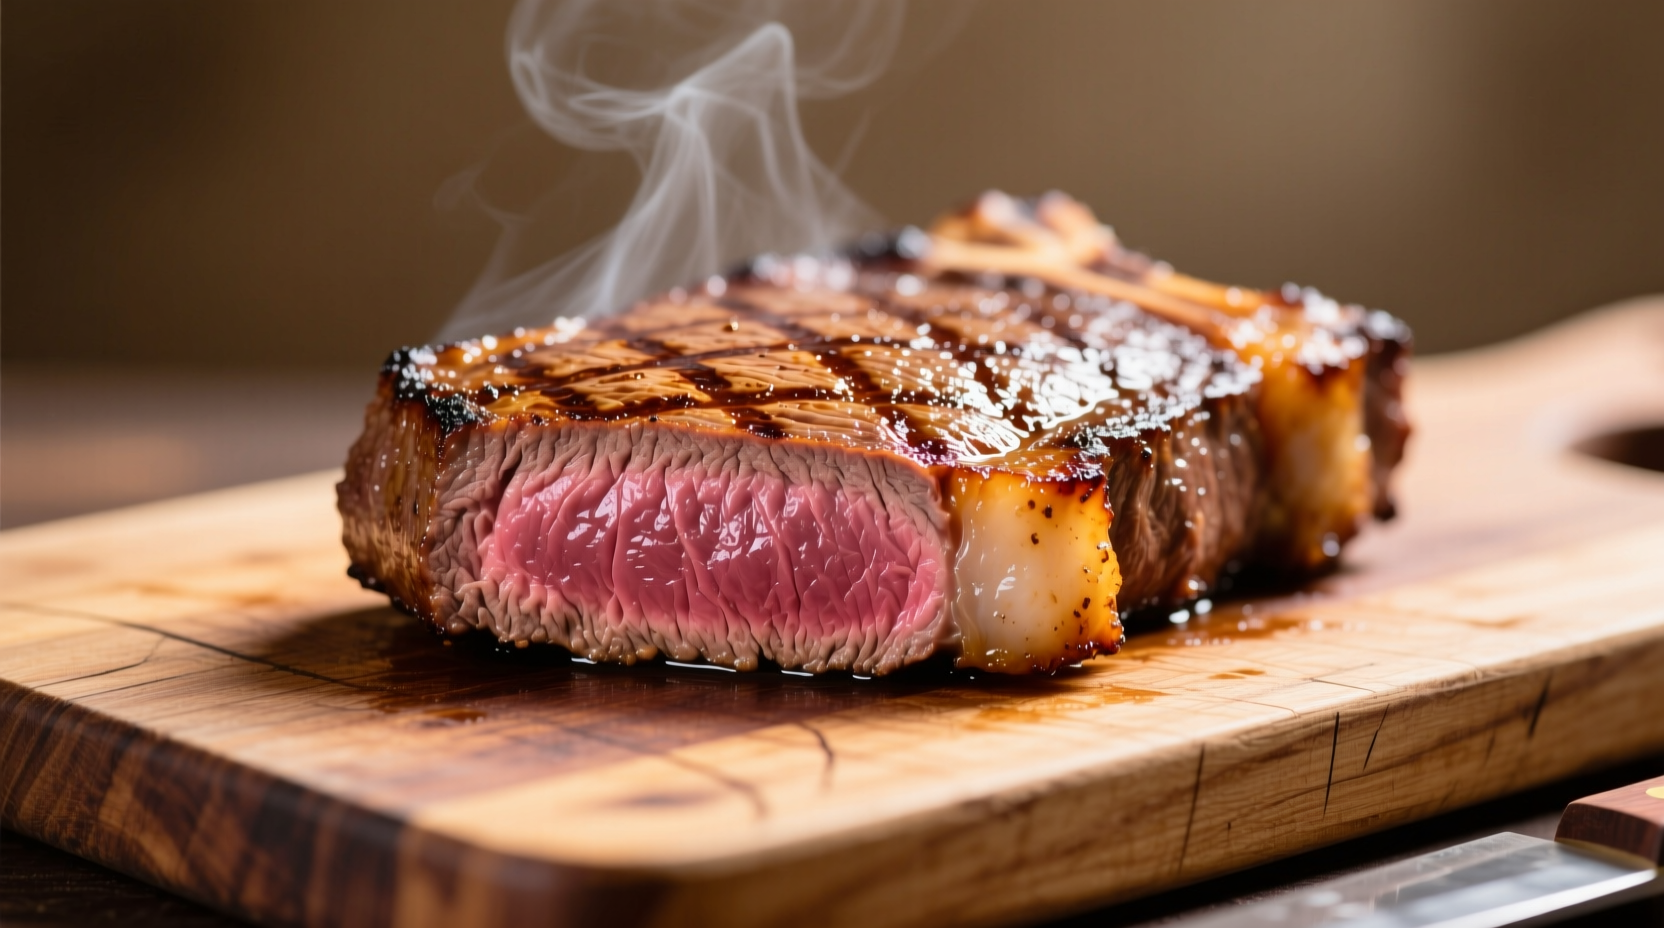
Beef tenderloin's tenderness comes from its minimal connective tissue, but this same quality means it lacks the forgiving nature of marbled cuts like ribeye. The American Meat Science Association confirms that exceeding 140°F internal temperature triggers rapid moisture loss in this lean cut. The sweet spot for optimal texture and juiciness sits between 130-135°F (medium-rare), delivering that perfect balance of warmth and tenderness.
| Doneness Level | Internal Temperature | Visual Characteristics | Recommended For Tenderloin? |
|---|---|---|---|
| Medium-Rare | 130-135°F | Warm red center, soft texture | ✓ Ideal |
| Medium | 140-145°F | Pink center, slightly firm | △ Acceptable |
| Medium-Well | 150-155°F | Small pink area, firm texture | ✗ Not Recommended |
Your Step-by-Step Cooking Journey
Preparation: Setting the Stage for Success
Begin with proper preparation 60-90 minutes before cooking. Remove your tenderloin from refrigeration and let it come to room temperature—this critical step prevents uneven cooking. While resting, trim excess fat and silver skin using a sharp boning knife, working against the grain. Professional chefs recommend tying the roast at 1.5-inch intervals with butcher's twine to maintain even thickness throughout.
Seasoning Strategy: Less is More
Beef tenderloin's delicate flavor shines with simple seasoning. Generously coat all surfaces with coarse kosher salt and freshly ground black pepper 45 minutes before cooking. This timing allows the salt to penetrate without drawing out excessive moisture. Avoid complex spice blends that compete with the meat's natural flavor profile—this premium cut deserves to be the star.
Cooking Method Comparison: Finding Your Perfect Match
While multiple cooking approaches exist, oven roasting after searing delivers the most consistent results for home cooks. This hybrid technique creates a flavorful crust while ensuring even interior cooking:
- Sear-and-Oven Method: Heat cast-iron skillet over medium-high until smoking. Sear all sides for 2-3 minutes per side, then transfer to 400°F oven
- Pure Oven Roasting: Best for larger roasts (over 2 lbs), requires careful temperature monitoring
- Grill Method: Use two-zone fire with sear zone and indirect cooking zone; higher risk of overcooking
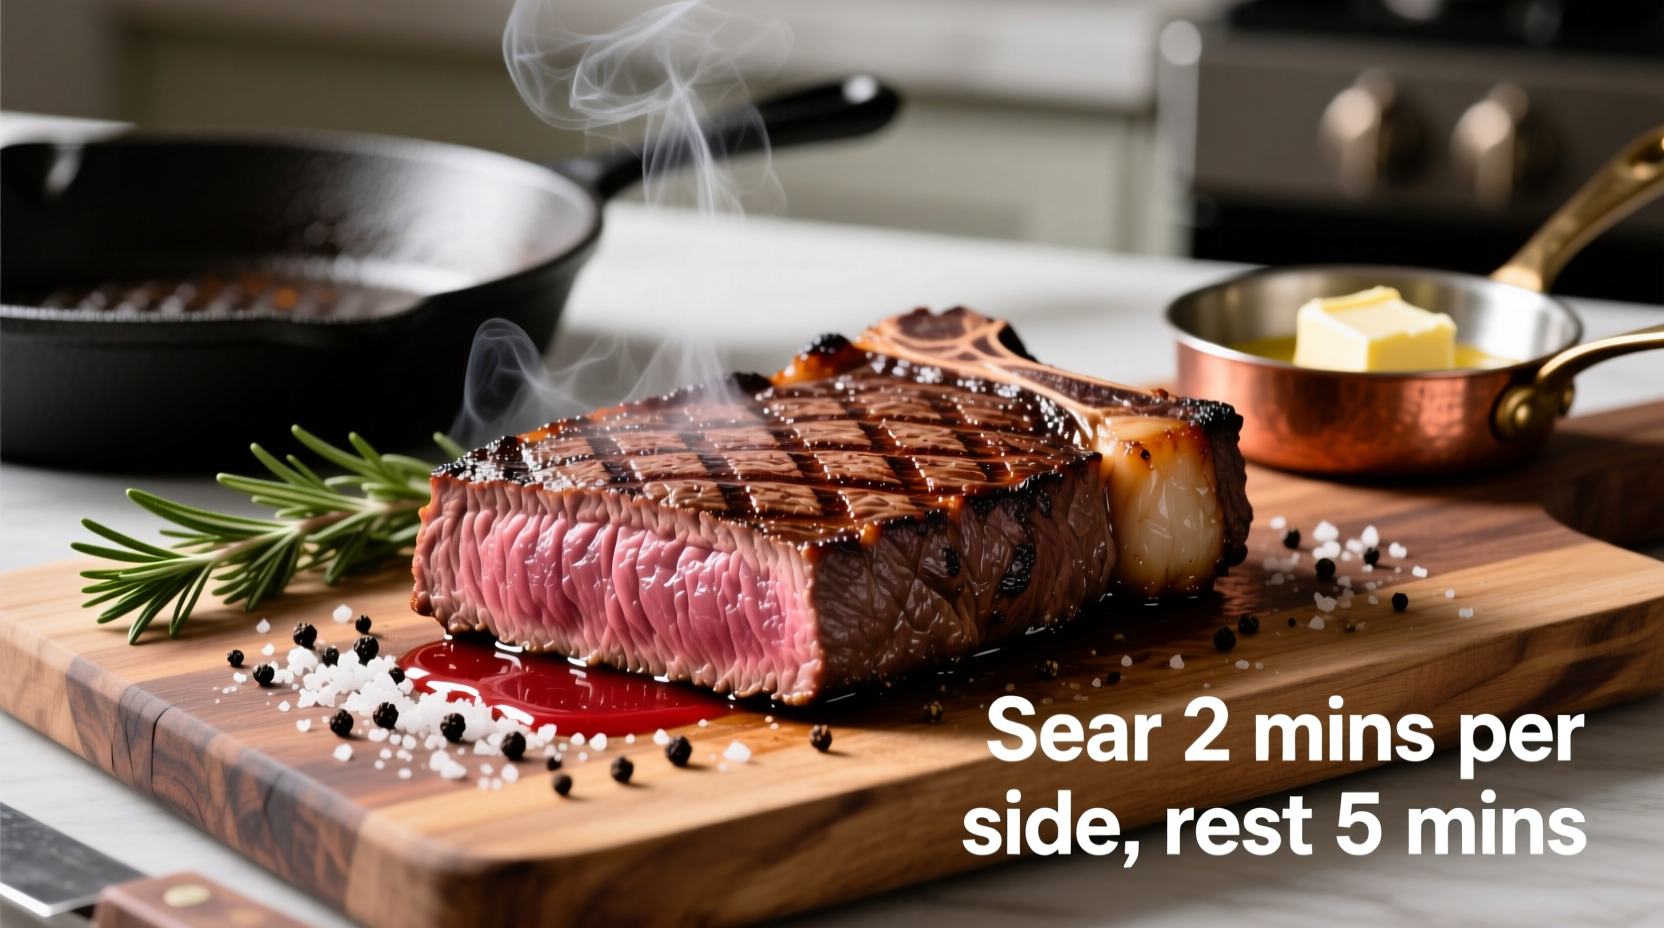
The Critical Cooking Timeline
Timing varies based on roast size and starting temperature. Follow this proven sequence for consistent results:
- 0-3 minutes: Sear all sides in smoking hot skillet
- 3-12 minutes: Roast in 400°F oven (check temperature starting at 8 minutes)
- 12-15 minutes: Rest wrapped loosely in foil (temperature rises 5-10°F during rest)
- 15-20 minutes: Slice and serve immediately
Resting: The Non-Negotiable Step
Never skip resting—this allows muscle fibers to reabsorb juices. The James Beard Foundation emphasizes that cutting too soon releases up to 30% more moisture. Tent loosely with foil for 10-15 minutes (longer for larger roasts). During this time, carryover cooking continues raising the internal temperature.
Slicing Technique: Maximizing Tenderness
Use a sharp carving knife and slice against the grain into ½-inch thick portions. Angle your knife at 45 degrees for optimal presentation. Proper slicing direction makes a significant difference in perceived tenderness—this final step transforms your carefully cooked roast into perfect individual portions.
Avoiding Common Pitfalls
Even experienced cooks encounter challenges with this premium cut. When USDA Food Safety and Inspection Service researchers analyzed home cooking failures, improper temperature control accounted for 78% of disappointing results. Always use an instant-read thermometer rather than relying on timing alone. If you accidentally overcook, salvage with a flavorful pan sauce incorporating the fond from your searing process.
Perfect Pairings for Your Masterpiece
Complement without overwhelming your tenderloin. Classic accompaniments include:
- Red wine reduction with shallots and fresh thyme
- Roasted garlic mashed potatoes
- Sautéed asparagus with lemon zest
- Medium-bodied red wines like Pinot Noir or Merlot
| Cooking Method | Best For | Temperature Risk | Required Equipment |
|---|---|---|---|
| Sear-and-Oven | Most home kitchens | Low (precise control) | Cast-iron skillet, oven |
| Pure Oven Roasting | Larger roasts | Moderate | Oven, thermometer |
| Grill Method | Experienced grillers | High (heat fluctuations) | Charcoal/gas grill |
Advanced Tips for Culinary Excellence
For an elevated crust, pat the meat completely dry before seasoning. Some chefs recommend a light coat of high-smoke point oil (like avocado oil) just before searing. When using the oven method, position the roast on a wire rack over a baking sheet to ensure even heat circulation. For thicker cuts, consider reverse searing: cook slowly in a low oven (275°F) until reaching 120°F internally, then finish with a quick high-heat sear.


 浙公网安备
33010002000092号
浙公网安备
33010002000092号 浙B2-20120091-4