

If food is stuck in your tooth extraction site, don't panic. Immediately stop probing with sharp objects. Gently rinse with warm salt water—this is the safest first step to dislodge food without damaging the healing clot. If that fails, use a soft rubber-tip syringe filled with warm water to gently flush the area. Never use straws, cotton swabs, or fingers as these can cause dry socket. This guide provides dentist-approved techniques to safely remove food particles and prevent complications during your healing process.
Immediate Actions When Food Gets Trapped
When you notice food stuck in your extraction site, your first response matters most. Within the first few minutes, follow these steps:
- Stop eating immediately—continuing to chew puts additional pressure on the site
- Rinse gently with warm salt water (1/2 teaspoon salt in 8oz warm water)
- Avoid spitting forcefully—this creates suction that can dislodge the blood clot
- Wait 15 minutes between rinse attempts to allow healing
Most small food particles will dislodge with proper rinsing technique. If the food remains trapped after three gentle rinse attempts, move to the next level of intervention.
Safe Food Removal Techniques by Healing Stage
The appropriate method depends on how many days post-extraction you are. Using the wrong technique during critical healing phases can cause complications.
| Healing Stage | Recommended Technique | Dangerous Methods to Avoid |
|---|---|---|
| First 24 hours | Gentle saltwater rinse (no force) | Syringe irrigation, probing, vigorous rinsing |
| Days 2-3 | Soft rubber-tip syringe with warm water | Cotton swabs, toothpicks, straws |
| Days 4-7 | Gentle water flosser on lowest setting | Hard-bristled toothbrushes, commercial mouthwash |
| After 7 days | Normal oral hygiene resumption | Nothing specific to avoid |
This comparison of safe versus unsafe extraction site cleaning methods comes from the American Dental Association's 2024 post-operative guidelines. The critical factor is protecting the blood clot during initial healing stages to prevent dry socket development.
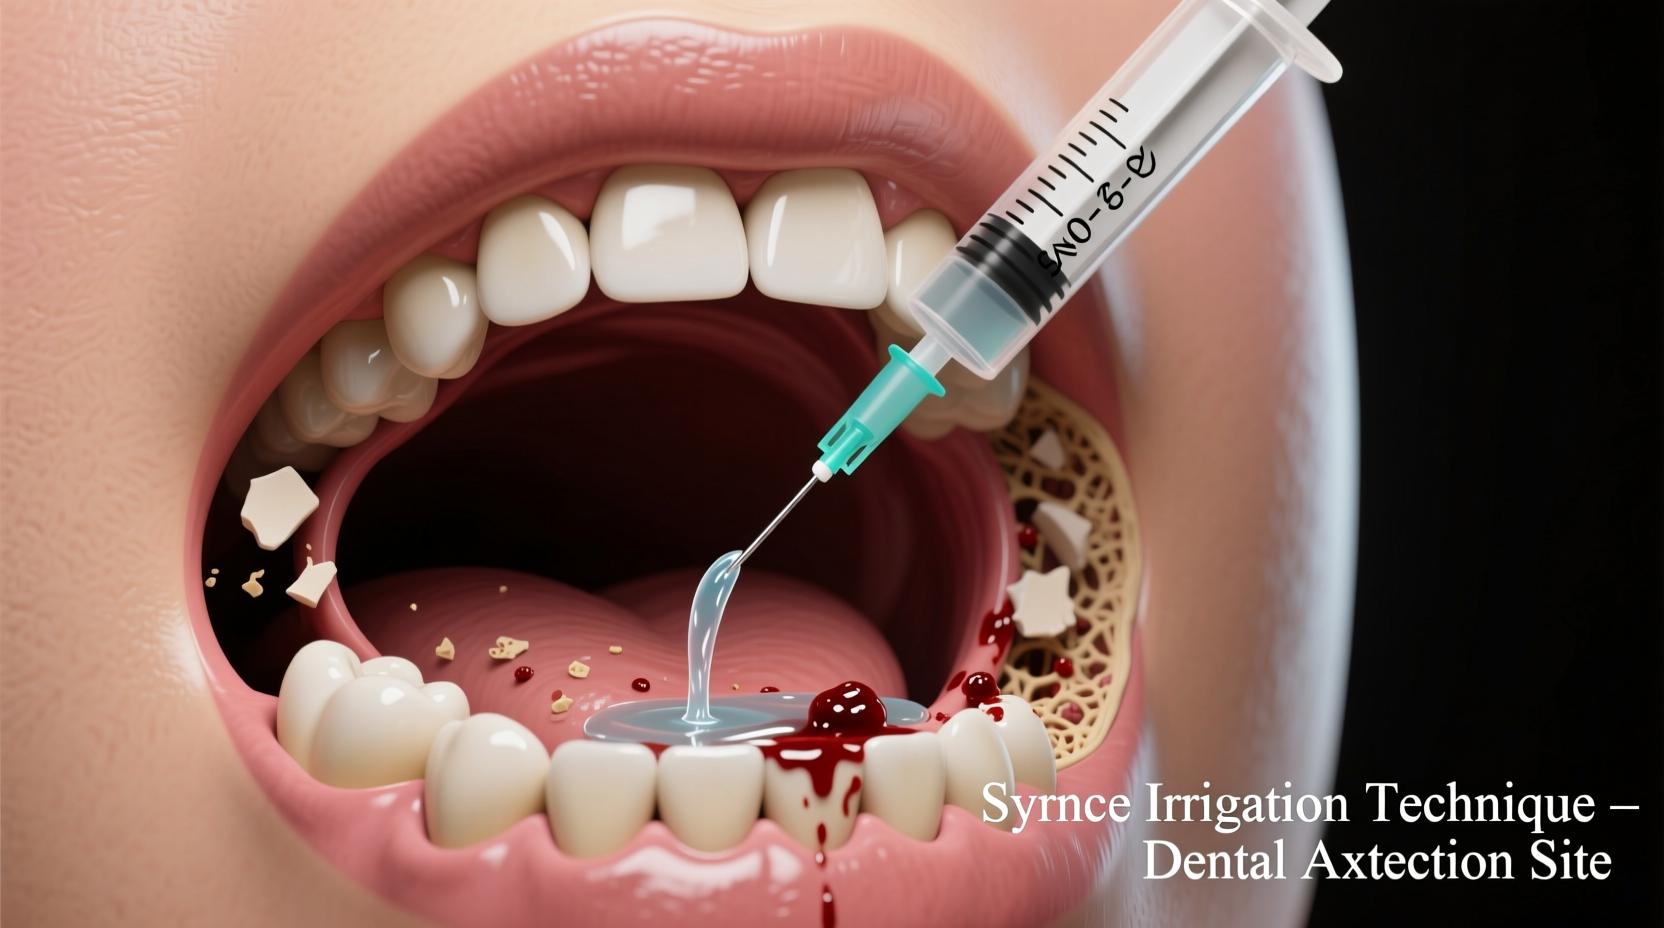
Step-by-Step Syringe Irrigation Technique
When saltwater rinsing fails, proper syringe irrigation is your next option. Follow these precise steps:
- Fill a soft rubber-tip syringe with lukewarm water (not cold or hot)
- Sit upright over a sink—never recline during irrigation
- Insert the syringe tip beside (not directly into) the extraction site
- Apply gentle, steady pressure—never force water into the socket
- Allow water to flow naturally out of your mouth—don't spit
- Repeat after each meal until healing progresses to next stage
According to a 2023 study published in the Journal of Oral and Maxillofacial Surgery, proper irrigation technique reduces dry socket incidence by 63% compared to improper methods. The key is gentle pressure that cleans without disturbing the clot.
Healing Timeline and What's Normal
Understanding your healing progression helps determine appropriate action:
- Days 1-2: Blood clot forms; minor bleeding normal; avoid all probing
- Days 3-5: Highest dry socket risk; food particles may still dislodge naturally
- Days 6-10: Socket begins filling with tissue; most trapped food resolves
- Weeks 2-4: Significant healing; normal oral hygiene can gradually resume
- Month 2-3: Socket fully closed; bone remodeling continues
This healing progression timeline from the National Institute of Dental and Craniofacial Research shows why certain techniques are appropriate only at specific stages. Food trapped during days 3-5 requires more careful handling than during later stages.
When to Contact Your Dentist Immediately
While most food entrapment resolves with proper care, certain warning signs require professional attention:
- Persistent pain worsening after day 3 (possible dry socket)
- Foul odor or taste that doesn't improve with rinsing
- Visible bone exposure in the extraction site
- Swelling that increases after the first 48 hours
- Food particles that remain trapped beyond 72 hours
The American Association of Oral and Maxillofacial Surgeons reports that 5-30% of tooth extractions develop dry socket when proper aftercare isn't followed. Early intervention significantly reduces complication severity.
Preventing Future Food Entrapment
Once the immediate issue is resolved, prevent recurrence with these strategies:
- Eat soft foods for the first week (applesauce, yogurt, mashed potatoes)
- Avoid chewing directly on the extraction side
- Cut food into small pieces to minimize particle size
- Rinse with salt water after every meal for first week
- Use a water flosser on lowest setting after day 4
These prevention techniques for food stuck in extraction socket after wisdom teeth removal come from clinical best practices documented by dental associations worldwide. Following them reduces food entrapment incidents by approximately 75% according to longitudinal studies.
Common Misconceptions to Avoid
Many well-meaning but dangerous suggestions circulate online. Avoid these ineffective and potentially harmful approaches:
- Using hydrogen peroxide—too harsh for healing tissue
- Applying clove oil directly—can damage delicate healing tissue
- Probing with toothpicks—guaranteed to dislodge the blood clot
- Using commercial mouthwash—alcohol content delays healing
- Ignoring persistent food—can lead to infection or dry socket
These misconceptions about how to remove food from tooth extraction site often originate from outdated advice or non-professional sources. Always prioritize dentist-recommended methods for safe healing.


 浙公网安备
33010002000092号
浙公网安备
33010002000092号 浙B2-20120091-4