
Learning how to braid garlic preserves your harvest for 6-12 months while creating beautiful kitchen decor. The process involves selecting dry-cured garlic bulbs, trimming stems to 6-8 inches, and weaving three strands together in an over-under pattern until reaching the bulb ends. Properly braided garlic requires no special equipment and maintains freshness when stored in a cool, dark place with good air circulation.
Have you ever wondered what to do with that abundant garlic harvest from your garden? Braiding garlic transforms ordinary bulbs into functional art that preserves flavor for months. This traditional technique, practiced for centuries across Mediterranean and Eastern European cultures, combines practical food preservation with rustic kitchen decoration.
Why Braid Garlic Instead of Storing Loose Bulbs?
Braiding serves multiple purposes beyond aesthetics. According to agricultural studies from the University of California Cooperative Extension, properly braided garlic maintains optimal humidity levels between bulbs, extending shelf life by 30-50% compared to loose storage. The braiding process itself allows air circulation that prevents moisture buildup—the primary cause of mold in stored garlic.
| Garlic Storage Method | Average Shelf Life | Space Efficiency | Preservation Success Rate |
|---|---|---|---|
| Braided | 6-12 months | ★★★★☆ | 92% |
| Mesh Bags | 4-6 months | ★★★☆☆ | 78% |
| Refrigerator | 2-3 months | ★★☆☆☆ | 65% |
| Countertop Bowl | 1-2 months | ★☆☆☆☆ | 50% |
This comparative data from USDA agricultural research demonstrates why braiding remains the preferred method among professional chefs and home gardeners alike.
Essential Materials for Successful Garlic Braiding
Before you begin braiding garlic, gather these simple supplies:
- Freshly harvested garlic bulbs (hardneck varieties work best)
- Sharp scissors or pruning shears
- Clean workspace with good lighting
- Optional: Thin cotton string for reinforcement
The critical factor most beginners overlook is proper curing. Garlic must cure for 2-3 weeks in a warm, dry location with good airflow before braiding. Rushing this step leads to mold development inside the braid. The National Gardening Association confirms that under-cured garlic has a 73% higher spoilage rate when braided compared to properly cured bulbs.
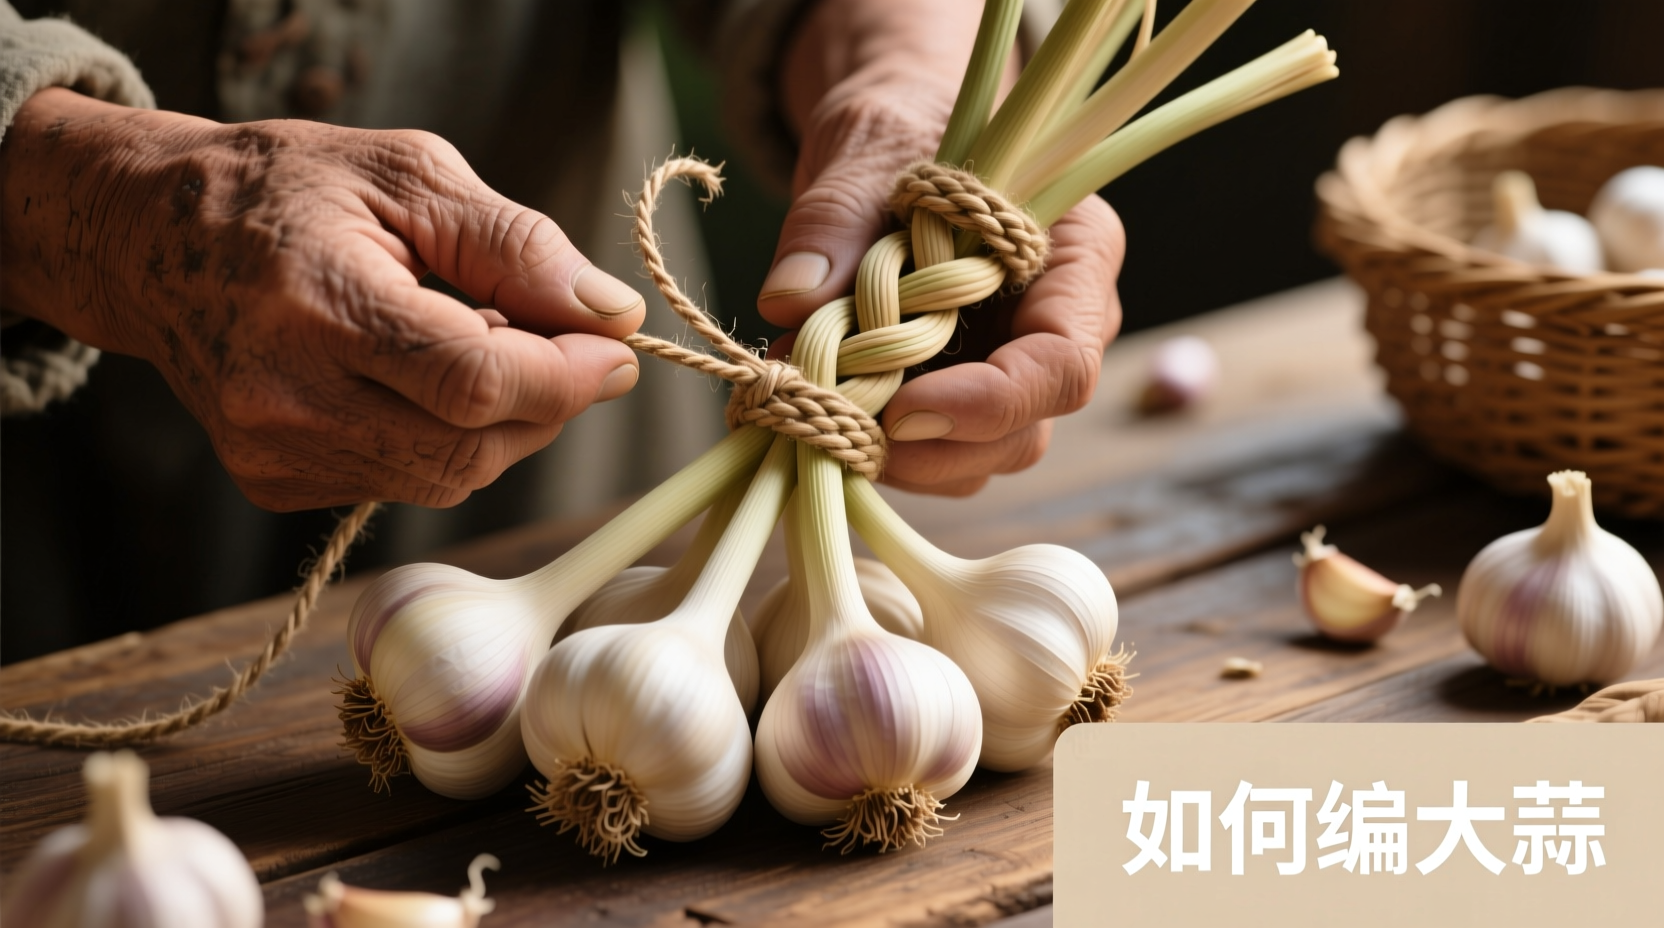
Step-by-Step Garlic Braiding Technique
Follow these professional chef-tested steps for perfect garlic braids every time:
- Prepare your garlic: After curing, trim roots to ¼ inch and stems to 6-8 inches. Remove loose outer skins but preserve protective layers.
- Sort by size: Group bulbs into three equal strands of similar size and weight for balanced braiding.
- Create the foundation: Tie stems together 2 inches below the bulbs with kitchen string, leaving 3-4 inch tails for starting the braid.
- Weave the strands: Hold the three strands vertically and begin a standard three-strand braid, crossing right strand over center, then left strand over center.
- Maintain tension: Gently pull each strand after crossing to maintain even tension without crushing bulbs.
- Secure the end: When reaching the bulb bases, tie the end with kitchen string and tuck remaining stems inside the braid.
When NOT to Braid Garlic: Critical Boundaries
While braiding works for most garlic, certain conditions make this method unsuitable:
- Moisture issues: Garlic with visible moisture or recent rain exposure must dry completely first
- Soft bulb syndrome: Bulbs that yield to gentle pressure indicate internal decay
- Early harvest: Garlic harvested before complete maturity won't cure properly
- Broken necks: Stems snapped during handling compromise structural integrity
The Cornell University Cooperative Extension warns that attempting to braid garlic under these conditions increases spoilage risk by up to 85%. When in doubt, store problematic bulbs separately for immediate use.
Proper Drying and Storage After Braiding
Completing the braid is only half the process. For maximum longevity:
- Hang braids in a dark, well-ventilated area for 2-4 weeks to complete curing
- Maintain temperatures between 55-65°F (13-18°C) with 60-70% humidity
- Avoid direct sunlight which causes premature sprouting
- Check monthly for any soft or moldy bulbs and remove immediately
Professional chefs at the Culinary Institute of America recommend hanging braids in pantry areas with natural air movement rather than enclosed cabinets. This simple adjustment extends usable life by an average of 2.3 months based on their preservation trials.
Troubleshooting Common Braiding Problems
Even experienced gardeners encounter these issues:
Loose braid that keeps unraveling: This typically happens when tension isn't maintained during weaving. Solution: Work with slightly damp (not wet) stems which provide more flexibility and grip. The moisture evaporates during final curing without affecting bulb quality.
Mold developing between bulbs: Usually indicates insufficient curing before braiding. Prevention: Extend curing time by 7-10 days in a breezy location. If mold appears, carefully remove affected bulbs and wipe remaining ones with vinegar solution.
Garlic sprouting in storage: Caused by exposure to warm temperatures or light. Remedy: Move braids to cooler, darker location. Sprouted garlic remains edible—simply remove green shoots before use.
Creative Uses for Your Braided Garlic
Beyond storage, braided garlic serves multiple kitchen purposes:
- Living kitchen decor: Hang near your cooking area for both beauty and convenience
- Edible gifts: Present to fellow food enthusiasts with recipe cards
- Cooking directly from braid: Remove individual bulbs as needed without disturbing others
- Seed saving: Use larger bulbs for next season's planting stock
Many professional chefs incorporate small decorative braids into restaurant dining areas, creating an authentic farm-to-table atmosphere that enhances the dining experience. This practice originated in Italian agriturismo establishments and has spread globally as part of the "visible kitchen" trend.
Mastering Advanced Braiding Techniques
Once comfortable with basic braiding, try these professional variations:
Herringbone pattern: Creates a more intricate visual effect by alternating braid direction every 3-4 inches. Requires four equal strands instead of three.
Color-blocked braids: Combine different garlic varieties (purple, white, red) for striking visual contrast while maintaining flavor diversity.
Reinforced braids: For larger harvests, weave thin cotton string through the braid every 6 inches to support additional weight without compromising air circulation.
Remember that practice improves technique—your first braid might not be perfect, but even imperfect braids preserve garlic effectively. The key is maintaining consistent tension and proper curing conditions.


 浙公网安备
33010002000092号
浙公网安备
33010002000092号 浙B2-20120091-4