
Knowing exactly when your salmon is cooked properly transforms an ordinary meal into a culinary success. As someone who's cooked thousands of salmon fillets across professional kitchens and home stoves, I've mastered the precise indicators that separate perfectly cooked salmon from disappointing results. Forget guesswork—these five reliable methods will ensure restaurant-quality results every time you cook salmon, whether you're pan-searing, baking, or grilling.
Why Perfect Salmon Doneness Matters
Getting salmon cooked just right isn't just about taste—it's crucial for both food safety and texture. Undercooked salmon risks foodborne illness from parasites like Anisakis, while overcooked salmon loses its delicate texture and healthy fats. The sweet spot delivers maximum flavor, nutrition, and safety.
The Temperature Method: Most Reliable Indicator
For absolute precision, a food thermometer provides the most reliable method to determine salmon doneness. Insert an instant-read thermometer into the thickest part of the fillet:
- 120-125°F (49-52°C): Rare – Translucent center, very soft texture
- 130-135°F (54-57°C): Medium-rare – Slightly translucent center, preferred by chefs
- 140-145°F (60-63°C): Medium – Opaque throughout, flakes easily – USDA recommended safe temperature
- 150°F+ (66°C+): Well-done – Dry, chalky texture, significant moisture loss
According to the FDA Food Code, fish should reach 145°F for food safety, though many chefs pull salmon at 135°F and let carryover cooking finish the process.
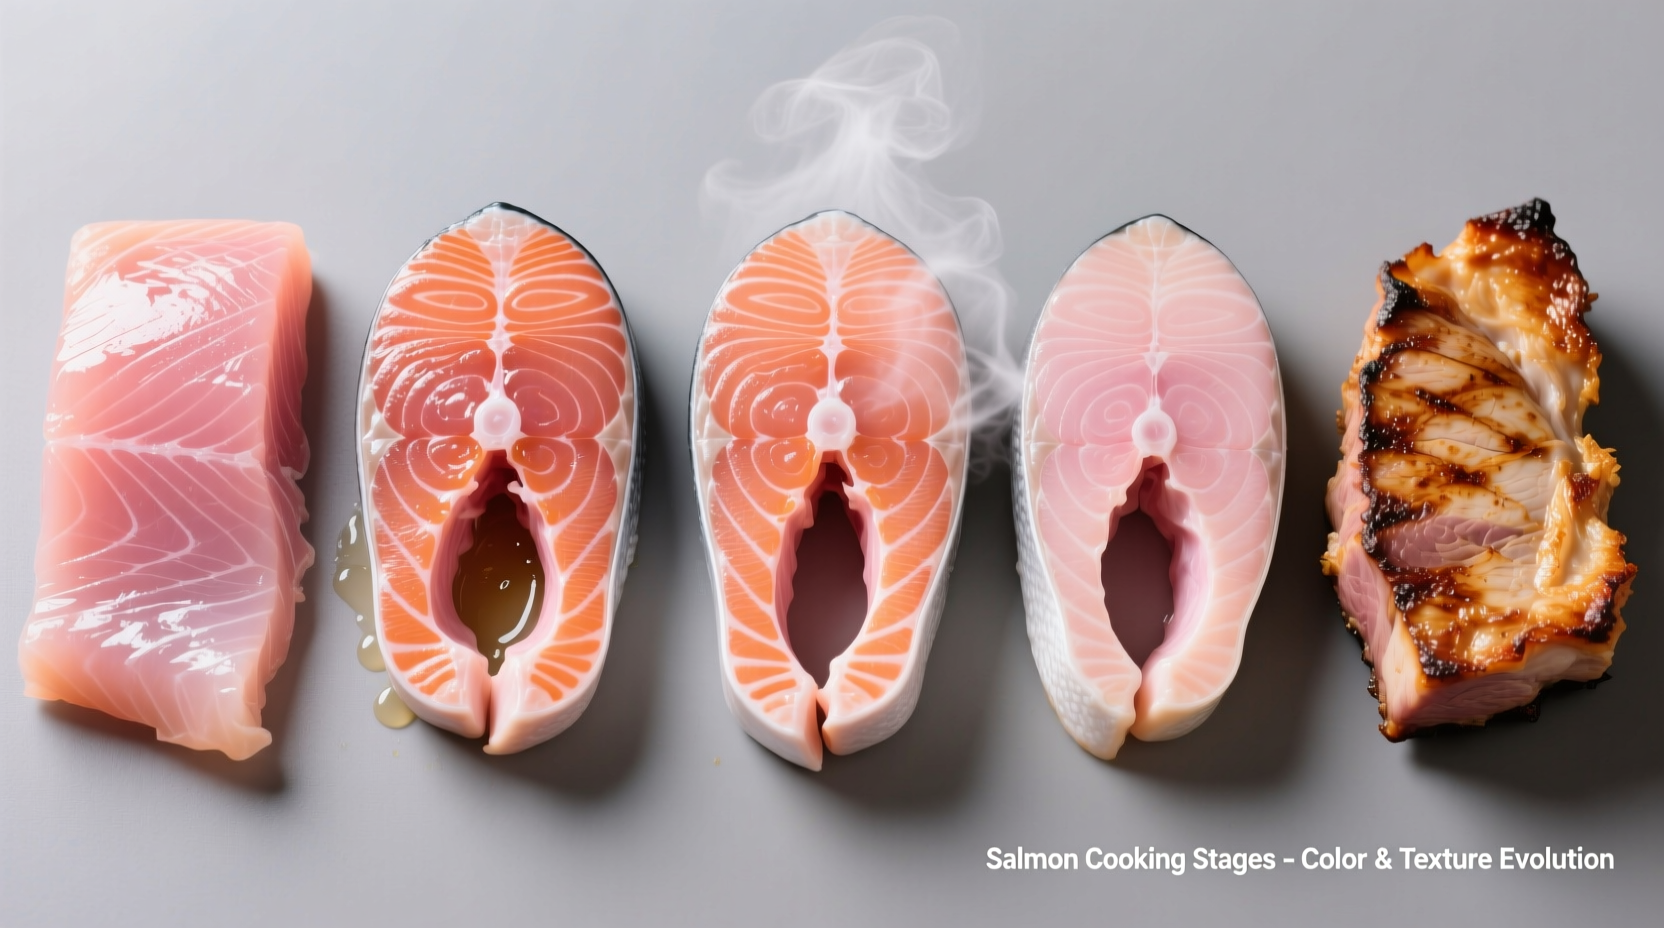
Visual Indicators: Color Transformation
Watch for this color progression as salmon cooks:
- Raw: Deep translucent red/orange, almost jelly-like appearance
- Beginning to cook: Outer edges turn opaque pink while center remains translucent
- Nearly done: Center shows slight translucency but is mostly opaque
- Perfectly cooked: Uniform opaque pink throughout with no translucency
- Overcooked: Pale, almost white color with visible moisture loss
The transformation from translucent to opaque happens as the fish's proteins denature and coagulate during cooking. This visual cue works for all cooking methods but requires practice to recognize precisely.
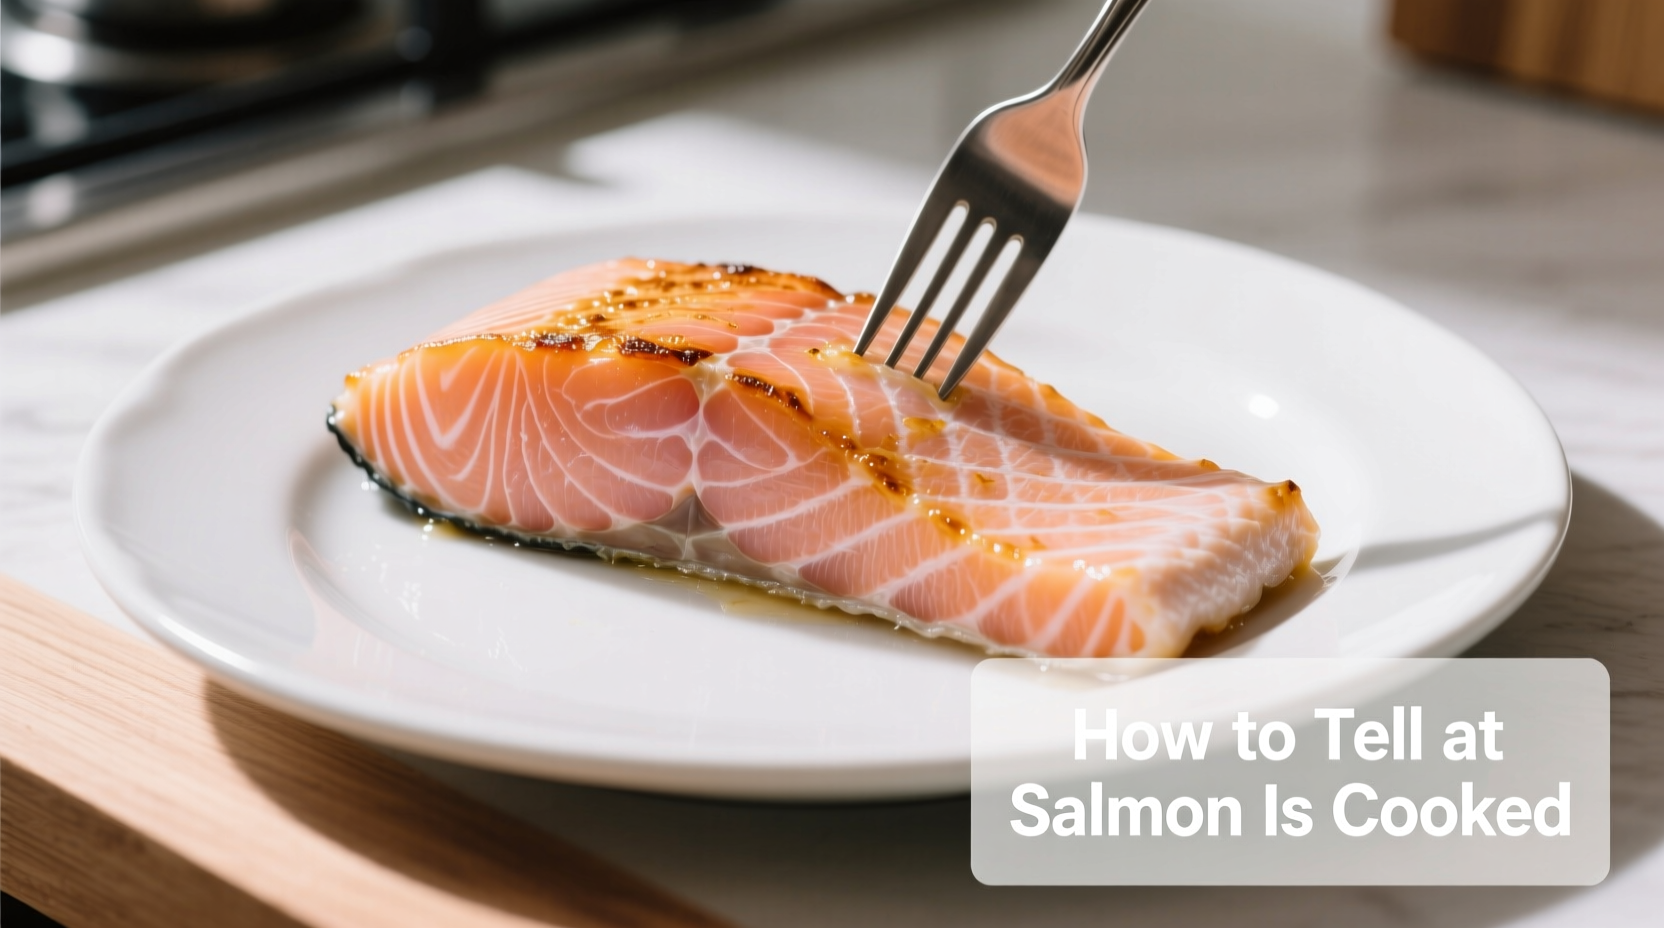
The Flaking Test: Simple Kitchen Check
Gently insert a fork into the thickest part of the salmon at a 45-degree angle and twist slightly:
- Undercooked: Flesh resists flaking and appears translucent
- Perfectly cooked: Flakes easily into large, moist segments
- Overcooked: Flakes into small, dry pieces with visible moisture loss
This method works best when combined with visual inspection. For thicker cuts, check both the top and bottom layers as cooking progresses.
Texture and Touch Test: Professional Technique
Chefs often use the "touch test" to assess doneness:
- Raw: Feels soft and jelly-like, similar to the base of your thumb when hand is relaxed
- Medium-rare: Slightly firm with gentle resistance, like thumb and forefinger touching
- Medium: Firm but yielding, similar to thumb and middle finger touching
- Well-done: Very firm with no give, like thumb and pinky touching
This technique requires practice but becomes intuitive with experience. The flesh should feel firm yet still slightly springy when properly cooked.
Doneness Indicators Across Cooking Methods
| Cooking Method | Approximate Time | Key Visual Cues | Special Considerations |
|---|---|---|---|
| Pan-seared | 6-8 minutes | Golden crust, opaque halfway through | Flip when edges turn opaque; finish in oven if thick |
| Baked | 12-15 minutes | Uniform opaque color throughout | Thicker cuts need lower temp (325°F) for even cooking |
| Grilled | 8-10 minutes | Clear sear marks, lifts easily from grates | Oil grates well; cook skin-side down first |
| Poached | 10-12 minutes | Firm texture, no translucency | Maintain 160-180°F liquid; don't boil |
Common Mistakes That Ruin Perfectly Cooked Salmon
Avoid these frequent errors that lead to disappointing results:
- Overcrowding the pan – Lowers temperature and steams instead of sears
- Flipping too soon – Wait until salmon releases naturally from cooking surface
- Cooking straight from refrigerator – Let salmon sit at room temperature 15-20 minutes first
- Ignoring carryover cooking – Remove salmon 5°F below target temperature
- Using high heat throughout – Start high for sear, then reduce for even cooking
Special Considerations for Different Salmon Types
Wild-caught salmon typically cooks faster than farmed due to lower fat content. King (Chinook) salmon, being fattier, can handle higher temperatures better than leaner varieties like sockeye. When cooking whole sides or thicker cuts, create a temperature gradient by starting skin-side down on lower heat before increasing temperature.
Resting Your Cooked Salmon
Always let salmon rest for 3-5 minutes after cooking. This allows:
- Temperature to equalize throughout the fillet
- Proteins to relax, retaining more moisture
- Carryover cooking to complete the process
- Flavors to distribute evenly
Cover loosely with foil during resting to maintain warmth without trapping steam that could soften the crust.
Food Safety Considerations
While some prefer medium-rare salmon at 130-135°F, the USDA Food Safety and Inspection Service recommends 145°F for safety. If serving vulnerable populations (pregnant women, elderly, immunocompromised), adhere strictly to the 145°F guideline. For sushi-grade salmon intended for raw consumption, ensure it's been frozen according to FDA guidelines to kill parasites.
Perfecting Your Salmon Cooking Technique
Mastery comes with practice—start with the thermometer method until you develop confidence in visual and tactile indicators. Keep a cooking journal noting variables like thickness, starting temperature, and cooking method to refine your technique. Remember that perfectly cooked salmon should be moist, tender, and flake into large, substantial pieces—never dry or crumbly.


 浙公网安备
33010002000092号
浙公网安备
33010002000092号 浙B2-20120091-4