
Drying fresh dill preserves its distinctive flavor for year-round culinary use while concentrating its aromatic compounds. Whether you've harvested an abundant garden crop or purchased a surplus from the market, proper drying techniques maintain maximum flavor and prevent mold development. This comprehensive guide details multiple effective methods for drying dill, helping you choose the best approach based on your equipment and time constraints.
Preparing Fresh Dill for Drying
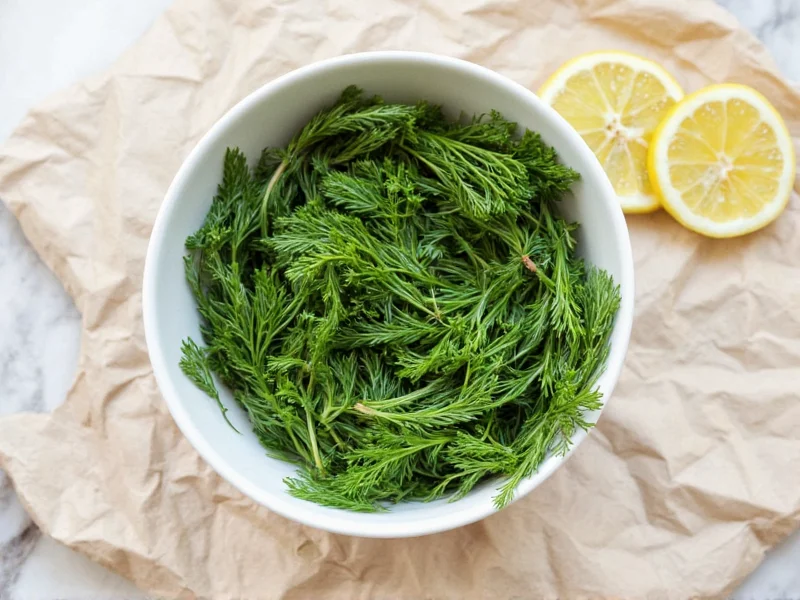
Before drying dill, proper preparation ensures optimal results. Start by harvesting dill in the morning after the dew has evaporated but before the sun reaches peak intensity. This timing captures the highest essential oil concentration. Gently rinse dill fronds under cool running water to remove dirt and insects, then shake off excess moisture. Avoid vigorous washing that damages delicate leaves.
Lay dill branches on clean kitchen towels or paper towels, patting gently to remove surface moisture. For best results, process dill within 24 hours of harvesting. If immediate drying isn't possible, store fresh dill upright in a glass with an inch of water, covered loosely with a plastic bag in the refrigerator for up to three days.
Air Drying Fresh Dill: The Traditional Method
Air drying preserves the most delicate flavor compounds through slow, gentle dehydration. Bundle 5-7 dill stems together with twine or rubber bands, securing them below the flower heads. Hang bundles upside down in a dark, warm (70-80°F), well-ventilated space with good airflow. Basements, closets, or unused rooms work well.
Cover bundles with paper bags punctured with small holes to protect from dust while allowing airflow. Complete drying typically takes 1-2 weeks. Check periodically by rubbing a leaf between your fingers—when it crumbles easily, the dill is fully dry. This method produces the most flavorful dried dill but requires patience and proper environmental conditions.
Oven Drying Dill: The Quickest Home Method
Oven drying offers a faster alternative when time is limited. Preheat your oven to its lowest possible setting, ideally between 140-170°F (60-75°C). Higher temperatures destroy essential oils and cause browning. Arrange dill sprigs in a single layer on a parchment-lined baking sheet, ensuring no overlapping.
Place the baking sheet in the oven with the door propped open 2-3 inches using a wooden spoon to maintain proper airflow. Check every 30 minutes, rotating the tray for even drying. Total drying time ranges from 1-3 hours depending on oven temperature and dill moisture content. Remove when dill becomes brittle and crumbles easily.
Using a Food Dehydrator for Perfectly Dried Dill
Food dehydrators provide the most controlled drying environment for preserving dill's flavor. Set the temperature to 95°F (35°C)—the ideal range for herb dehydration that preserves volatile oils. Arrange dill sprigs in a single layer on dehydrator trays, leaving space between stems for air circulation.
Drying time typically ranges from 2-4 hours. Check periodically after the two-hour mark by testing leaf brittleness. The consistent, gentle heat of a dehydrator produces uniformly dried dill with excellent flavor retention. This method works particularly well for large harvests and provides the most reliable results across different environmental conditions.
| Drying Method | Time Required | Temperature | Flavor Preservation | Best For |
|---|---|---|---|---|
| Air Drying | 1-2 weeks | Ambient (70-80°F) | Excellent | Small batches, optimal flavor |
| Oven Drying | 1-3 hours | 140-170°F | Good | Urgent drying needs |
| Food Dehydrator | 2-4 hours | 95°F | Excellent | Consistent results, larger batches |
Proper Storage of Dried Dill
Correct storage maintains dried dill's flavor and potency for up to one year. Before storage, ensure dill is completely dry by testing a small sample—any moisture causes mold during storage. Remove leaves from stems by running your fingers downward along the stalks. Store in airtight glass containers away from direct light, heat, and humidity.
Dark glass jars with tight-sealing lids work best for long-term storage. Label containers with the drying date, as flavor diminishes over time. For extended preservation, store in the freezer where dill maintains quality for up to two years. Avoid plastic containers that can absorb flavors and potentially leach chemicals into the herbs.
Using Dried Dill in Cooking
Dried dill has a more concentrated flavor than fresh, requiring adjustment in recipes. Use one teaspoon of dried dill for every tablespoon of fresh dill called for in recipes. Add dried dill early in the cooking process for soups, stews, and sauces to allow full flavor release. For delicate dishes like fish or salad dressings, add dried dill near the end of preparation to preserve its aromatic qualities.
Reconstitute dried dill by soaking in warm water for 10-15 minutes before use in recipes requiring fresh texture. This technique works well for dips and spreads. Dried dill also makes excellent infused vinegars and oils when combined with your preferred base and stored in a cool, dark place for 2-4 weeks.
Common Drying Mistakes to Avoid
Several common errors compromise dried dill quality. Drying dill in direct sunlight causes rapid flavor degradation and color loss. High drying temperatures above 180°F destroy essential oils responsible for dill's characteristic taste. Inadequate airflow during drying leads to mold development, especially in humid environments.
Harvesting dill after rain or heavy dew introduces excess moisture that prolongs drying time and increases spoilage risk. Overcrowding dill during the drying process prevents proper air circulation, resulting in uneven drying. Finally, storing dried dill while still slightly moist guarantees mold development, ruining your entire batch.
Troubleshooting Dried Dill Issues
If your dried dill lacks flavor, you likely used excessive heat during the drying process. Next time, reduce temperatures and extend drying time. Brown or black spots indicate mold development, usually from insufficient air circulation or incomplete drying. Discard affected batches immediately.
Dill that remains flexible after drying contains too much moisture. Return it to your drying method for additional processing time. If dill crumbles excessively during handling, you've over-dried it—while still usable, it may have slightly diminished flavor. For future batches, check for doneness more frequently during the final drying stages.
Frequently Asked Questions
Can I dry dill in the microwave?
While possible, microwave drying dill often produces inconsistent results with significant flavor loss. If attempting this method, place dill between paper towels and microwave on 10% power for 30-second intervals, checking frequently. Most culinary experts recommend against microwave drying for herbs due to the high risk of overheating and flavor degradation.
How do I know when dill is completely dry?
Properly dried dill becomes brittle and crumbles easily when rubbed between your fingers. Stems should snap rather than bend. If any part remains flexible or shows moisture, continue drying. The drying process is complete when no moisture remains in either leaves or stems.
Does dried dill taste different from fresh dill?
Yes, dried dill has a more concentrated, slightly different flavor profile than fresh dill. The drying process transforms some flavor compounds while concentrating others. Dried dill offers earthier notes with less of the bright, grassy characteristics of fresh dill. Use 1 teaspoon dried dill to replace 1 tablespoon fresh dill in recipes for proper flavor balance.
Can I dry dill flowers for culinary use?
Absolutely. Dill flowers (also called dill bloom or dill umbels) dry beautifully and offer a more intense flavor than the leaves. Harvest flowers when fully open but before seeds develop. Dry using the same methods as dill fronds, though flowers may require slightly less drying time. Dried dill flowers make excellent additions to vinegar infusions and pickling recipes.


 浙公网安备
33010002000092号
浙公网安备
33010002000092号 浙B2-20120091-4