
Creating homemade sriracha chili sauce allows you to control ingredients, avoid preservatives, and customize heat levels to your preference. Unlike the mass-produced Huy Fong Foods version that dominates supermarket shelves, authentic Thai-style sriracha undergoes natural fermentation, developing complex flavors that store-bought options often lack. This comprehensive guide walks you through the traditional fermentation method that produces a vibrant, flavorful sauce with the perfect balance of heat, sweetness, and tang.
Understanding Authentic Sriracha vs Commercial Versions
Before diving into the recipe, it's crucial to understand the difference between traditional Thai sriracha and the Americanized version most people recognize. True sriracha originates from Si Racha, Thailand, where it's made with sun-ripened red chilies, garlic, vinegar, sugar, and salt—fermented for weeks to develop its signature flavor. The popular Huy Fong Foods rooster sauce, while delicious, uses a different chili variety (red jalapeños) and skips extended fermentation, relying instead on preservatives for shelf stability.
| Characteristic | Traditional Thai Sriracha | Commercial American Version | Homemade Version |
|---|---|---|---|
| Primary Chili | Bird's eye chilies | Red jalapeños | Your choice (see recommendations below) |
| Fermentation Time | 3-4 weeks | Minimal (hours) | 2-4 weeks (recommended) |
| Preservatives | None | Potassium sorbate, sodium bisulfite | None (optional for extended shelf life) |
| Texture | Smooth, slightly chunky | Thick, uniform | Customizable (smooth to chunky) |
Essential Ingredients for Homemade Sriracha
The magic of homemade sriracha chili sauce comes from just five core ingredients, but each plays a critical role in flavor development and preservation. Quality matters more than complexity here.
Chili Selection: The Heart of Your Sauce
For authentic heat and flavor, choose one of these options:
- Red jalapeños (most accessible): Provide the familiar Huy Fong profile with moderate heat (2,500-8,000 SHU)
- Serrano peppers: Slightly hotter (10,000-23,000 SHU) with brighter flavor
- Thai bird chilies: For authentic Thai-style heat (50,000-100,000 SHU) – use half the amount
- Combination approach: 70% red jalapeños + 30% serranos creates balanced complexity
Always use fully ripe red chilies – green chilies lack the sweetness needed for proper fermentation. Avoid wax-coated supermarket chilies; farmers' market or homegrown produce works best.
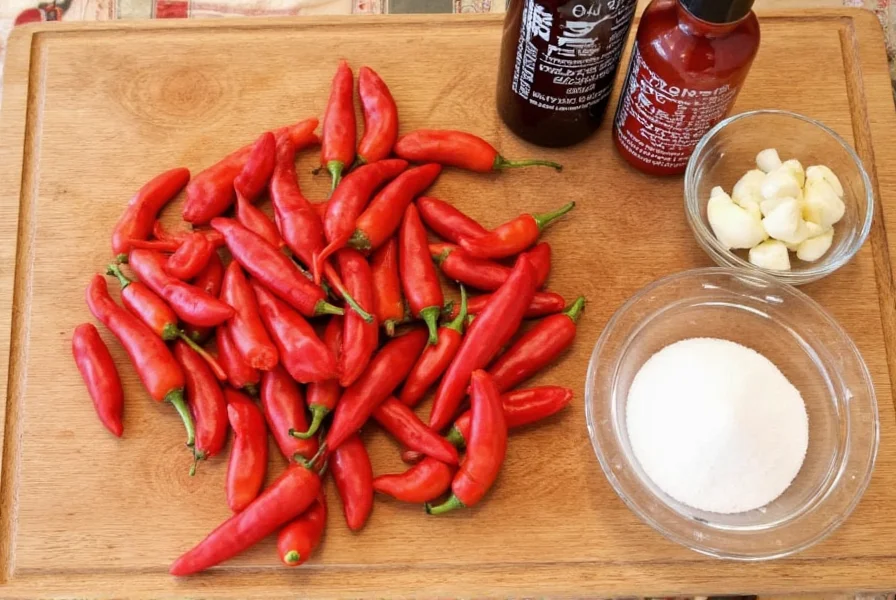
Fermentation Essentials
These ingredients drive the transformation from raw chilies to complex sauce:
- Garlic: Use fresh, firm heads (not pre-minced). The 1:5 garlic-to-chili ratio by weight creates authentic flavor without overpowering
- Vinegar: 5% acidity distilled white vinegar is standard, but apple cider vinegar adds fruitiness (use after fermentation completes)
- Salt: Non-iodized sea salt or kosher salt (3% of total weight) controls fermentation and prevents spoilage
- Sugar: White sugar dissolves best, but coconut sugar adds depth (use 10% less if substituting)
Step-by-Step Homemade Sriracha Process
Preparation Phase (Day 1)
- Wash and dry 1 kg ripe red chilies, removing stems but keeping seeds for heat
- Mince 200g garlic (about 2 heads) – don't use a food processor as it can create bitterness
- In a large bowl, combine chilies, garlic, 30g non-iodized salt, and 50g sugar
- Pack mixture tightly into a clean 1-gallon fermentation vessel, leaving 5cm headspace
- Weight down with fermentation weights or a clean zip-top bag filled with brine (3% salt solution)
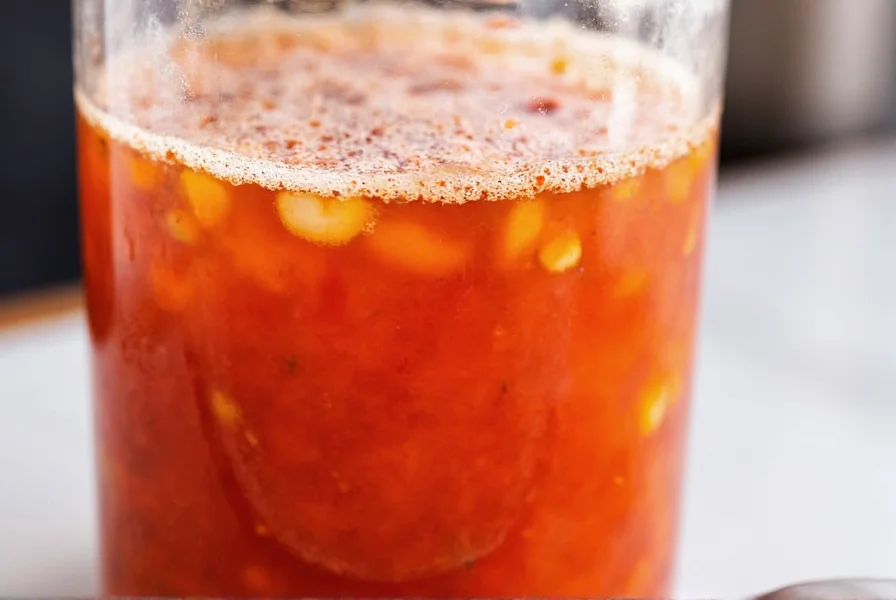
Fermentation Timeline
Natural fermentation develops flavor complexity that shortcuts can't replicate. Monitor these stages:
| Timeframe | Visual Indicators | Action Required |
|---|---|---|
| Days 1-3 | Bubbling begins, color darkens slightly | Ensure chilies remain submerged |
| Days 4-7 | Vigorous bubbling, possible white film (kahm yeast) | Skim yeast if present, maintain submersion |
| Weeks 2-3 | Bubbling slows, color deepens to brick red | Taste test for flavor development |
| Week 4 | Little to no bubbling, rich aroma | Proceed to blending when flavor satisfies |
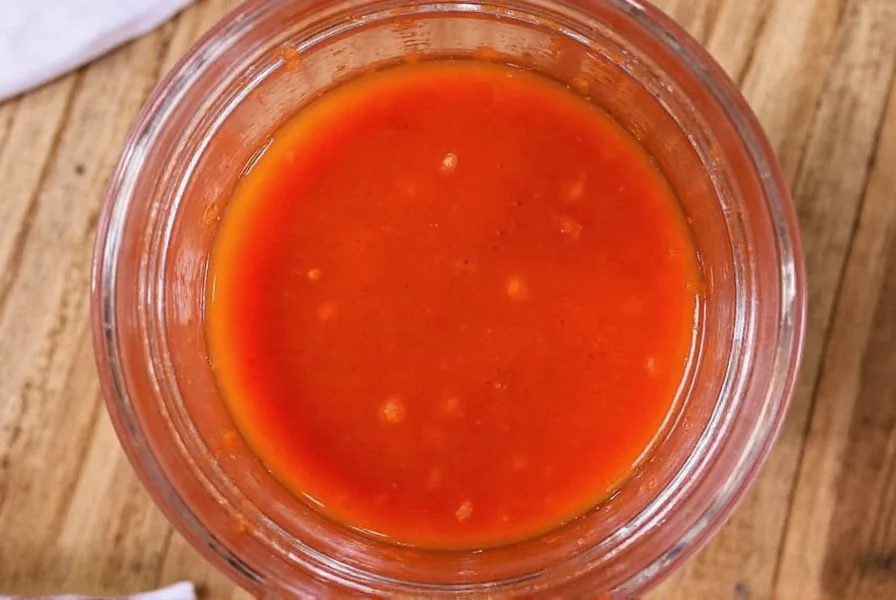
Blending and Final Processing
- After 2-4 weeks, strain fermented chilies, reserving liquid
- Blend chilies with 120ml reserved liquid until smooth
- Return to vessel and add 150g sugar and 120ml 5% vinegar
- Stir well and let sit 24-48 hours for flavors to meld
- Strain through fine mesh sieve for smooth texture (optional)
- Bottle in sterilized containers, leaving 1cm headspace
Customization Options for Your Homemade Sriracha
One major advantage of making sriracha chili sauce from scratch is customization. Try these variations:
Heat Level Adjustments
- Milder version: Remove 50-75% of seeds before fermenting
- Extra hot version: Add 10-20% Thai bird chilies to your base
- Smoky variation: Include 2-3 chipotle peppers in adobo
Flavor Enhancements
- Fruit-infused: Add 100g ripe pineapple or mango during final blending
- Umami boost: Include 15g dried shiitake mushrooms in fermentation
- Herbal notes: Stir in 5g fresh cilantro or basil after fermentation
Storage and Shelf Life Guidelines
Proper storage ensures your homemade sriracha maintains quality and safety:
- Refrigerated: Store in airtight containers for 6-12 months (flavor improves for first 3 months)
- Room temperature: Only safe for 1-2 weeks (not recommended)
- Freezing: Portion into ice cube trays, then transfer to bags for up to 18 months
Always use clean utensils when handling your sauce. Discard if you notice mold, off smells, or significant separation that doesn't remix with shaking. The natural acidity (pH below 4.6) created during fermentation prevents botulism, but proper salt concentration is critical for safety during the initial fermentation phase.
Troubleshooting Common Homemade Sriracha Issues
Fermentation Problems
- No bubbling after 5 days: Ensure proper salt concentration (too much salt inhibits fermentation), check temperature (ideal range: 68-75°F/20-24°C)
- White film on surface: This is usually harmless kahm yeast – skim off and ensure produce stays submerged
- Unpleasant odors: Discard if smells like rotten eggs or sewage (indicates harmful bacteria)
Texture and Flavor Fixes
- Too thin: Simmer gently for 10-15 minutes to reduce, or add 1 tsp xanthan gum per cup
- Too thick: Blend in small amounts of reserved brine or vinegar
- Not tangy enough: Add 5-10ml vinegar per cup of finished sauce
- Too sweet: Balance with additional vinegar (5ml increments)
Homemade vs Store-Bought: Making an Informed Choice
While commercial sriracha offers convenience, homemade provides distinct advantages for those willing to invest time:
Advantages of Homemade Sriracha Chili Sauce
- No preservatives: Avoid potassium sorbate and sodium bisulfite found in most commercial versions
- Fresher flavor: Noticeable brightness lacking in shelf-stable products
- Ingredient control: Source organic, local produce and adjust to dietary needs
- Cost effective: Approximately $3-4 per 12oz batch vs $4-6 for commercial equivalent
- Customization: Tailor heat, sweetness, and texture to personal preference
When Commercial Might Be Better
- Immediate need (no 2-4 week wait)
- Consistent flavor batch-to-batch
- Long shelf stability at room temperature
- Industrial-scale production requirements
Frequently Asked Questions
How long does homemade sriracha last in the refrigerator?
Properly stored homemade sriracha maintains quality for 6-12 months in the refrigerator. The vinegar and salt content act as natural preservatives. For best flavor, use within 3-6 months. Always check for signs of spoilage like mold, off odors, or significant separation before using.
Can I speed up the fermentation process for homemade sriracha?
While you can technically reduce fermentation to 7-10 days, authentic flavor development requires 2-4 weeks. Shorter fermentation yields a one-dimensional, harsher sauce lacking the complex umami notes that develop during proper fermentation. The wait significantly improves both flavor and safety by allowing beneficial bacteria to fully establish.
Why does my homemade sriracha separate in the bottle?
Separation occurs naturally in preservative-free sriracha as the chili solids settle. This is normal and indicates no artificial thickeners were used. Simply shake well before each use. If separation is excessive, you may need to adjust your blending technique or add a small amount of xanthan gum (1/8 tsp per cup) during final processing.
Is homemade sriracha safe without preservatives?
Yes, when properly fermented and stored. The combination of salt (3% minimum), natural acidity from fermentation, and added vinegar creates an environment inhospitable to harmful bacteria. Always maintain proper fermentation temperatures (68-75°F), ensure chilies stay submerged, and refrigerate after fermentation completes for maximum safety.
Can I use green chilies to make sriracha?
While possible, green chilies produce a significantly different product. Authentic sriracha requires fully ripe red chilies for their natural sweetness, which balances the heat and acidity. Green chilies lack this sugar content, resulting in a harsher, more vegetal sauce. If using green chilies, increase sugar by 25-50% and expect a different flavor profile.


 浙公网安备
33010002000092号
浙公网安备
33010002000092号 浙B2-20120091-4