

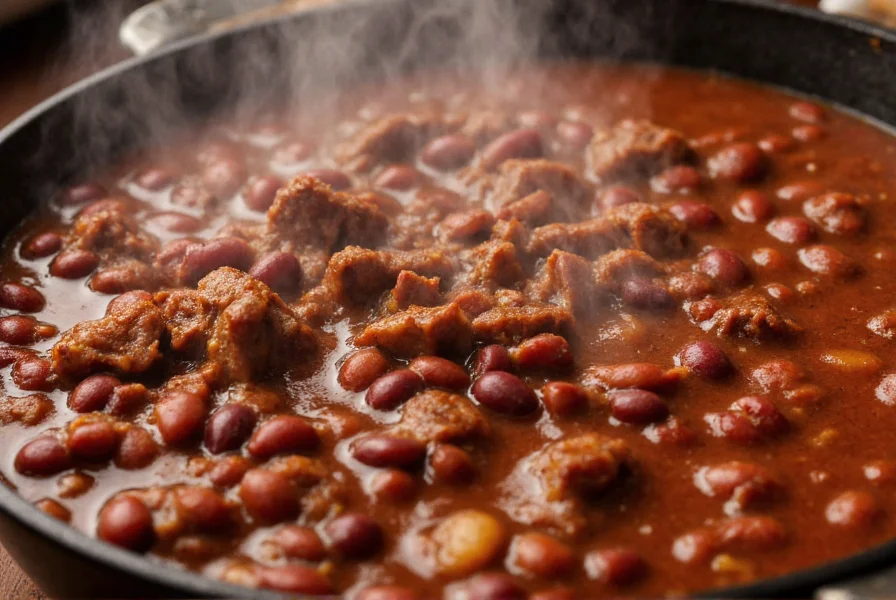
There's nothing quite like a steaming bowl of hearty beef and bean chili on a cool evening. This tried-and-true recipe has been perfected through years of kitchen testing to deliver deep, layered flavors without overwhelming heat. Unlike many simplified versions, this approach builds flavor at every stage—from properly browning the beef to the strategic addition of spices at precise moments.
Why This Beef and Bean Chili Recipe Works
Most chili recipes miss critical flavor-building opportunities. This version incorporates professional kitchen techniques accessible to home cooks. The secret lies in the three-stage spice incorporation method and the acid balance from quality tomatoes. You'll notice the difference immediately in the depth of flavor that develops as the chili simmers.
Essential Ingredients for Authentic Beef and Bean Chili
The quality of your ingredients directly impacts the final result. Don't substitute critical components if you want authentic flavor.
| Ingredient | Quantity | Notes |
|---|---|---|
| Ground chuck (80% lean) | 2 lbs | Fat content crucial for flavor development |
| Kidney beans, drained | 2 (15oz) cans | Rinse to reduce sodium |
| Fire-roasted diced tomatoes | 1 (28oz) can | Essential for smoky depth |
| Yellow onion, diced | 1 large | Yellow provides best sweetness |
| Chili powder | 3 tbsp | Use pure chili powder, not seasoning blend |
| Garlic, minced | 4 cloves | Fresh only—no powder |
| Beef broth | 2 cups | Low-sodium preferred |
Equipment You'll Need
- 6-quart heavy-bottomed pot or Dutch oven (essential for even heating)
- Wooden spoon
- Measuring cups and spoons
- Can opener
- Colander (for rinsing beans)
Step-by-Step Beef and Bean Chili Instructions
Stage 1: Building the Flavor Foundation (20 minutes)
- Heat 1 tablespoon of vegetable oil in your pot over medium-high heat until shimmering.
- Add ground chuck in a single layer—don't crowd the pot. Let it develop a proper sear (5-7 minutes).
- Once browned, remove beef with a slotted spoon, leaving drippings in the pot.
- Add onions to the drippings and cook until translucent (5 minutes).
- Add garlic and cook for 1 minute until fragrant.
Stage 2: Spice Incorporation (Critical Step)
- Reduce heat to medium. Add chili powder, cumin, and oregano directly to the onion mixture.
- Stir constantly for 1 minute—this toasts the spices in the fat, unlocking their full flavor potential.
- Return the browned beef to the pot.
- Add tomatoes, broth, and Worcestershire sauce. Bring to a gentle simmer.
Stage 3: Simmering and Finishing (40 minutes)
- Cover and simmer on low heat for 45 minutes, stirring occasionally.
- Add drained kidney beans and continue simmering uncovered for 15 minutes.
- Stir in 1 tablespoon of apple cider vinegar—this brightens the flavors.
- Taste and adjust seasoning as needed.
- For thicker chili, simmer uncovered an additional 10-15 minutes.
Serving Your Beef and Bean Chili
Serve hot with traditional toppings: shredded cheddar, sour cream, diced red onion, and fresh cilantro. This classic beef and bean chili pairs perfectly with cornbread or saltine crackers. For a complete meal, add a simple green salad with vinaigrette dressing.

Storage and Reheating Instructions
Chili tastes even better the next day as flavors continue to meld. Store in an airtight container:
- Refrigerator: Up to 4 days
- Freezer: Up to 3 months (thaw overnight in refrigerator)
Reheat gently on the stove over medium-low heat, adding a splash of broth if needed. Avoid boiling, which can make beans mushy.
Popular Variations for Your Beef and Bean Chili Recipe
Once you've mastered the basic recipe, try these chef-approved variations:
- Smoky Chipotle Version: Add 2 minced chipotle peppers in adobo sauce and 1 teaspoon smoked paprika
- Texas-Style: Omit beans and increase beef to 3 pounds for a meat-focused chili
- Slow Cooker Method: After browning, transfer to slow cooker and cook on low for 6-8 hours
- Spice Level Adjustments: For milder chili, reduce chili powder to 2 tablespoons; for hotter, add 1/4 teaspoon cayenne
Common Mistakes to Avoid in Beef and Bean Chili
Even experienced cooks make these chili preparation errors:
- Rushing the beef browning: Proper searing creates fond (browned bits) that builds flavor—don't stir too soon
- Adding all spices at once: Toasting dry spices in fat at the right moment makes a dramatic difference
- Overcooking beans: Add beans late in the process to maintain texture
- Skipping the acid: A splash of vinegar or lime juice at the end balances richness
Frequently Asked Questions
Can I make beef and bean chili in an Instant Pot?
Yes, you can adapt this beef and bean chili recipe for an Instant Pot. Use the sauté function to brown the beef and onions, then add all ingredients except beans. Pressure cook for 15 minutes, natural release for 10 minutes, then stir in beans and use sauté function to thicken if needed.
Why does my chili taste bland?
Bland chili usually results from three issues: not properly toasting spices in fat, insufficient seasoning layers, or missing acid balance. Always toast dry spices in the pot after sautéing onions, season in stages (not just at the end), and finish with a splash of vinegar or lime juice to brighten flavors.
How can I thicken my beef and bean chili?
For thicker chili, simmer uncovered for additional 10-15 minutes to reduce liquid. Alternatively, mash some beans against the side of the pot and stir back in, or create a cornstarch slurry (1 tablespoon cornstarch mixed with 2 tablespoons cold water) and stir in during the last 5 minutes of cooking.
What's the difference between chili con carne and beef and bean chili?
Traditional chili con carne ("chili with meat") from Texas typically contains only meat, chili peppers, and spices—no beans. Beef and bean chili is a more common American adaptation that includes kidney or pinto beans, tomatoes, and often additional vegetables. Both are delicious but represent different regional interpretations.


 浙公网安备
33010002000092号
浙公网安备
33010002000092号 浙B2-20120091-4