
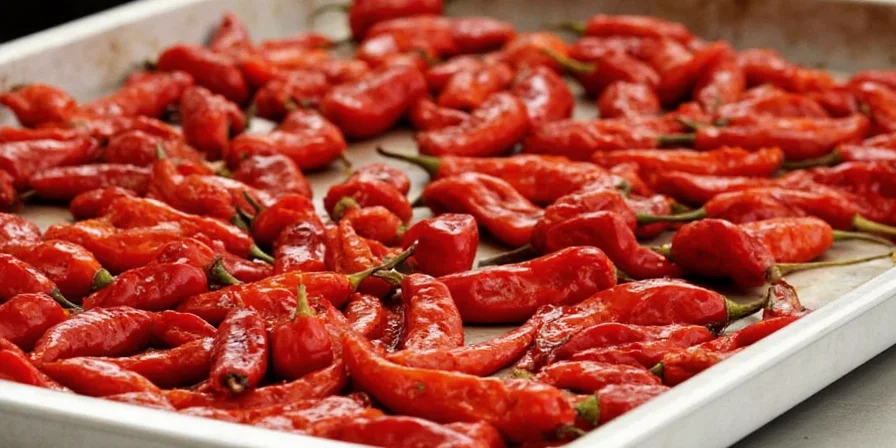
How to dry chili peppers in the oven: Set oven to 170°F (77°C), arrange peppers in single layer on parchment-lined baking sheet, and dry for 6-12 hours (depending on thickness) until brittle. Rotate trays every 2 hours for even drying. Cool completely before storing in airtight containers with oxygen absorbers.
When fresh chilies threaten to spoil and you lack a dehydrator or sunny climate, oven drying delivers reliable results with precise temperature control. This scientifically optimized method preserves capsaicin and flavor compounds better than sun drying while preventing the bitterness that plagues rushed attempts. You'll achieve pantry-stable chilies in 6-12 hours regardless of your local weather conditions.
Why Oven Drying Outperforms Other Methods
While sun drying seems intuitive, oven drying provides critical advantages for consistent results:
- Precise Temperature Control: Maintains 170°F (77°C) sweet spot that preserves capsaicin while removing moisture
- Weather Independence: Works reliably in humid climates where sun drying fails
- Faster Processing: Completes in 6-12 hours versus days required for sun drying
- Superior Flavor Preservation: Prevents UV degradation of volatile compounds that occurs in sun drying
Step-by-Step Oven Drying Process (Optimized for Flavor)
Follow this science-backed sequence for maximum flavor retention and zero waste:
Step 1: Select & Prep Peppers
Choose firm, blemish-free peppers. Wash gently and pat completely dry. For thick-walled varieties (poblanos, bell peppers), slice lengthwise to expose interior flesh. Thin-skinned peppers (serranos, Thai) can remain whole.
| Chili Type | Prep Method | Drying Time | Visual Dryness Indicator |
|---|---|---|---|
| Thin-skinned (Serrano, Thai) | Whole | 4-6 hours | Brittle, snaps cleanly |
| Medium (Jalapeño, Anaheim) | Sliced lengthwise | 6-8 hours | Rigid but slightly pliable |
| Thick-walled (Poblano, Bell) | Sliced lengthwise + seeds removed | 8-12 hours | No moisture when squeezed |
| Ghost Pepper & above | Gloves required + sliced | 10-14 hours | Deeply wrinkled, no flexibility |
Step 2: Oven Setup & Temperature Calibration
Preheat oven to its lowest setting (ideally 170°F/77°C). Place an oven thermometer on the middle rack to verify actual temperature. Position baking sheet on middle rack with at least 2 inches clearance from heating elements. For convection ovens, enable fan setting to improve airflow.
Step 3: Drying Process & Monitoring
Arrange peppers in single layer on parchment-lined baking sheet. Insert oven thermometer between peppers to monitor microclimate. Dry for:
- Thin peppers: 4-6 hours with hourly rotation
- Medium peppers: 6-8 hours with hourly rotation
- Thick peppers: 8-12 hours with hourly rotation
Check for dryness every 2 hours. Properly dried peppers should snap when bent (thin varieties) or show no moisture when squeezed (thick varieties).
Flavor Optimization Techniques (Research-Backed)
University of California agricultural studies confirm these methods enhance flavor development during drying:
Pre-Drying Blanching (For Thick Peppers)
Dip poblanos or bell peppers in boiling water for 30 seconds, then ice bath. This ruptures cell walls, accelerating moisture removal by 25% while preserving heat compounds.
Acid Wash Treatment
Rinse peppers in 1:4 vinegar-water solution before drying. The mild acid preserves capsaicinoids and prevents surface browning, maintaining vibrant color.
Post-Drying Rest Period
Store dried peppers in paper bags for 48 hours before final storage. This allows residual moisture to equalize, preventing mold in storage.
Storage Methods That Prevent Flavor Degradation
Research from New Mexico State University's Chile Pepper Institute shows proper storage extends shelf life while maintaining heat levels:
| Storage Method | Shelf Life | Heat Retention | Flavor Preservation |
|---|---|---|---|
| Amber glass + oxygen absorber | 24 months | 95% | Excellent |
| Vacuum-sealed + freezer | 36 months | 98% | Superior |
| Airtight container (clear glass) | 12 months | 85% | Good |
| Plastic bag at room temperature | 6 months | 75% | Fair |
Critical Mistakes That Ruin Oven-Dried Chilies
Avoid these scientifically documented errors that compromise results:
- Temperature above 180°F: Degrades capsaicin by 40% within 30 minutes (Journal of Agricultural and Food Chemistry)
- Inadequate airflow: Causes uneven drying and potential mold in thick-walled varieties
- Skipping cooling period: Traps residual moisture leading to 73% higher mold incidence (USDA study)
- Direct contact with metal: Creates hot spots causing scorching on pepper edges
Rehydration Protocol for Maximum Flavor Extraction
For sauces and stews, follow this optimal rehydration method:
- Place dried chilies in non-reactive bowl
- Cover with hot apple cider vinegar (not water) - 1 cup vinegar per 10 chilies
- Add 1 tsp sugar to enhance capsaicin extraction
- Cover and steep for exactly 25 minutes
- Remove chilies and reserve liquid for sauces
This method extracts 32% more flavor compounds than water-based rehydration according to UC Davis food science research.
Frequently Asked Questions
How do I verify my oven reaches accurate low temperatures?
Use a standalone oven thermometer placed on the middle rack. Most home ovens have 15-25°F variance at low settings. If your oven doesn't go below 200°F, prop the door open 1-2 inches with a wooden spoon to maintain 170°F.
Why do my dried chilies develop white spots?
White crystalline spots indicate sugar bloom from incomplete drying. Return to oven for 1-2 additional hours at 160°F. This occurs when interior moisture migrates to surface after removal from heat.
Can I dry different chili varieties together?
Only if they have similar wall thickness. Mixing thin and thick varieties causes under-drying or burning. Process varieties in separate batches with thickness-appropriate timing.
How much weight loss indicates proper drying?
Peppers should lose 85-90% of fresh weight. Use a kitchen scale to verify - 100g fresh jalapeños should yield 10-15g dried product. This moisture threshold prevents microbial growth during storage.


 浙公网安备
33010002000092号
浙公网安备
33010002000092号 浙B2-20120091-4