
7 Hilariously Effective Ways to Dry Red Chili Peppers (Without Setting Your Kitchen on Fire)
Table of Contents
- Introduction: The Spicy Saga Begins
- Method #1: Sun-Drying – Mother Nature’s Dehydrator
- Method #2: Oven Drying – When You Can’t Wait for the Sun
- Method #3: Air-Drying Indoors – The “Set It and Forget It” Approach
- Method #4: Using a Food Dehydrator – For the Tech-Savvy Spice Enthusiast
- Method #5: Microwave Magic – Quick but Risky
- Method #6: Smoking – Because Why Not Add Flavor While Drying?
- Method #7: Freeze-Drying – For Those Who Like Things Crispy and Futuristic
- Storing Dried Chilies: A Love Letter to Shelf Life
- Common Mistakes to Avoid – Don’t Be That Guy
- FAQs: Frequently Asked Questions (and Some You Probably Shouldn’t Ask)
- Conclusion: Now Go Make Something Deliciously Fiery
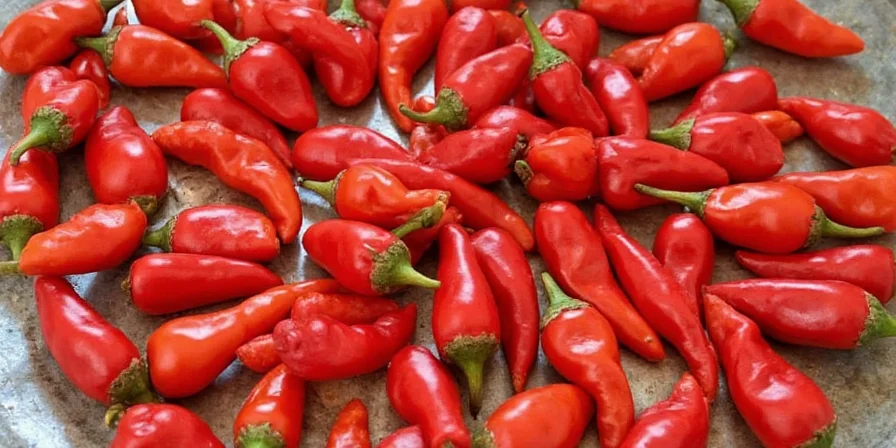
Introduction: The Spicy Saga Begins
So, you’ve got a pile of fresh red chili peppers staring at you like they’re daring you to make a move. Maybe you just harvested them from your garden, or maybe you went a little overboard at the farmer’s market. Either way, you know that if you don’t dry them soon, they’ll go from spicy-hot to sad-and-soggy faster than you can say “jalapeño popper.”
Drying chilies isn’t just about preservation—it’s also about intensifying flavor, reducing moisture content for better storage, and turning your kitchen into a veritable spice lab. Let’s explore the best (and most entertaining) ways to dry red chili peppers without ending up with a fire drill or a culinary disaster.
Method #1: Sun-Drying – Mother Nature’s Dehydrator
Pros:
- Free energy source (the sun!)
- Natural flavor enhancement
- Eco-friendly
Cons:
- Weather-dependent (hello, unexpected rainstorms!)
- Takes longer (patience is not our strong suit)
- Potential bug infestation (no one wants bugs in their burrito)
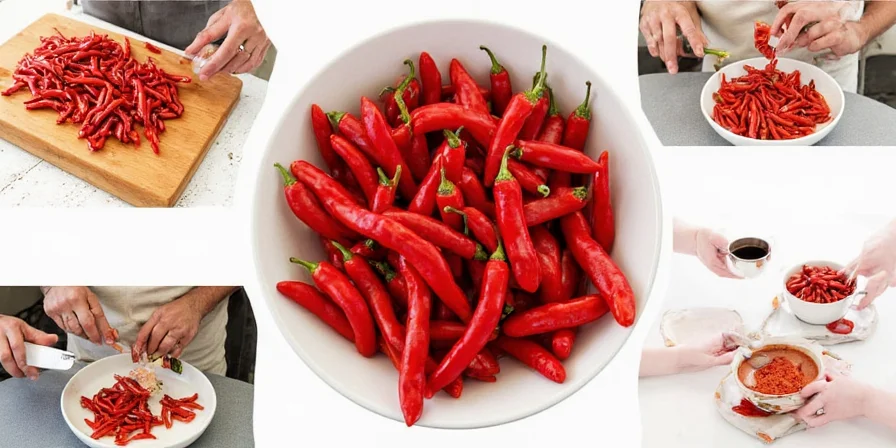
The Step-by-Step Guide:
- Rinse and pat dry those chilies.
- Spread them out on a tray lined with mesh or cheesecloth.
- Place in direct sunlight, ideally elevated off the ground.
- Flip daily to ensure even drying.
- Cover with netting to keep insects at bay.
- Check after 5–7 days; they’re done when brittle and crisp.
Bonus tip: If you live in a humid area, place a desiccant packet nearby to speed things up. Also, try not to leave them outside overnight unless you enjoy waking up to raccoon confetti.
Method #2: Oven Drying – When You Can’t Wait for the Sun
Pros:
- Faster than sun-drying
- Controlled environment
- Easy cleanup
Cons:
- Energy consumption (electricity bill might spike)
- Risk of burning if you forget they’re in there
How to Do It:
- Preheat oven to the lowest setting (usually 150°F / 65°C).
- Line a baking sheet with parchment paper.
- Arrange chilies in a single layer—don’t let them touch.
- Bake for 4–6 hours, flipping halfway through.
- Check every hour; remove when crisp and brittle.
Pro tip: Crack the oven door slightly to allow moisture to escape. This helps prevent steaming and speeds up the process. Set a timer so you don’t accidentally turn your peppers into charcoal briquettes.
Method #3: Air-Drying Indoors – The “Set It and Forget It” Approach
Pros:
- No energy required
- Minimal effort
- Can be decorative
Cons:
- Slow (weeks instead of days)
- Humidity issues can sabotage progress
Steps:
- Thread chilies onto a string using a needle (or just tie them together).
- Hang in a warm, dry, well-ventilated room (not your damp basement).
- Wait patiently while they slowly shrivel into spicy perfection.
Fun fact: These chili garlands are called “ristras” in New Mexico and look super festive hanging above a doorway. Just make sure Fido doesn’t mistake them for a chew toy.
Method #4: Using a Food Dehydrator – For the Tech-Savvy Spice Enthusiast
Pros:
- Fast, consistent results
- Temperature control
- Perfect for large batches
Cons:
- Requires equipment purchase
- Takes up counter space
How to Use a Dehydrator:
- Wash and slice chilies in half (or leave whole for easier grinding later).
- Place them on dehydrator trays, skin side down for faster drying.
- Set temperature to 135°F (57°C) and let run for 8–12 hours.
- Check periodically; they’re ready when crispy and snap easily.
Smart tip: If your dehydrator has a timer, set it to remind you to check on progress. Otherwise, you might walk away and come back to a tray full of spicy sawdust.
Method #5: Microwave Magic – Quick but Risky
Pros:
- Super fast (minutes, not hours)
- No special tools needed
Cons:
- Risky business (chilies can catch fire or explode)
- Inconsistent results
Procedure:
- Place chilies between two paper towels on a microwave-safe plate.
- Microwave on high for 1 minute, then check progress.
- If still pliable, microwave in 30-second intervals until brittle.
Warning: DO NOT LEAVE THE ROOM. Microwaving chilies can lead to sudden combustion or an acrid smell that will haunt your kitchen for days. Always use caution and keep a bowl of water nearby… just in case.
Method #6: Smoking – Because Why Not Add Flavor While Drying?
Pros:
- Infuses amazing smoky flavor
- Kills bacteria during the process
- Unique preservation method
Cons:
- Requires smoker or grill setup
- Can overpower delicate dishes
Smoking Tips:
- Use a smoker or grill set to low heat (around 200°F).
- Add wood chips (hickory or mesquite work great).
- Place chilies on wire rack, skin side up.
- Smoke for 2–4 hours, depending on desired dryness.
Chef’s kiss: Smoked dried chilies are perfect for making mole sauces, adobo pastes, or adding depth to soups and stews. Just remember to store them separately—they’ll definitely impart their smokiness to anything else nearby.
Method #7: Freeze-Drying – For Those Who Like Things Crispy and Futuristic
Pros:
- Preserves maximum flavor and nutrients
- Extremely long shelf life
- Great for emergency spice kits
Cons:
- Expensive equipment
- Not common household appliance
Instructions:
- Freeze chilies first on a tray.
- Transfer to freeze dryer and follow manufacturer instructions.
- Once dry, store in vacuum-sealed containers with oxygen absorbers.
Note: Unless you own a spaceship or have $2,000 lying around, this method might not be for everyone. But hey, if you do have access to a freeze dryer, drop us a line—we need advice.
Storing Dried Chilies: A Love Letter to Shelf Life
| Storage Method | Shelf Life | Best For |
|---|---|---|
| Airtight container in cool, dark pantry | 6–12 months | Most everyday uses |
| Vacuum-sealed bags | 1–2 years | Long-term storage |
| Whole vs. ground | Whole lasts longer | Flavor retention |
Remember: Moisture is the enemy. Store your chilies in a dry place, and avoid glass jars unless they have tight-fitting lids. Paper bags? Sure, if you’re going rustic-chic. Ziplock bags? Only if you squeeze out all the air first.
Common Mistakes to Avoid – Don’t Be That Guy
- Forgetting to wear gloves – Capsaicin is a cruel mistress.
- Leaving them too close to heat sources – Your chilies are drying, not roasting.
- Using plastic containers – They trap moisture. Stick to glass or metal.
- Overcrowding – Proper airflow is essential. No one likes soggy neighbors.
- Drying wet chilies – Pat them dry first. Wet chilies = moldy chilies.

FAQs: Frequently Asked Questions (and Some You Probably Shouldn’t Ask)
Can I dry green chilies the same way?
Sure, but they won’t be as spicy or flavorful. Plus, they tend to take longer to dry due to higher moisture content.
Should I remove seeds before drying?
Nope! Seeds contain lots of capsaicin, so leave ’em in for extra kick. Remove after drying if you want milder heat.
What if my chilies get moldy?
Chuck ’em. Mold means moisture snuck in somewhere. Start over and double-check your technique.
Can I rehydrate dried chilies?
Absolutely! Just soak in hot water or broth for 15–20 minutes. Perfect for sauces, moles, or salsas.
Conclusion: Now Go Make Something Deliciously Fiery
Congratulations! You are now officially a chili-drying wizard. Whether you sun-dried them like a desert survivalist, smoked them like a Texas pitmaster, or microwaved them like a mad scientist, your efforts will be rewarded with intensely flavored, shelf-stable spices that’ll elevate your cooking game.
Now get out there and grind them into powder, toss them into stews, or just snack on them like a true spice ninja. And remember: the only thing hotter than your chilies should be your culinary skills.


 浙公网安备
33010002000092号
浙公网安备
33010002000092号 浙B2-20120091-4