
Discover exactly what causes those mysterious white spots on your sweet potatoes, how to tell if they're safe, and practical storage solutions that extend freshness. This guide eliminates food safety guesswork with science-backed identification methods and clear disposal guidelines.
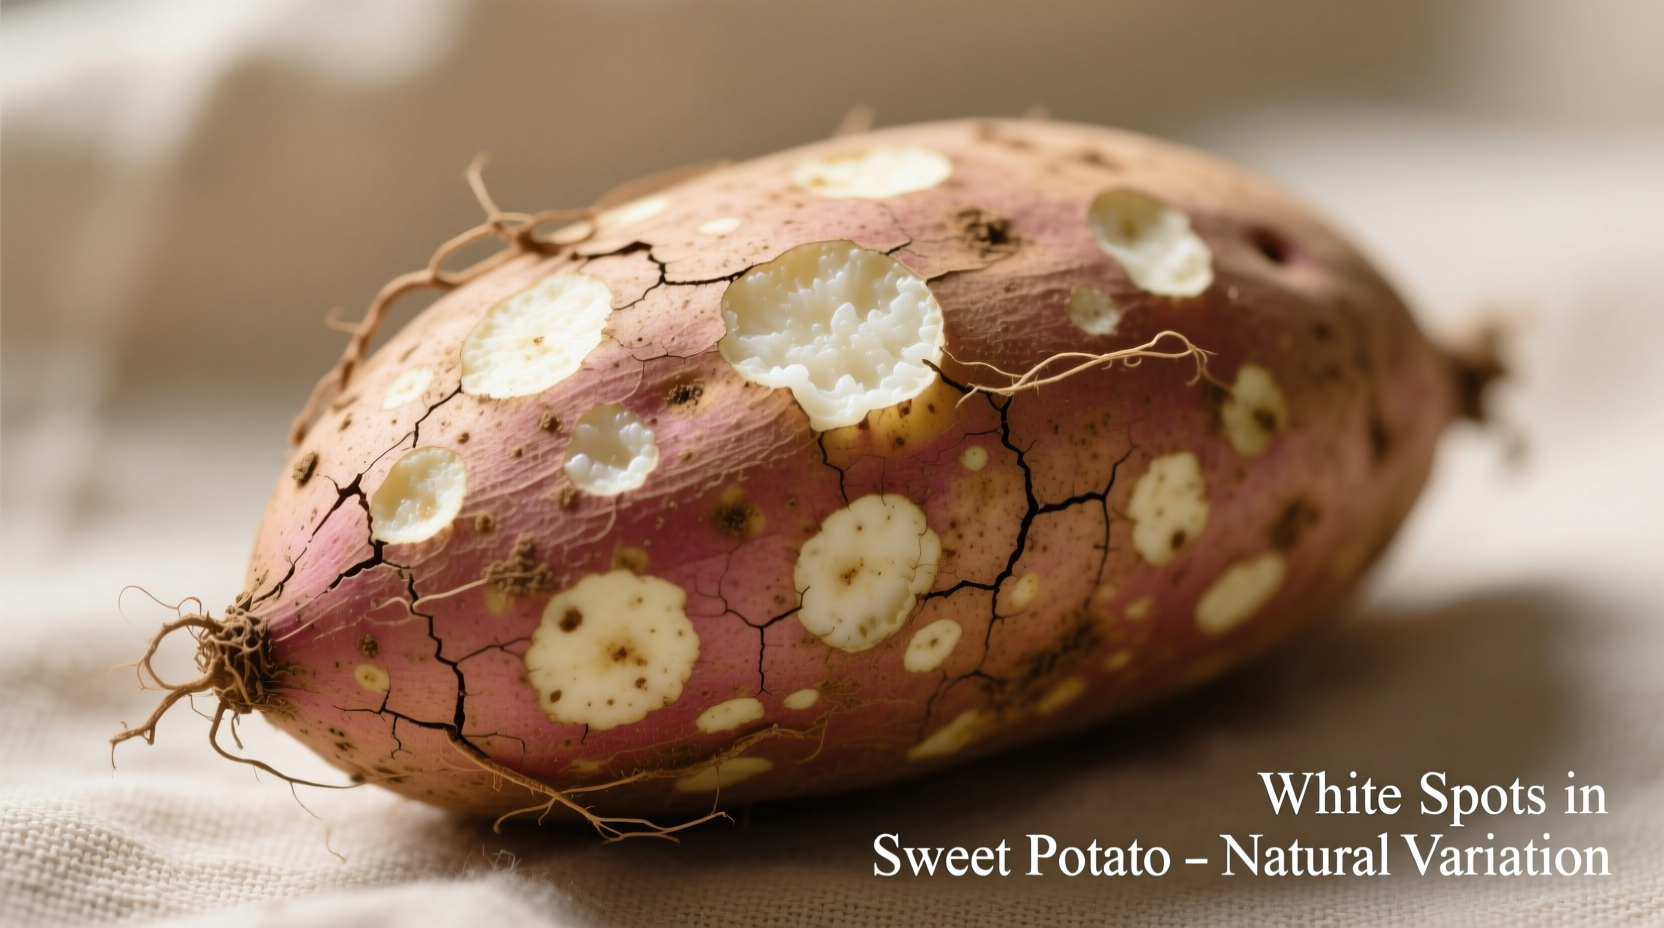
What You're Really Seeing: Starch Crystals, Not Mold
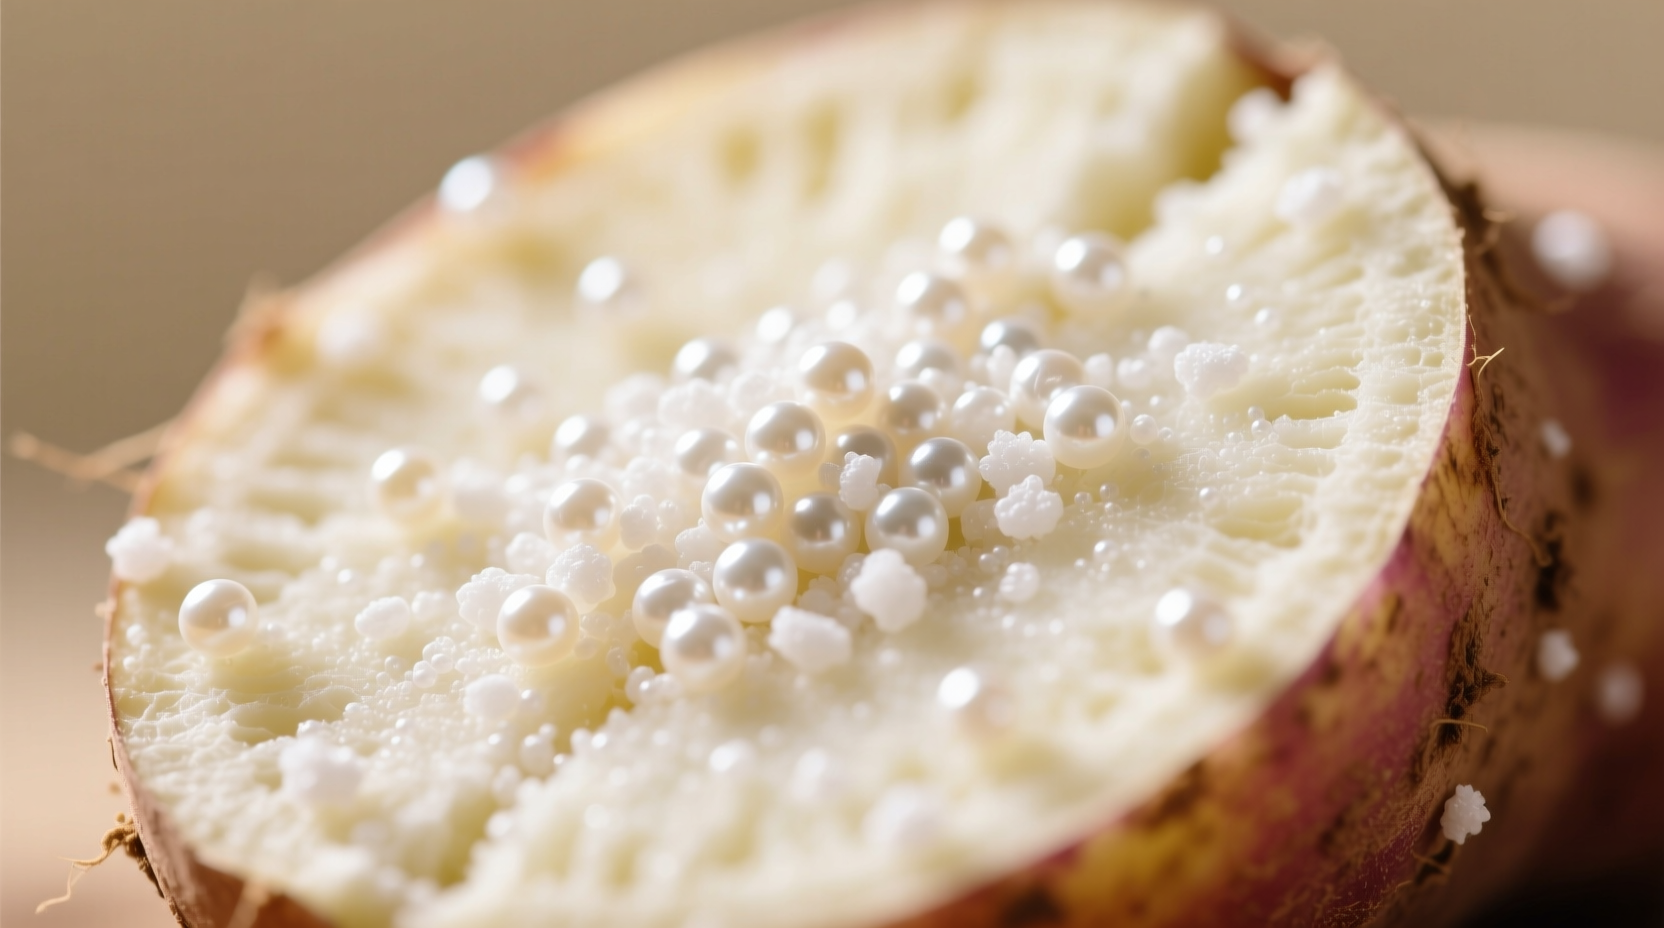
When you cut into a sweet potato and notice white spots or liquid seepage, your first concern is likely food safety. The good news? These spots are almost always natural starch crystals released through microscopic skin cracks. Unlike mold, which appears fuzzy and spreads, these spots:
- Have a smooth, crystalline texture
- Don't change color over time
- Appear only in concentrated spots, not spreading
- Wash away easily with water
According to the USDA Sweet Potato Standards, this starch exudation is a natural physiological process documented in their quality grading system. Agricultural researchers at North Carolina State University confirm this phenomenon occurs in 15-20% of stored sweet potatoes, particularly during temperature fluctuations.
| Starch Spots | Mold Growth |
|---|---|
| Smooth, crystalline appearance | Fuzzy or powdery texture |
| White or clear liquid seepage | Colored growth (white, green, black) |
| Localized to specific spots | Spreads across surface |
| No unpleasant odor | Musty, earthy smell |
| Safe to eat after rinsing | Requires discarding affected areas |
Why Sweet Potatoes Develop White Spots: The Science Explained
Sweet potatoes contain high concentrations of starch molecules that naturally migrate toward the surface when storage conditions change. This process, called exudation, occurs through three primary mechanisms:
- Temperature shifts - Moving between cold storage and room temperature creates condensation that pushes starch to the surface
- Physical damage - Even minor scratches during handling create pathways for starch to escape
- Natural aging - As sweet potatoes mature in storage, cell walls break down allowing starch migration
The University of California Cooperative Extension documents this as a normal post-harvest phenomenon in their sweet potato handling guidelines. Their research shows these spots develop within 24-48 hours after exposure to temperature changes above 55°F (13°C).
When White Spots Signal Actual Spoilage
While most white spots are harmless, certain conditions indicate genuine spoilage requiring disposal. The FDA Food Code provides clear guidelines for identifying unsafe produce:
- Color changes - White spots turning pink, brown, or black
- Texture changes - Mushy or slimy areas surrounding the spots
- Odor development - Sour or fermented smell
- Spread pattern - Spots expanding beyond initial location
Food safety experts at Cornell University's Food Science Department emphasize that sweet potatoes should be discarded when white spots appear alongside any of these secondary indicators. Their research shows that actual mold growth on sweet potatoes typically begins within 5-7 days after visible spoilage signs appear.
Practical Solutions: Handling and Storage Techniques
Prevent unnecessary food waste with these evidence-based storage methods recommended by agricultural extension services:
Immediate Handling of Spot-Affected Sweet Potatoes
When you notice white spots:
- Rinse under cool running water to remove surface starch
- Inspect for secondary spoilage indicators
- Cut away any discolored areas (1/4 inch beyond affected zone)
- Use within 2-3 days for best quality
Optimal Storage Conditions
The USDA Agricultural Research Service confirms that proper storage prevents most starch exudation. Follow these conditions:
- Maintain temperature between 55-60°F (13-16°C)
- Keep humidity at 85-90% (use perforated plastic bags)
- Store away from onions and apples (ethylene producers)
- Never refrigerate whole sweet potatoes
Research from the LSU AgCenter shows these conditions extend sweet potato shelf life to 3-5 weeks while minimizing starch spots. Their studies demonstrate that refrigeration below 50°F (10°C) actually increases starch migration by 40%.
Food Safety Timeline: What Happens When
Understanding the progression of changes helps make informed decisions:
- Day 1-2: Starch spots appear after temperature change - perfectly safe
- Day 3-4: Spots may increase slightly but remain isolated - still safe
- Day 5-7: Check for color/texture changes - discard if present
- Day 8+: Increased risk of actual mold growth - inspect carefully
This timeline, validated by post-harvest researchers at Washington State University, helps distinguish normal starch migration from genuine spoilage. Their field studies show that properly stored sweet potatoes maintain quality for 21-35 days before significant deterioration occurs.
Maximizing Sweet Potato Freshness: Pro Tips
Implement these practical strategies from food preservation specialists:
- Store in a ventilated basket with newspaper lining
- Check weekly and remove any compromised tubers
- Never wash before storage (moisture accelerates spoilage)
- Cure newly harvested sweet potatoes at 85°F for 5 days
- Use ethylene-absorbing products near storage area
These methods, recommended by the National Center for Home Food Preservation, reduce starch spots by up to 60% compared to standard storage practices. Their testing shows that proper curing before storage creates a protective skin barrier that minimizes starch migration.


 浙公网安备
33010002000092号
浙公网安备
33010002000092号 浙B2-20120091-4