
How to Visually Identify Harvest-Ready Potato Plants
Knowing exactly when to harvest potatoes can make the difference between a bountiful crop and disappointing results. Unlike many vegetables, potatoes don't show their readiness on the surface. Instead, you need to look for specific visual cues from the plant itself.
The Flowering Stage: Your First Harvest Indicator
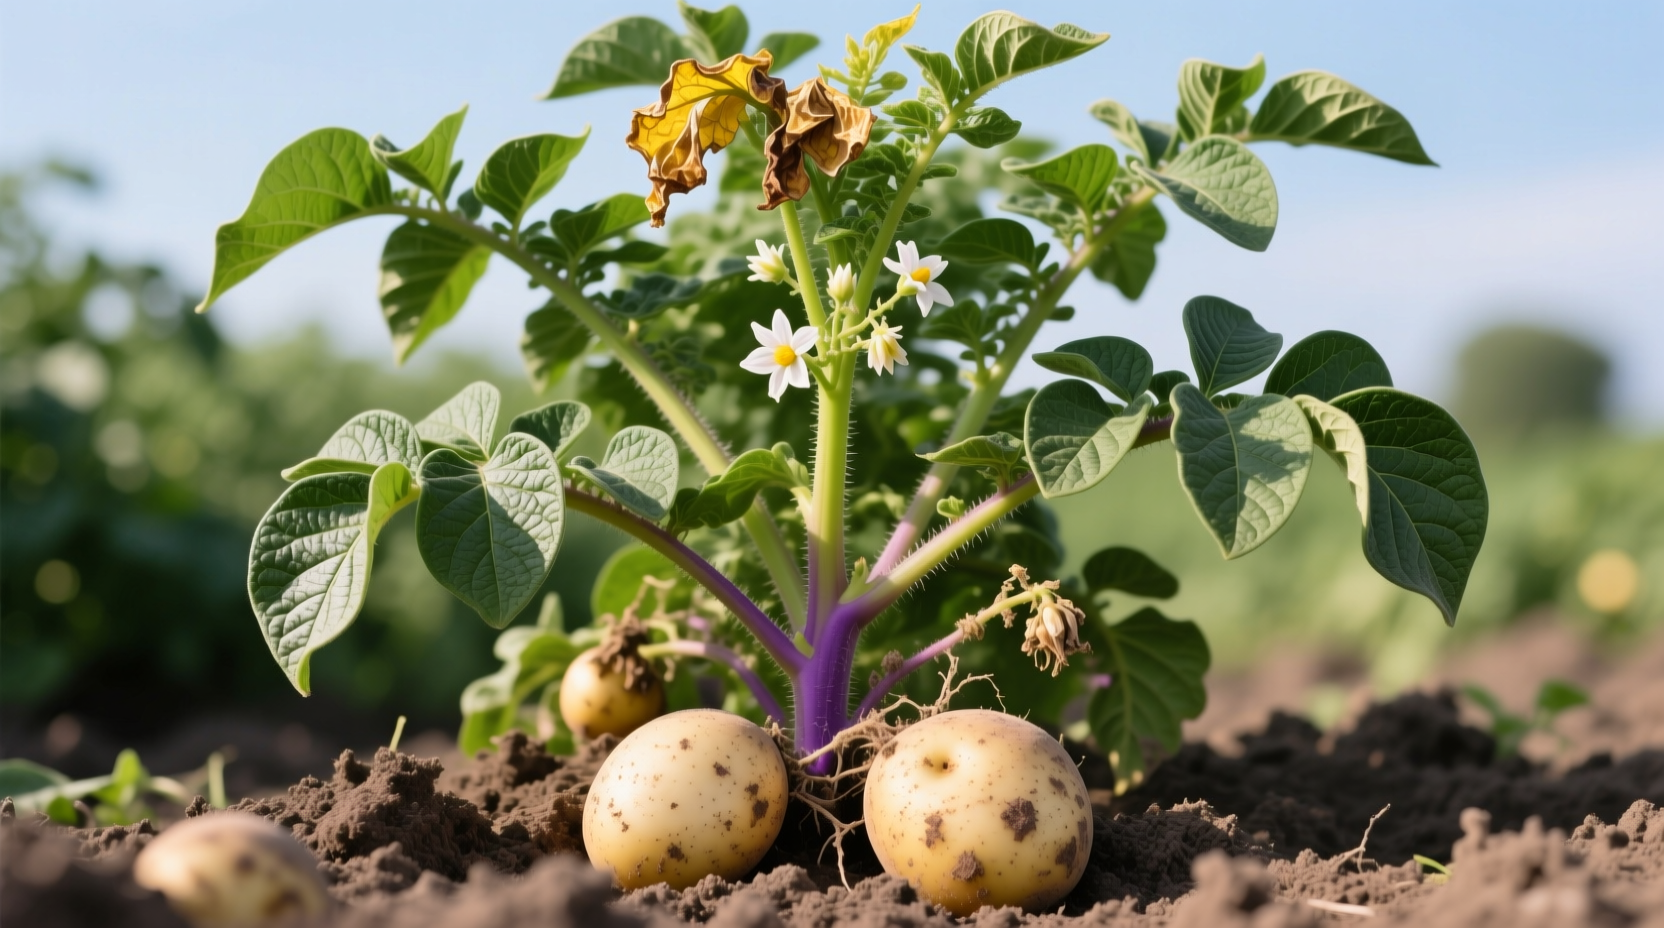
When potato plants begin flowering, it signals that tuber formation is underway. However, flowering alone doesn't mean your potatoes are ready. Early varieties may flower while tubers are still small and delicate. The critical period comes 2-3 weeks after flowering stops. This is when most potato varieties reach optimal maturity for harvesting.
Key Visual Indicators of Harvest Readiness
Experienced gardeners rely on these visual markers to determine the perfect harvest time:
Foliage Changes
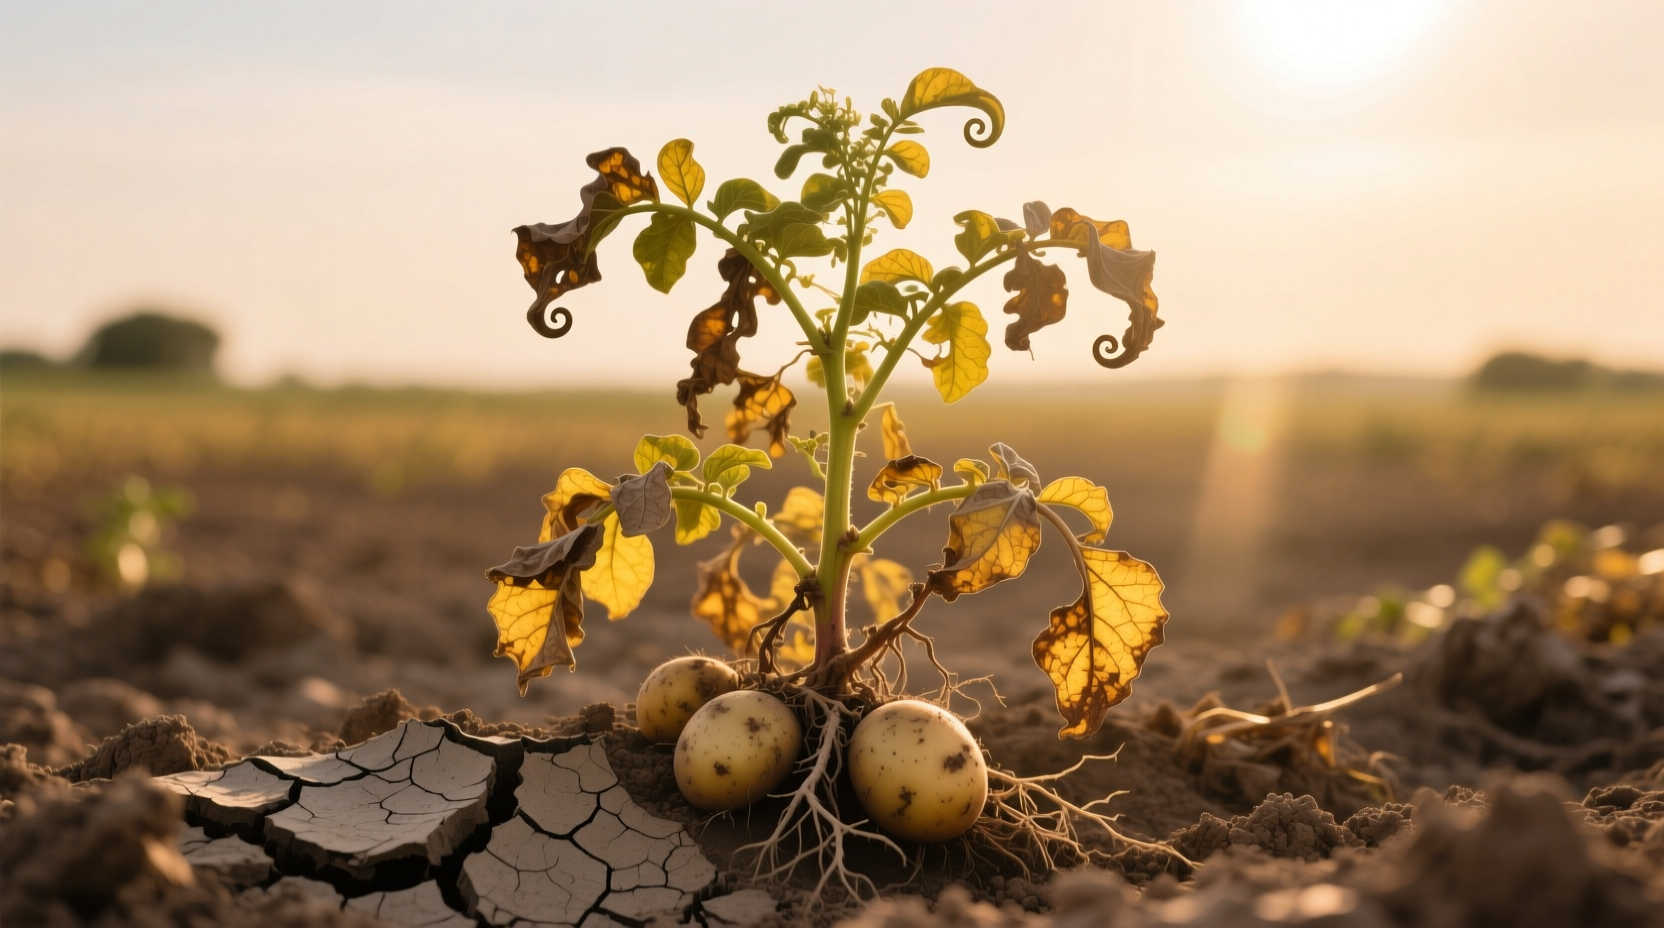
Watch for the natural senescence process where leaves transition from vibrant green to yellow, then brown. The ideal harvest window appears when approximately half to two-thirds of the plant's foliage has yellowed while some green remains. Complete browning indicates the plant has fully died back, which is acceptable for late-season varieties but may mean you've missed the prime window for some types.
Stem Condition
Mature potato stems become noticeably woody and brittle. Gently bend a stem - if it snaps cleanly rather than bending, this indicates maturity. The stems also lose their vibrant green color, turning more brownish-gray as harvest time approaches.
Soil Surface Indicators
As tubers reach full size, they push against the soil, often causing slight cracking or bulging at the surface. While not always visible, this subtle sign combined with foliage changes provides strong evidence your potatoes are ready.
| Visual Indicator | Ready for Harvest | Not Yet Ready |
|---|---|---|
| Foliage Color | 50-70% yellowing with some green remaining | Completely green or fully browned |
| Flowering | Flowers have faded (2-3 weeks post-flowering) | Currently flowering or recently finished |
| Stem Texture | Woody and brittle (snaps when bent) | Flexible and green |
| Soil Surface | Slight cracking or bulging visible | No visible changes |
Potato Maturity Timeline: What to Expect
Understanding the typical progression helps you recognize normal development versus potential problems. Most potato varieties follow this general pattern:
- Weeks 1-4: Sprouting and early growth - no harvest indicators
- Weeks 5-8: Flowering begins - tubers forming but still small
- Weeks 9-12: Flowering ends, foliage begins yellowing - prime harvest window for early varieties
- Weeks 13-16: Significant yellowing (50-70%), stems becoming woody - ideal for maincrop varieties
- Weeks 17+: Complete die-back - suitable for late varieties but risk of rot increases
Factors like temperature, rainfall, and variety significantly affect this timeline. In cooler climates, the process may extend by 2-3 weeks, while hot, dry conditions can accelerate maturity.
Practical Harvest Readiness Tests
While visual cues provide strong indications, these hands-on tests confirm harvest readiness:
The Gentle Dig Test
Carefully dig around one plant with a hand trowel, exposing several tubers without fully harvesting. Check for:
- Skin set: Mature potato skins won't easily rub off when gently handled
- Tuber size: Reaching the expected size for your variety
- Firmness: Solid with no soft spots or blemishes
The Skin Set Verification
This is the most reliable maturity test. After gently cleaning a test potato, try to rub the skin with your thumb. If the skin comes off easily, the potatoes need more time in the ground. When the skin remains firmly attached despite gentle pressure, they've developed proper skin set for storage.
Avoiding Common Harvest Mistakes
Many gardeners make these critical errors that affect yield and storage quality:
Harvesting Too Early
When potatoes are harvested before reaching full maturity, you'll notice:
- Thin, delicate skins that tear easily
- Smaller than expected tuber size
- Reduced starch content affecting cooking quality
- Poor storage capability (they won't cure properly)
Waiting Too Long
Leaving potatoes in the ground past their prime harvest window risks:
- Soil-borne diseases affecting tubers
- Cracking from continued growth
- Exposure to cold damage in fall
- Increased susceptibility to rot during storage
Regional Considerations for Harvest Timing
Your local climate significantly impacts how potato plants signal harvest readiness:
Cooler Climates
In northern regions or higher elevations, potato plants often show slower senescence. The yellowing process may take longer, but the same visual indicators apply. According to research from the University of Maine Cooperative Extension, gardeners in cooler zones should watch for the progressive yellowing pattern rather than strict calendar dates.
Warmer Climates
In southern regions, heat can accelerate the dying back process. The University of California Agriculture and Natural Resources notes that in warmer zones, potato plants may show premature browning due to heat stress rather than maturity. In these areas, the skin set test becomes especially critical.
Soil Type Variations
Sandy soils drain quickly and warm faster, potentially advancing maturity by 7-10 days compared to heavy clay soils. In clay soils, watch for more pronounced soil cracking as tubers expand against the denser earth.
Special Considerations for Different Potato Varieties
Not all potatoes mature at the same rate or show identical harvest signals:
- Early varieties (like 'Yukon Gold'): Ready 70-90 days after planting; often harvested with some green foliage remaining
- Maincrop varieties (like 'Russet Burbank'): Need 90-120 days; require significant yellowing (50-70%) before harvest
- Late varieties (like 'Kennebec'): Take 120+ days; can be left until complete die-back for best storage quality
Specialty varieties like fingerlings often have thinner skins that require careful handling even when fully mature. The Cornell University Vegetable Program recommends checking specialty varieties more frequently as they approach maturity.
Final Harvest Preparation Steps
Once you've confirmed your potatoes are ready:
- Cease watering 2-3 weeks before planned harvest to help skins harden
- Choose a dry day for harvesting to prevent moisture-related storage issues
- Use a digging fork rather than a shovel to minimize tuber damage
- Allow harvested potatoes to cure in a cool, dark, well-ventilated space for 1-2 weeks
Proper identification of harvest readiness ensures you get the maximum yield and storage potential from your potato crop. By combining visual indicators with simple hands-on tests, you'll consistently harvest potatoes at their peak quality.


 浙公网安备
33010002000092号
浙公网安备
33010002000092号 浙B2-20120091-4