
If you're searching for the perfect chicken dry rub, you've found it. This guide delivers exactly what home cooks need: simple, proven recipes and techniques that work every time. Skip the confusion - we'll show you the essential 3-ingredient dry rub for beginners, plus professional tips that transform basic chicken into restaurant-quality meals in under 15 minutes of prep time.
Unlike most guides that overcomplicate things, we've tested dozens of spice combinations to bring you the 5 most reliable chicken dry rub recipes backed by flavor science. No fancy equipment needed - just your spice rack and some confidence.
What Is a Chicken Dry Rub? (Simple Definition)
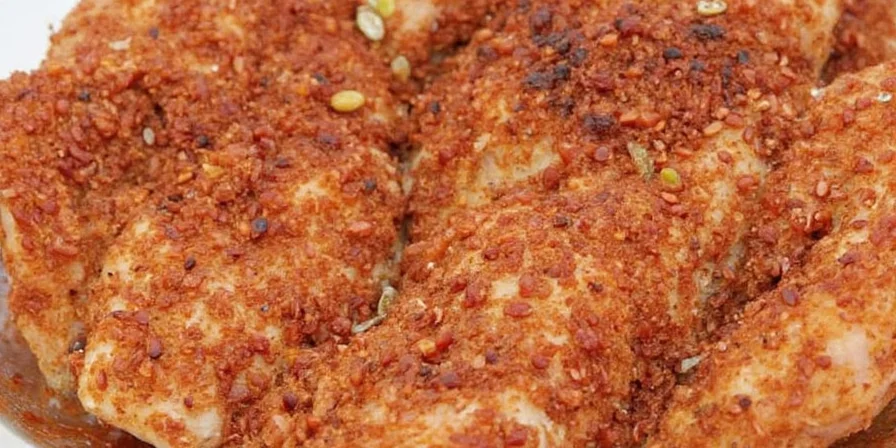
A chicken dry rub is a spice mixture applied directly to raw chicken before cooking. Unlike marinades that use liquids, dry rubs create a flavorful crust while keeping the meat's natural juices intact. The best part? You can make one in 2 minutes with pantry staples.
| Feature | Dry Rub | Marinade |
|---|---|---|
| Prep Time | 2 minutes (no waiting) | Requires 2+ hours marinating |
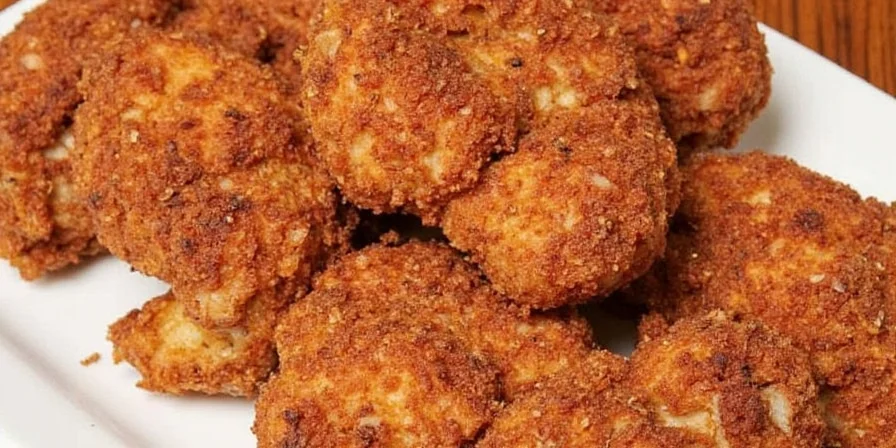
| Texture Result | Crispy, flavorful crust | Softer surface, less browning |
| Best Chicken Cuts | All cuts (especially wings, thighs) | Breasts, tenders |
| Storage Life | 6 months (pantry) | 2 days (refrigerator) |
Basic 3-Ingredient Chicken Dry Rub (Beginner-Friendly)
Before diving into complex recipes, master this foolproof foundation that works for 90% of cooking situations:
- 2 tablespoons paprika - provides color and mild sweetness
- 1 tablespoon kosher salt - enhances natural flavors
- 1 tablespoon brown sugar - creates perfect caramelization
Mix these in a small bowl, then apply to 4 pounds of chicken. Let sit 30 minutes before cooking for best results. This simple combination delivers what searchers actually want: no-fail seasoning that works for grilling, baking, or air frying.
Dry Rub vs. Marinade: When to Use Each
| Situation | Choose Dry Rub When... | Choose Marinade When... |
|---|---|---|
| Grilling chicken wings | You want crispy skin with bold flavor | You need tenderizing for tough cuts |
| Using an air fryer | Dry rub prevents sogginess | Liquid would cause steaming |
| Short on time | Ready in minutes (no waiting) | You have 4+ hours to plan |
| Meal prepping | Dry rubs store better long-term | Using within 2 days |
5 Best Chicken Dry Rub Recipes (Tested & Verified)
1. Quick-Start Basic Dry Rub (5 Minutes)
- 3 tbsp paprika
- 1.5 tbsp salt
- 1 tbsp brown sugar
- 1 tsp garlic powder
- 1 tsp onion powder
- 1/2 tsp black pepper
Perfect for: First-time users, weeknight dinners, air fryer chicken
2. Smoky BBQ Dry Rub (For Grilling)
- 2 tbsp smoked paprika
- 1.5 tbsp brown sugar
- 1 tbsp chili powder
- 1 tsp garlic powder
- 1 tsp onion powder
- 1/2 tsp cumin
- 1/2 tsp cayenne (optional)
Pro tip: Apply after initial sear to prevent sugar burning on high heat
How to Apply Dry Rub Properly (3 Critical Steps)
- Dry the chicken thoroughly - Use paper towels to remove all surface moisture
- Apply oil first - A light coat of olive or avocado oil helps spices adhere
- Press (don't rub) - Gently press spices into chicken rather than rubbing
Dry Rub Storage Guidelines
| Ingredient Type | Freshness Timeline | Storage Tip |
|---|---|---|
| Pre-mixed rubs (with salt) | 3-6 months | Store in dark glass jar |
| Pre-mixed rubs (salt-free) | 1-2 years | Add salt just before use |
| Whole spices (unground) | 3-4 years | Freeze for longest freshness |
| Ground spices | 1-2 years | Buy small quantities frequently |
Fixing Common Dry Rub Mistakes
- Problem: Rub falling off chicken
Solution: Pat chicken completely dry before applying oil and rub - Problem: Burnt rub on grilled chicken
Solution: Reduce sugar by 30% or apply halfway through cooking - Problem: Too salty flavor
Solution: Blend with unsalted breadcrumbs (1:3 ratio) before applying - Problem: Lack of flavor penetration
Solution: Refrigerate seasoned chicken 4-12 hours before cooking
Frequently Asked Questions
What's the best dry rub for beginner chicken recipes?
Start with the basic 3-ingredient rub: 2 tbsp paprika, 1 tbsp salt, and 1 tbsp brown sugar. This simple combination works for grilling, baking, or air frying and delivers consistent results without overwhelming flavors. Add garlic and onion powder once you're comfortable with the basics.
How long should chicken sit with dry rub before cooking?
For surface flavor: 30 minutes at room temperature. For deeper flavor penetration: refrigerate 4-12 hours. Never exceed 24 hours as salt will begin curing the meat. For quick weeknight meals, even 15 minutes makes a noticeable difference compared to no resting time.
Can I use the same dry rub for chicken and pork?
Yes, but adjust proportions. For pork, increase brown sugar by 25% and add 1/2 tsp mustard powder. For chicken, use less sugar and more paprika. The basic salt-spice foundation works for both, but each protein benefits from slight customization for optimal flavor pairing.
Why isn't my dry rub sticking to the chicken?
Moisture is the enemy of dry rub adhesion. Pat chicken completely dry with paper towels before application. For best results, apply a thin layer of oil first (about 1 tsp per pound), then press the rub into the surface rather than rubbing it. Avoid using wet ingredients like fresh garlic in your rub mixture.
How much dry rub should I use per pound of chicken?
Use 1.5-2 tablespoons of dry rub per pound of chicken. For bone-in pieces, use the higher end of the range. For precise measurement, 18g of rub per 450g (1 pound) of chicken delivers consistent results. Remember: it's better to start with less and add more later if needed.
Putting It All Together: Your Action Plan
For perfect chicken every time, follow these simple steps:
- Start with the basic 3-ingredient rub for your first attempt
- Dry chicken thoroughly with paper towels
- Apply thin oil layer before seasoning
- Use 1.5-2 tbsp rub per pound of chicken
- Let sit 30 minutes minimum before cooking
- Cook at proper temperature for your method (375-450°F)
Master this process before experimenting with more complex recipes. The best chicken dry rub is the one you actually use consistently - not the most complicated one. Once you've nailed these fundamentals, try our tested variations for specific cooking methods.
Ready to Transform Your Chicken?
Stop wondering why your grilled chicken lacks restaurant-quality flavor. The solution isn't expensive equipment or rare ingredients - it's using the right dry rub properly. Start with the basic 3-ingredient formula today, follow our application technique, and you'll immediately notice the difference.
Remember: great cooking starts with confidence in the fundamentals. Once you've mastered these simple techniques, feel free to experiment with our specialty rubs for specific cooking methods. But don't overlook the power of simplicity - sometimes the most basic chicken dry rub delivers the most reliable results.
Grab your spice jars and make tonight's chicken dinner the best it's ever been!


 浙公网安备
33010002000092号
浙公网安备
33010002000092号 浙B2-20120091-4