
Understanding Potato Slips: Your Foundation for Successful Cultivation
Many gardeners confuse potato slips with seed potatoes or sweet potato slips, but they represent a distinct propagation phase essential for maximizing your potato harvest. Unlike sweet potatoes (which grow from vine cuttings called slips), regular potato slips develop directly from the "eyes" of seed potatoes during the pre-sprouting process known as chitting.
These early sprouts give your potato plants a crucial head start, allowing them to establish root systems faster once planted. Research from Cornell University's College of Agriculture and Life Sciences shows that properly developed slips can advance harvest time by 10-14 days while improving overall tuber quality and disease resistance.

The Science Behind Successful Slip Development
Potato slips form through a natural biological process triggered when dormant tubers encounter optimal temperature and light conditions. During chitting, potatoes convert stored starches into energy that fuels sprout development. The ideal environment for slip formation includes:
- Temperature: 50-65°F (10-18°C) - cooler than room temperature
- Light: Bright, indirect sunlight for 12-16 hours daily
- Humidity: Moderate (40-60%) to prevent drying
- Duration: 2-4 weeks before planting
| Propagation Method | Time to Harvest | Yield Potential | Disease Resistance |
|---|---|---|---|
| Potato slips (chitted) | 90-110 days | High (up to 30% more) | Improved |
| Direct seed potatoes | 100-120 days | Moderate | Standard |
| Sweet potato slips | 90-150 days | Variable | Different profile |
Step-by-Step Guide to Growing Perfect Potato Slips
Follow this proven method to develop strong, healthy slips that will give your potato plants the best possible start:
1. Selecting and Preparing Seed Potatoes
Choose certified disease-free seed potatoes from reputable suppliers. Avoid using grocery store potatoes, which often contain sprout inhibitors. Place potatoes in a single layer in egg cartons or shallow trays with the "rose end" (the end with more eyes) facing up. This orientation encourages stronger sprout development.
2. The Chitting Process Timeline
Understanding the progression of slip development helps you determine optimal planting time:
- Days 1-7: Initial eye activation - small bumps appear at potato eyes
- Days 8-14: Sprout emergence - white to pale green shoots develop
- Days 15-21: Sprout strengthening - shoots turn vibrant green and thicken
- Days 22-28: Optimal planting stage - 1-2 inch sprouts with dark green color
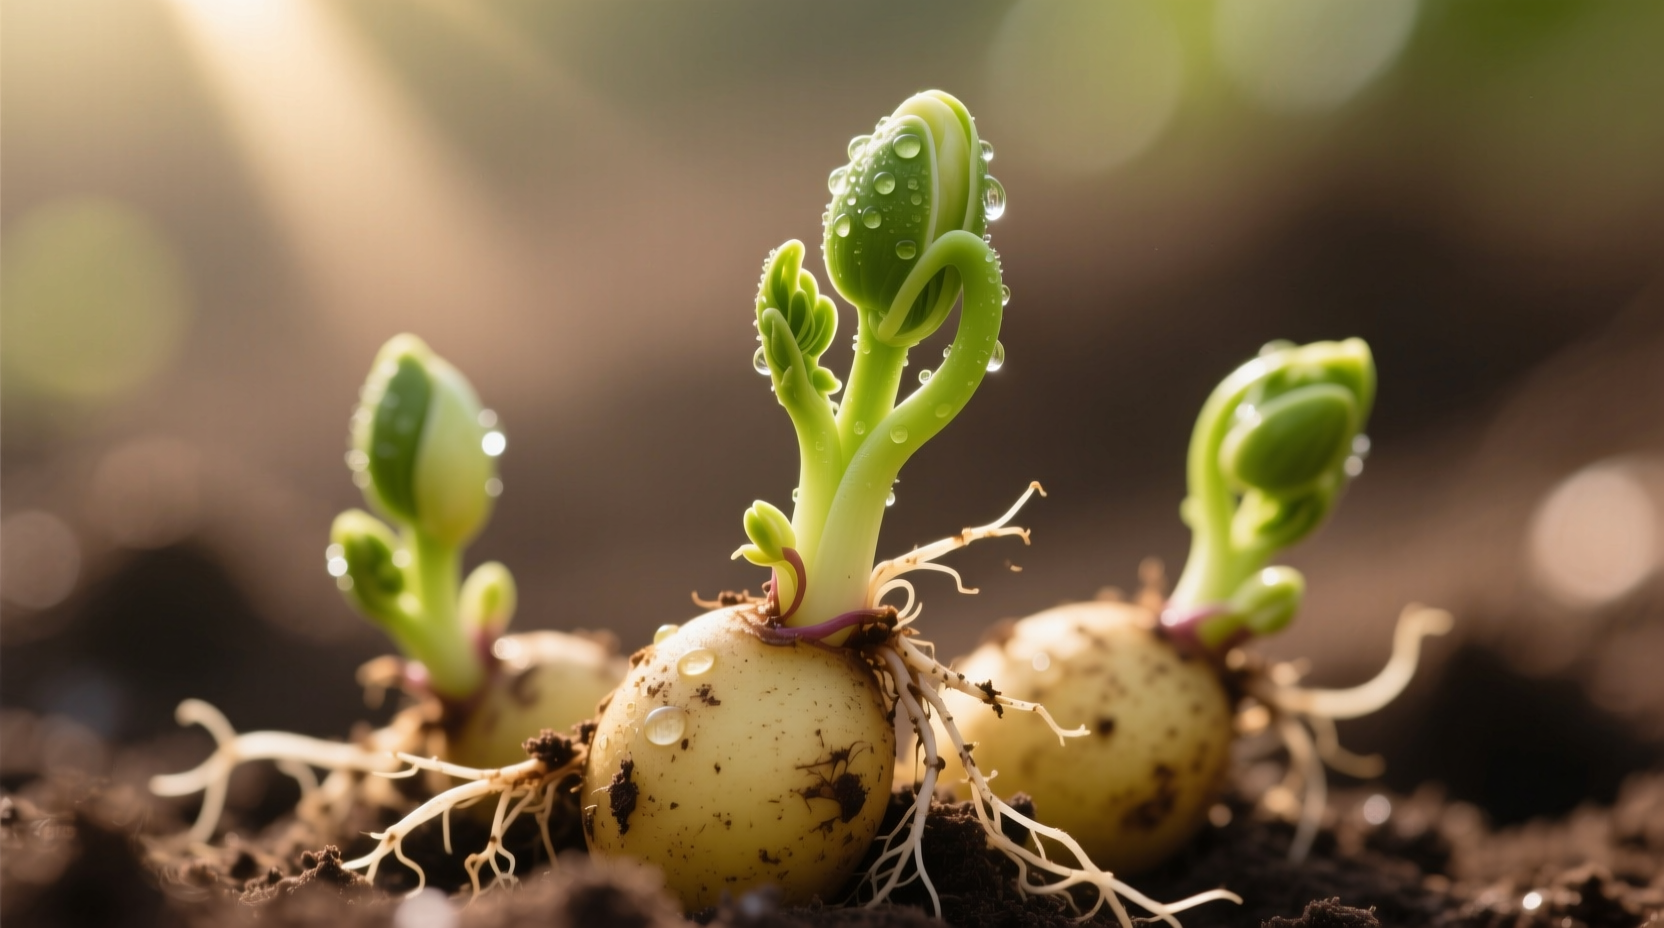
3. Recognizing Quality Slips
Healthy potato slips display specific characteristics that indicate readiness for planting:
- Rich green color (indicates chlorophyll development)
- Firm, sturdy texture (not thin or leggy)
- Length of 1-2 inches (longer sprouts may break during planting)
- Multiple sprouts per potato (3-5 strong sprouts ideal)
Avoid planting potatoes with weak, spindly sprouts or those showing signs of disease like dark spots or soft areas. The University of Minnesota Extension notes that properly developed slips significantly reduce the risk of common potato diseases including blackleg and soft rot.
Planting Your Potato Slips for Maximum Yield
The timing and technique of planting your slips dramatically affects your final harvest. Follow these science-backed recommendations:
When to Plant Potato Slips
Plant slips when:
- Soil temperature reaches at least 45°F (7°C) at planting depth
- Two weeks before your last expected frost date
- Morning soil feels cool but not cold to the touch
Planting too early in cold, wet soil causes rot, while planting too late misses the optimal growing window. The USDA Natural Resources Conservation Service recommends using soil thermometers for accurate planting decisions rather than relying solely on calendar dates.
Proper Planting Technique
Handle slips carefully to avoid damaging the delicate sprouts:
- Dig trenches 4-6 inches deep with loose soil at the bottom
- Place seed potatoes with developed slips spaced 12-15 inches apart
- Position potatoes with slips facing upward
- Cover with 3-4 inches of soil initially (add more as plants grow)
- Water gently but thoroughly after planting
Troubleshooting Common Potato Slip Problems
Even with careful preparation, gardeners sometimes encounter issues with their potato slips. Here's how to address the most frequent challenges:
Leggy or Weak Slips
Symptoms: Long, thin, pale sprouts that appear fragile
Cause: Insufficient light during chitting
Solution: Move potatoes to brighter location; consider using grow lights for 12 hours daily
Rotting Seed Potatoes
Symptoms: Soft, mushy areas with unpleasant odor
Cause: Excessive moisture during chitting
Solution: Ensure proper air circulation; use egg cartons instead of trays that hold moisture
Late-Season Planting Challenges
When planting later than ideal, adjust your approach:
- Reduce chitting time to 10-14 days
- Plant deeper (6-8 inches) to access cooler soil
- Choose early-maturing potato varieties
- Provide consistent moisture to compensate for warmer temperatures
Remember that potato slips represent just the beginning of your cultivation journey. Proper hilling, watering, and pest management after planting remain crucial for a successful harvest. The Royal Horticultural Society emphasizes that while slips give plants a strong start, ongoing care determines final yield quality.


 浙公网安备
33010002000092号
浙公网安备
33010002000092号 浙B2-20120091-4