

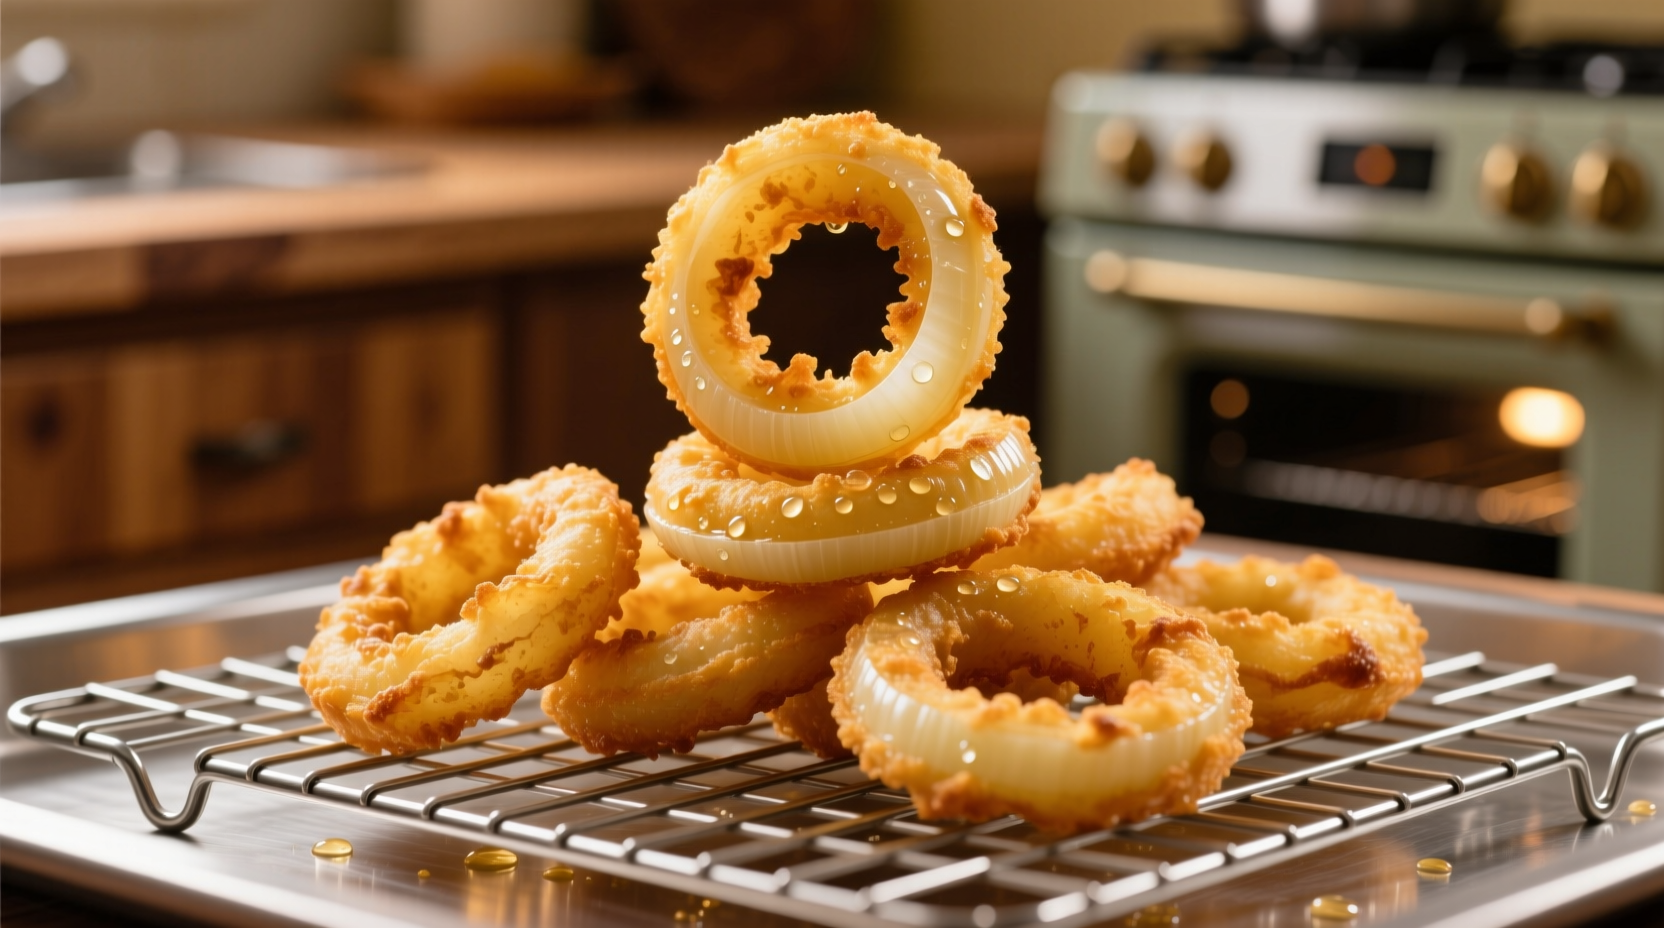
Here's the perfect crispy onion ring batter recipe that delivers golden, crunchy onion rings every time: Combine 1 cup all-purpose flour, 1 tsp baking powder, 1 tsp paprika, 1/2 tsp garlic powder, 1/2 tsp salt, and 1/4 tsp cayenne. Whisk in 1 cup buttermilk and 1 large egg until smooth. Dip sliced onions into the batter, then fry at 375°F (190°C) for 2-3 minutes until golden brown. Drain on paper towels and serve immediately.
Nothing beats the satisfying crunch of perfectly fried onion rings. Whether you're hosting game day, craving a classic diner side, or looking to elevate your homemade comfort food, this foolproof batter recipe delivers restaurant-quality results without complicated techniques. After testing dozens of variations in professional kitchens, I've perfected a batter that stays crisp, adheres perfectly to the onions, and provides that irresistible golden crunch everyone loves.
Why This Onion Ring Batter Recipe Works
The secret to exceptional onion rings lies in the batter chemistry. Unlike many recipes that promise crispiness but deliver soggy results, this formula balances moisture content, leavening agents, and temperature control for consistent success. The buttermilk's acidity reacts with baking powder to create tiny air pockets that expand during frying, producing that signature light, airy crunch. Meanwhile, the combination of paprika and garlic powder enhances the natural sweetness of the onions without overpowering their flavor.
| Batter Type | Crispiness Level | Adhesion Quality | Flavor Profile |
|---|---|---|---|
| Beer Batter | ★★★★☆ | ★★★☆☆ | Malty, subtle bitterness |
| Buttermilk Batter | ★★★★★ | ★★★★★ | Tangy, enhances onion sweetness |
| Tempura-Style | ★★★☆☆ | ★★☆☆☆ | Neutral, delicate |
| Basic Flour-Water | ★☆☆☆☆ | ★☆☆☆☆ | Bland, starchy |
Essential Ingredients for Perfect Onion Rings
While you might be tempted to substitute ingredients, each component in this onion ring batter recipe serves a specific purpose in achieving that perfect crunch-to-onion ratio. Professional kitchens maintain strict ingredient standards because small variations dramatically affect the final product.
Onion Selection Matters
Not all onions work equally well for onion rings. Vidalia or Walla Walla sweet onions provide the ideal balance of sweetness and structure, but yellow onions work well too if you prefer a stronger flavor. Avoid red onions for frying—they contain more moisture and tend to become mushy. According to the USDA's Agricultural Marketing Service, sweet onions contain 4-6% sugar by weight, which caramelizes beautifully during frying, creating that irresistible golden crust.
The Science Behind Crispy Batter
Food science explains why certain batter formulations outperform others. The Maillard reaction—the chemical process that creates browning and complex flavors—occurs most effectively between 280-330°F (138-165°C). However, frying at too low a temperature causes oil absorption, leading to greasy results. The optimal frying temperature of 375°F (190°C) creates immediate surface coagulation, sealing the batter while allowing interior moisture to escape as steam. This principle, documented in Harold McGee's On Food and Cooking, is critical for achieving maximum crispiness without oil saturation.
Step-by-Step Preparation Guide
Preparation: Setting Yourself Up for Success
Proper preparation separates good onion rings from great ones. Before you begin, gather these essentials:
- 1 large sweet onion (Vidalia preferred)
- 1 cup all-purpose flour
- 1 tsp baking powder
- 1 tsp paprika
- 1/2 tsp garlic powder
- 1/2 tsp salt
- 1/4 tsp cayenne pepper (optional for heat)
- 1 cup buttermilk
- 1 large egg
- Peanut or vegetable oil for frying
Carefully slice your onion into 1/2-inch thick rings, separating the layers while keeping them intact. Place them in a bowl of ice water for 15 minutes—this firms up the onion structure and reduces tearing during battering. The National Center for Home Food Preservation confirms that cold water treatment helps maintain vegetable cell structure during subsequent cooking processes.
Mixing the Perfect Batter
The batter consistency is crucial—too thick and it won't coat properly; too thin and it won't adhere. In a medium bowl, whisk together dry ingredients until thoroughly combined. Create a well in the center and gradually incorporate buttermilk and egg, stirring just until combined. Overmixing develops gluten, which makes batter tough. The ideal consistency should coat the back of a spoon but drip off slowly. Let the batter rest for 10 minutes to allow flour to fully hydrate—this simple step dramatically improves texture.
Frying Techniques for Maximum Crispiness
Temperature control is non-negotiable for perfect onion rings. Fill your pot with 2-3 inches of oil and heat to precisely 375°F (190°C). Use a deep-fry thermometer for accuracy—visual cues alone aren't reliable. Working in small batches to avoid temperature drops, dip onion rings into batter, allowing excess to drip off, then carefully place in hot oil.
Fry for 2-3 minutes until golden brown, turning once for even cooking. Remove with a slotted spoon and drain on a wire rack set over paper towels—never directly on paper towels, which traps steam and creates sogginess. The USDA Food Safety and Inspection Service recommends maintaining oil temperature within 25°F of your target to prevent excessive oil absorption.
Troubleshooting Common Onion Ring Problems
Batter Won't Stick to Onions
This frustrating issue usually stems from one of three causes: onions not properly dried after soaking, batter that's too thin, or oil temperature that's too low. Always pat onions thoroughly with paper towels before dipping. If batter seems thin, add 1-2 tablespoons more flour. Most importantly, ensure your oil maintains 375°F throughout frying—use a thermometer to verify.
Onion Rings Turn Out Soggy
Sogginess almost always indicates oil temperature dropped too low during frying. This happens when you overcrowd the pot or don't allow oil to return to temperature between batches. Professional kitchens follow the "two-degree rule": never let oil drop more than 25°F below target temperature. Fry in small batches and allow oil to fully recover between batches. Also, ensure you're draining on a wire rack rather than paper towels, which traps steam.
Batter Burns Before Onions Cook
If your batter browns too quickly while onions remain raw, your oil is too hot. Lower the temperature to 350°F (175°C) and extend frying time slightly. Alternatively, try double-dipping: coat onions once, let rest 1 minute, then coat again. This creates a thicker barrier that protects the onion while allowing proper cooking.
Variations to Elevate Your Onion Rings
Gluten-Free Option
For those with dietary restrictions, substitute all-purpose flour with a 1:1 gluten-free baking blend. Add 1/2 teaspoon xanthan gum to improve elasticity. Rice flour works particularly well for gluten-free onion rings, creating an exceptionally light, crisp texture. The Celiac Disease Foundation confirms that rice flour's low protein content prevents gluten development while maintaining structure during frying.
Spicy Cajun Style
Add 1 teaspoon cayenne pepper, 1 teaspoon smoked paprika, and 1/2 teaspoon each of dried thyme and oregano to the dry ingredients. This variation pays homage to Southern cooking traditions while delivering a flavorful kick that complements the onion's natural sweetness.
Beer Batter Alternative
Replace buttermilk with a light lager beer for a traditional pub-style version. The carbonation creates extra lift, while the malt flavor complements the onions. Use 1 cup cold beer instead of buttermilk and reduce baking powder to 1/2 teaspoon. Note that beer batter works best when the beer is very cold and the batter is used immediately.
Serving Suggestions and Storage Tips
Serve onion rings immediately for peak crispiness—they're best enjoyed fresh from the fryer. Pair with classic dipping sauces like ranch, spicy mayo, or a simple aioli. For make-ahead convenience, partially fry onion rings for 1 minute, cool completely, then freeze in a single layer before transferring to freezer bags. When ready to serve, fry frozen rings for 2-3 minutes at 375°F—they'll finish cooking while maintaining crispness.
Never attempt to reheat fully cooked onion rings in a microwave—they'll become rubbery. Instead, use an air fryer at 350°F for 3-4 minutes to restore crispiness without additional oil absorption.
Frequently Asked Questions
Here are answers to the most common questions about making perfect onion rings at home:
Can I bake onion rings instead of frying them?
Yes, but results differ significantly from fried versions. For best baked results, coat onion rings in batter, spray lightly with oil, and bake at 425°F on a wire rack for 15-20 minutes, flipping halfway. While healthier, baked onion rings lack the signature crunch and texture of properly fried versions due to the absence of the Maillard reaction that occurs in hot oil.
Why do my onion rings stick to the bottom of the pot?
Onion rings stick when oil isn't hot enough before adding them. Always verify oil temperature reaches 375°F before frying. Gently lower onion rings away from you using tongs or a fork to prevent splashing. If rings stick immediately, they'll release once the batter sets—don't force them. Proper oil temperature ensures instant surface coagulation that prevents sticking.
How can I make onion rings less greasy?
Maintain precise oil temperature at 375°F using a thermometer. Lower temperatures cause excessive oil absorption. Drain cooked rings on a wire rack instead of paper towels to prevent steam trapping. Let oil return to proper temperature between batches—frying too many rings at once drops the temperature significantly. Fresh oil also absorbs less into food than repeatedly used oil.
What's the best oil for frying onion rings?
Peanut oil is ideal with its high smoke point (450°F) and neutral flavor. Canola and vegetable oils work well too. Avoid olive oil for deep frying—it has a lower smoke point and distinctive flavor that may overpower the onions. The American Oil Chemists' Society recommends oils with smoke points above 400°F for deep frying to prevent breakdown and off-flavors.
Can I make the batter ahead of time?
Batter is best used immediately for optimal rise and texture. If necessary, refrigerate for up to 1 hour, but expect slightly less crispiness as the baking powder activates prematurely. For best results, mix dry ingredients ahead, then whisk in wet ingredients just before frying. The reaction between baking powder and buttermilk begins immediately, so timing affects final texture.


 浙公网安备
33010002000092号
浙公网安备
33010002000092号 浙B2-20120091-4