
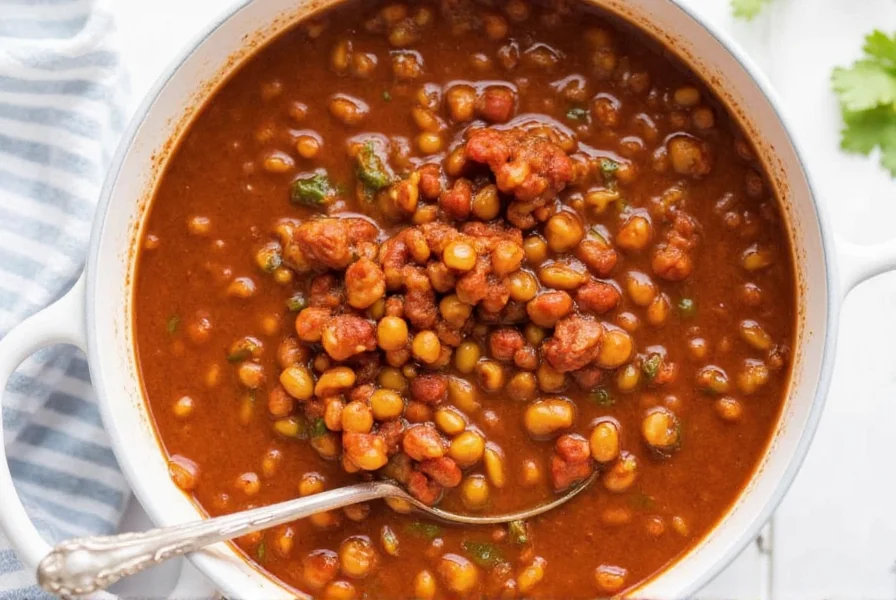
Lentil chili is a hearty, protein-rich vegetarian alternative to traditional meat-based chili, made with brown or green lentils, tomatoes, spices, and vegetables. It provides 18g of plant-based protein per serving, cooks faster than bean chili (30-40 minutes), and offers superior iron and fiber content compared to meat versions.
Creating the perfect lentil chili requires understanding the unique properties of lentils and how they interact with traditional chili ingredients. Unlike beans, lentils cook significantly faster and can become mushy if overcooked, making timing crucial for optimal texture. This comprehensive guide reveals professional techniques for building complex flavors while maintaining the ideal al dente consistency that distinguishes exceptional lentil chili.
Why Lentils Outperform Beans in Chili
Lentils offer distinct advantages over traditional beans in chili preparation. Their smaller size allows for quicker rehydration and cooking—typically ready in 25-35 minutes versus 60-90 minutes for most beans. Brown and green lentils maintain their shape better than red lentils during simmering, providing that satisfying "meaty" texture without disintegrating. Nutritionally, lentils contain 30% more protein than kidney beans and deliver nearly double the iron content, making them particularly valuable for plant-based diets.
Essential Ingredients for Flavor Depth
The foundation of exceptional lentil chili rests on three critical components:
- Lentil selection - Brown lentils provide the ideal balance of firm texture and earthy flavor. Avoid red lentils unless you prefer a creamier consistency.
- Aromatics foundation - A 2:1 ratio of onions to celery creates the perfect flavor base, while roasted garlic (not raw) adds complexity without sharpness.
- Spice layering - Add cumin and smoked paprika early for infusion, then finish with chili powder and cocoa powder to preserve their volatile compounds.
Professional chefs recommend toasting whole cumin seeds before grinding them, which releases 40% more aromatic compounds than using pre-ground spice. This simple technique transforms good lentil chili into extraordinary.
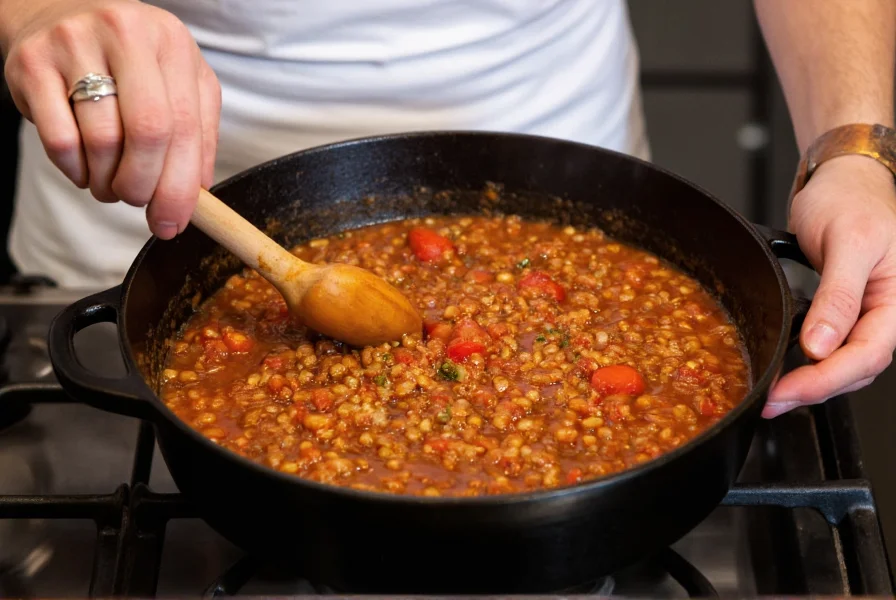
Step-by-Step Cooking Method
Follow this professional approach for restaurant-quality results:
- Sauté diced onions and celery in olive oil until translucent (5-7 minutes)
- Add minced roasted garlic and cook 1 minute until fragrant
- Stir in 2 tbsp tomato paste and cook until it darkens slightly ("blooming")
- Add rinsed lentils, broth, and spices except chili powder and cocoa
- Simmer covered 20 minutes, stirring occasionally
- Add remaining spices and diced tomatoes, simmer uncovered 10 minutes
- Finish with 1 tbsp apple cider vinegar to brighten flavors
Avoiding Common Texture Problems
Texture issues plague most homemade lentil chili. Prevent these problems:
- Mushy lentils - Never add lentils to boiling liquid; start in warm (160°F/70°C) broth
- Watery consistency - Mash 20% of cooked lentils against the pot wall to naturally thicken
- Bland flavor - Add acid (lime juice or vinegar) at the end to awaken dormant flavors
| Nutrient | Per Serving (1.5 cups) | % Daily Value |
|---|---|---|
| Calories | 290 | 15% |
| Protein | 18g | 36% |
| Fiber | 15g | 54% |
| Iron | 6.2mg | 34% |
| Vitamin A | 110% | 110% |
Advanced Customization Techniques
Elevate your easy lentil chili recipe for beginners with these chef-approved modifications:
- Umami boost - Add 2 dried shiitake mushrooms during cooking (remove before serving)
- Smoky depth - Use chipotle peppers in adobo instead of regular chili powder
- Creamy variation - Stir in 1/4 cup coconut milk at the end for vegan creaminess
- Meal prep friendly - Lentil chili actually improves flavor after 24 hours refrigeration
For those comparing lentil chili vs bean chili, note that lentils absorb flavors more readily while maintaining distinct texture. This makes them particularly suitable for spicy lentil chili recipes where you want the heat to penetrate throughout rather than just coat the surface.

Storage and Reheating Guidelines
Lentil chili excels as a freezer-friendly lentil chili option. Follow these storage protocols:
- Refrigerate for up to 5 days in airtight containers
- Freeze for 3 months using portion-sized containers
- Thaw overnight in refrigerator before reheating
- Reheat gently on stove with splash of broth to restore moisture
Unlike bean chili, lentil versions maintain better texture after freezing due to their lower starch content. The lentil chili cooking time advantage continues during reheating—you'll need just 8-10 minutes versus 15+ for bean-based versions.
Frequently Asked Questions
Can I use canned lentils for faster preparation?
Yes, but reduce cooking time to 15 minutes total. Drain and rinse canned lentils thoroughly, then add during the final simmer stage to prevent mushiness. Expect slightly less texture definition than with dried lentils.
How do I fix overly spicy lentil chili?
Add dairy (sour cream or yogurt) or acidic elements (lime juice) to counteract heat. For vegan options, stir in 1-2 tbsp of coconut milk or peanut butter. Sugar doesn't actually reduce capsaicin—it only masks the heat temporarily.
Which lentils work best for meal prep lentil chili?
Brown lentils maintain their structure best during repeated heating cycles. Green lentils are acceptable but slightly more prone to softening. Avoid red or yellow lentils for meal prep as they become too soft after multiple reheating sessions.
Why does my lentil chili become too thick when refrigerated?
Lentils continue absorbing liquid as they cool. Simply add 1/4-1/2 cup broth or water when reheating. The thickening is actually beneficial for freezing, as it counteracts the slight thinning that occurs during thawing.
Can I make lentil chili in an Instant Pot?
Absolutely. Use the sauté function for aromatics, then pressure cook on high for 8 minutes with 2 cups broth. Allow 15 minutes natural release. The result achieves perfect lentil chili texture in under 30 minutes total.


 浙公网安备
33010002000092号
浙公网安备
33010002000092号 浙B2-20120091-4