
Discover the exact steps professional gardeners use to grow vigorous tomato plants from seeds. Whether you're a beginner or looking to improve your success rate, this guide delivers actionable techniques backed by horticultural science. You'll learn optimal timing based on your climate zone, avoid common mistakes that cause leggy seedlings, and produce robust plants ready for garden transplantation.
When to Start Tomato Seeds: Timing Is Everything
Begin your tomato seeds indoors 6-8 weeks before your area's last expected spring frost. This timing ensures seedlings reach the ideal size (6-8 inches tall with 3-4 true leaves) when outdoor conditions become favorable. Starting too early creates leggy plants that struggle after transplanting, while late starts reduce your harvest window.
| USDA Hardiness Zone | Last Frost Date | Seed Starting Date | Transplant Date |
|---|---|---|---|
| 3-4 | May 15-30 | March 20-April 5 | June 1-15 |
| 5-6 | May 1-15 | March 5-20 | May 15-30 |
| 7-8 | April 15-30 | February 20-March 5 | May 1-15 |
| 9-10 | March 15-30 | January 20-February 5 | April 1-15 |
This planting timeline, verified by University of Minnesota Extension, accounts for regional climate variations. Gardeners in warmer zones can start earlier but must provide adequate light to prevent stretching. Northern gardeners should consider using supplemental lighting even during recommended windows.
Essential Materials for Success
Don't waste time with improper equipment. Professional growers use these specific items:
- Sterile seed starting mix - Never use garden soil which compacts and harbors diseases
- Containers with drainage - 3-4 inch cells or biodegradable pots work best
- Heat mat - Maintains consistent 75°F soil temperature for faster germination
- Full-spectrum grow lights - Positioned 2-4 inches above seedlings for 14-16 hours daily
- Moisture dome - Creates humidity during germination phase
According to Cornell University's Home Gardening Guide, using pasteurized seed starting mix reduces damping-off disease by 73% compared to regular potting soil. This critical detail separates successful growers from those battling fungal issues.
Step-by-Step Seed Starting Process
Follow this professional sequence for optimal results:
- Prepare containers - Fill cells within 1 inch of top with moistened seed mix
- Sow seeds - Place 2 seeds 1/4 inch deep per cell, cover lightly with mix
- Water gently - Use spray bottle to avoid displacing seeds
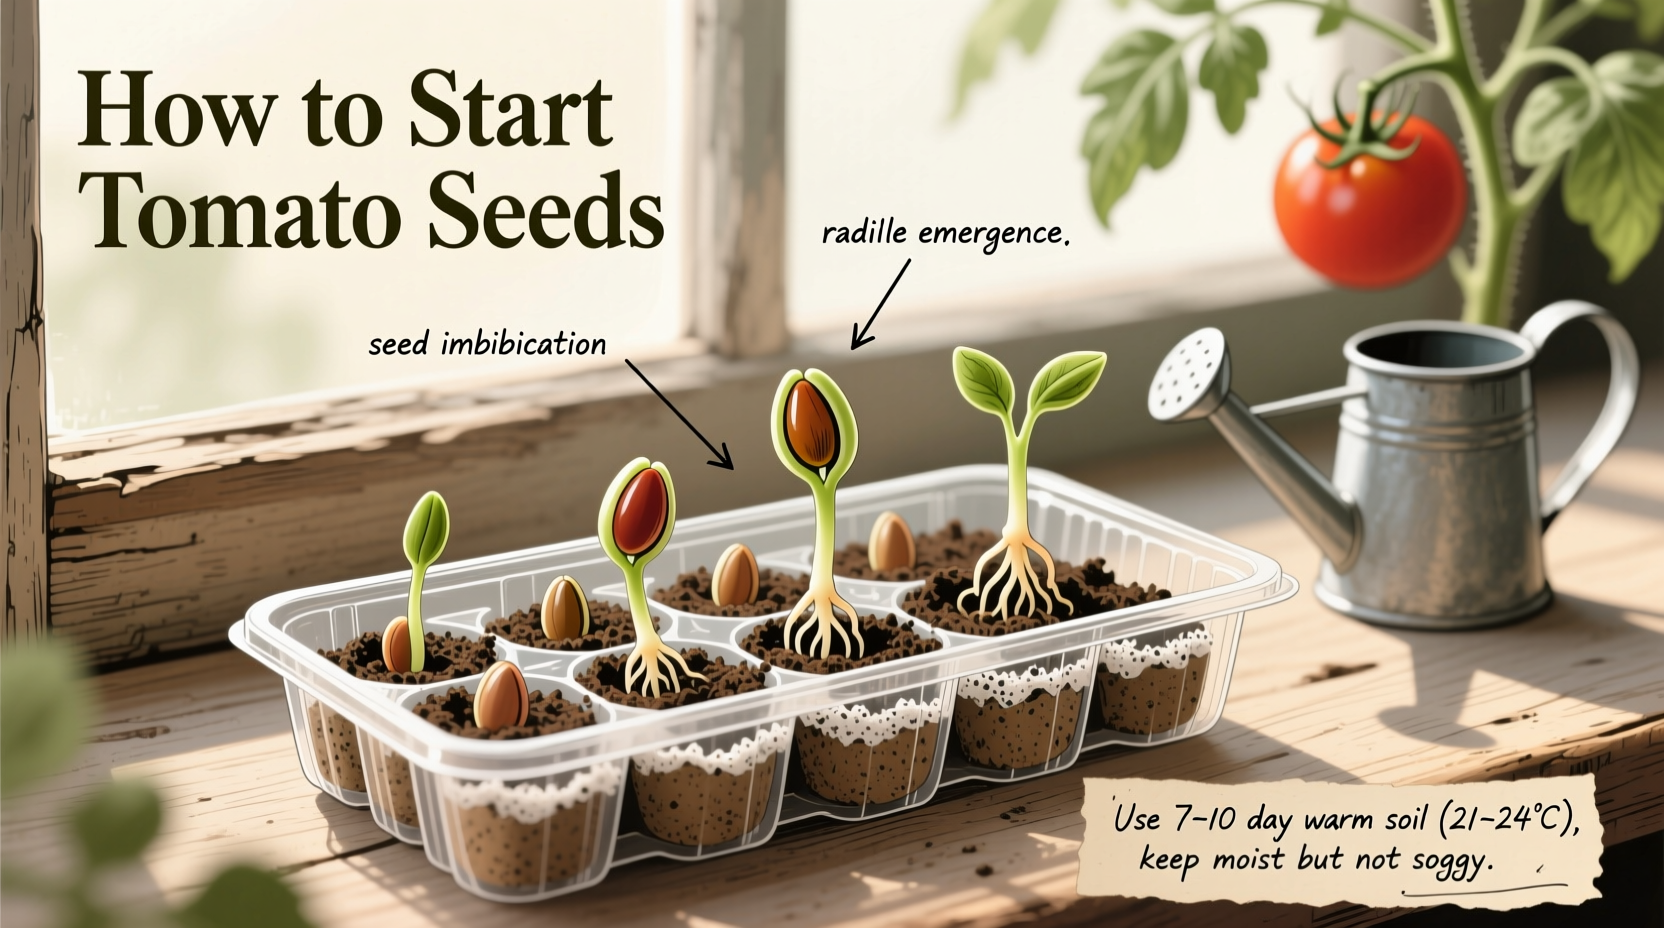
- Cover and warm - Place on heat mat with dome until sprouts appear (5-10 days)
- Provide light - Move to grow lights immediately after sprouting
- Thin seedlings - Keep strongest plant per cell when first true leaves develop
Caring for Seedlings: Avoiding Common Mistakes
Most tomato seed starting failures happen during the seedling stage. Prevent these critical errors:
Watering Techniques That Prevent Disease
Water from below by placing trays in shallow water rather than overhead watering. This prevents damping-off disease while encouraging deeper root growth. Allow soil to dry slightly between waterings - constantly wet soil creates perfect conditions for fungal pathogens. The Oregon State University Extension confirms that bottom-watering reduces seedling mortality by 40% compared to top watering.
Light Requirements for Stocky Plants
Insufficient light causes leggy, weak plants. Provide 14-16 hours of full-spectrum light daily, keeping bulbs 2-4 inches above foliage. Rotate trays daily if using stationary lights. As seedlings grow, raise the light source to maintain proper distance. This prevents stretching while developing strong stems capable of supporting fruit.
| Problem | Early Sign | Solution | Prevention |
|---|---|---|---|
| Leggy seedlings | Thin, tall stems with sparse leaves | Bury deeper when transplanting | Increase light intensity/duration |
| Damping-off | Stems collapse at soil line | Remove affected plants immediately | Sterile mix, bottom watering, airflow |
| Yellow leaves | Lower leaves turn yellow | Apply diluted liquid fertilizer | Start feeding at 2-3 week intervals |
| Slow growth | No new leaves for 7+ days | Check soil temperature | Maintain 70-80°F with heat mat |
Hardening Off: The Critical Transition
Skipping this step causes transplant shock that sets back growth by 2-3 weeks. Begin hardening off 7-10 days before planting outdoors:
- Start with 1-2 hours of morning sun in a sheltered location
- Gradually increase exposure by 1-2 hours daily
- Expose to gentle wind by placing in breezy area
- Bring indoors if temperatures drop below 45°F
- After 7 days, leave outside overnight if no frost expected
The USDA's Agricultural Research Service confirms that properly hardened seedlings establish 50% faster and produce earlier fruit than non-hardened plants. This simple process strengthens cell walls and prepares plants for outdoor conditions.
Transplanting to Your Garden
Plant tomatoes deeper than their container depth - burying up to the first set of true leaves encourages additional root growth along the stem. Space plants 24-36 inches apart in rows 3-4 feet apart. Water thoroughly after planting and apply 2-3 inches of organic mulch to conserve moisture. Avoid fertilizing at transplant time, which can burn tender roots.
For best results, plant on cloudy days or in the evening to reduce transplant shock. The University of Illinois Extension reports that tomatoes planted during cooler parts of the day establish 30% faster with less wilting.
Maximizing Your Harvest
Continue monitoring soil moisture as plants establish. Begin regular fertilization 2 weeks after transplanting using balanced organic fertilizer. Remove suckers on indeterminate varieties to direct energy toward fruit production. Consistent watering prevents blossom end rot, a common calcium deficiency issue.
By following these science-backed techniques, you'll transform your tomato seed starting from hit-or-miss to consistently successful. The extra attention during these early stages pays dividends throughout the growing season with healthier plants and higher yields.


 浙公网安备
33010002000092号
浙公网安备
33010002000092号 浙B2-20120091-4