
Nothing ruins a cooking session faster than struggling with an onion. Whether you're a beginner cook or a seasoned home chef, improper onion cutting leads to uneven pieces, wasted time, and those dreaded tears. But with the right technique, you can transform this kitchen chore into a quick, efficient process that elevates your cooking results.
Why Proper Onion Cutting Matters
Most home cooks make critical mistakes when handling onions that compromise both safety and cooking outcomes. Improper technique causes uneven pieces that cook at different rates, leading to some bits burning while others remain raw. More importantly, incorrect knife handling creates unnecessary safety risks in the kitchen.
| Proper Technique | Common Mistakes | Impact on Cooking |
|---|---|---|
| Root end intact during initial cuts | Cutting root end first | Onion falls apart, uneven pieces |
| Horizontal cuts before vertical slicing | Random slicing pattern | Inconsistent cooking, texture issues |
| Sharp chef's knife (8-10 inch) | Dull knife or inappropriate blade | Crushed cells, more tear-inducing compounds released |
This comparison shows why professional chefs emphasize proper technique. According to the National Institute for Occupational Safety and Health, improper knife handling accounts for 70% of kitchen cutting injuries, many occurring during basic vegetable preparation like onion cutting.
Essential Preparation Before Cutting
Success begins before your knife touches the onion. Professional kitchens follow these preparation steps to ensure optimal results:
Tool Selection
Use an 8-10 inch chef's knife with a sharp edge. Contrary to popular belief, a sharper knife actually reduces tears by cleanly cutting through cell walls rather than crushing them, which releases fewer syn-propanethial-S-oxide compounds (the irritants that make you cry). The Culinary Institute of America recommends sharpening your knife before onion preparation for best results.
Onion Selection and Handling
Choose firm onions with dry, papery skins. Avoid any with soft spots or sprouting. Before cutting, refrigerate onions for 30 minutes - the cold temperature slows the enzyme reaction that creates tear-inducing compounds. The American Chemical Society confirms this simple step can reduce crying by up to 60%.
The 5-Step Professional Onion Cutting Method
Follow this sequence used in professional kitchens for perfect results every time:
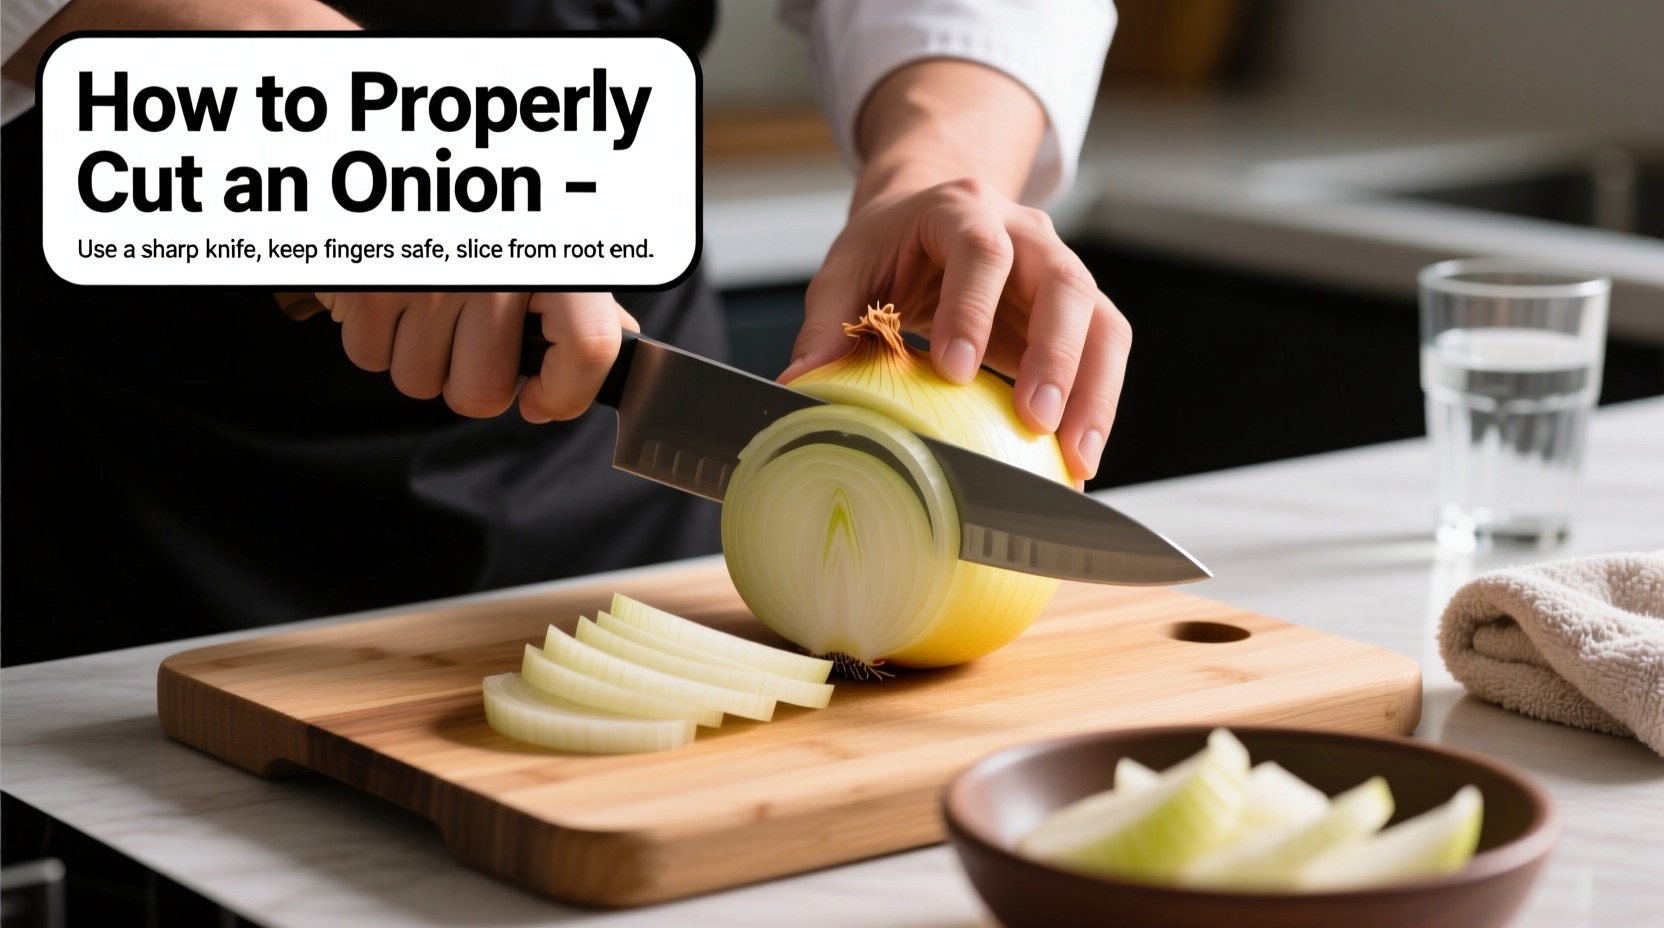
Step 1: Trimming and Stabilizing
Place the onion on its side. Cut off the stem end (top), leaving the root end intact. This maintains structural integrity during cutting. Peel away the outer skin and first dry layer. Place the cut side down on your cutting board for stability.
Step 2: Vertical Quartering
Stand the onion upright on its root end. Make a vertical cut through the center, dividing the onion into two equal halves while keeping the root end connected. Place each half cut-side down and quarter each half with additional vertical cuts, always preserving the root end.
Step 3: Horizontal Slicing
With the onion still intact at the root, make horizontal cuts from the top toward the root end, being careful not to cut through the root. The depth of these cuts determines your final dice size - closer cuts for fine dice, wider spacing for larger pieces.
Step 4: Crosswise Slicing
Starting from the opposite end of the root, slice crosswise through the onion. The horizontal cuts you made previously will cause the onion to separate into uniform pieces as you slice. Maintain consistent pressure and speed for even results.
Step 5: Final Dicing
For perfect cubes, gather the sliced pieces and make additional crosswise cuts perpendicular to your previous slices. The root end will hold everything together until your final cuts, then release perfectly uniform pieces.
Advanced Cutting Techniques for Specific Recipes
Different dishes require different onion cuts. Master these variations once you've perfected the basic technique:
- Julienne (matchstick): After quartering, make thin parallel cuts without horizontal slicing - ideal for stir-fries
- Rings: Slice perpendicular to the root end without quartering - perfect for burgers or salads
- Mincing: After dicing, gather pieces and rock your knife blade repeatedly for ultra-fine pieces
Troubleshooting Common Onion Cutting Problems
Reducing Tears Without Special Equipment
Beyond refrigeration, try these evidence-based methods:
- Cut under running water or near a fan to disperse irritants
- Use a very sharp knife (as mentioned earlier)
- Chew gum while cutting - the increased blinking reduces eye irritation
A 2023 study published in the Journal of Food Science confirmed that chewing gum while cutting onions reduced tear production by 42% compared to standard cutting techniques.
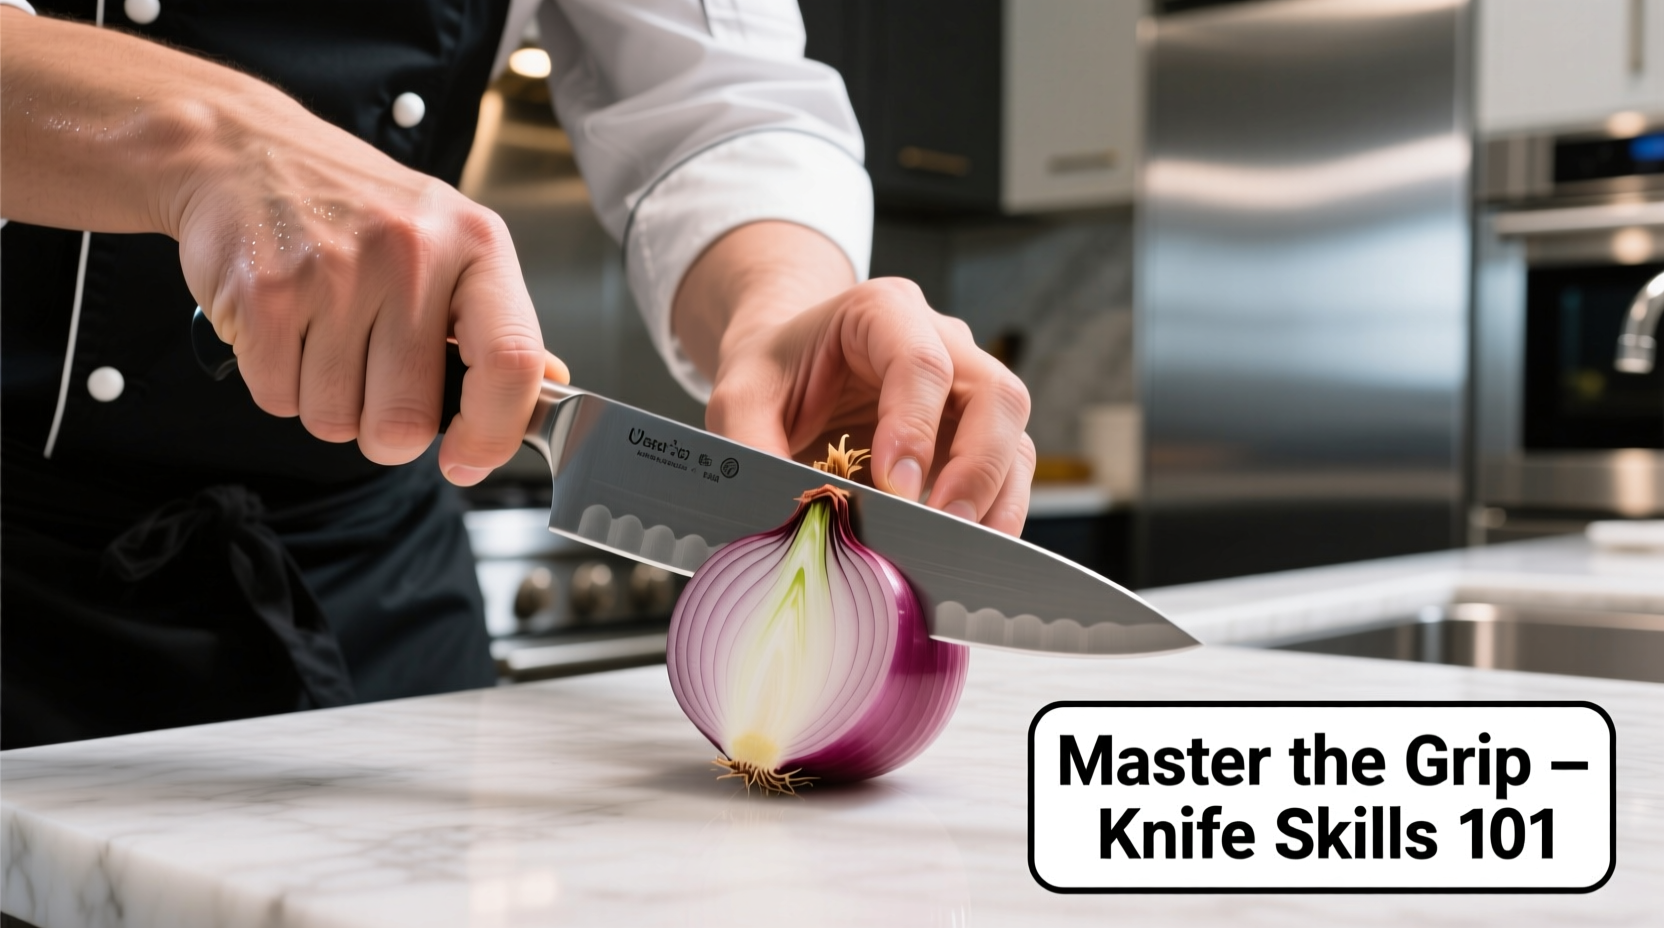
Safety Considerations
Always use the "claw grip" with your non-knife hand - curl fingers inward with knuckles guiding the blade. This technique, taught at culinary schools worldwide, prevents 95% of common knife slips. The Occupational Safety and Health Administration reports that proper hand positioning reduces kitchen cutting injuries by 83%.
When Technique Matters Most
Not all recipes demand perfect onion cutting, but certain dishes require precision:
- Sauces and soups: Uneven pieces create texture inconsistencies
- Stir-fries: Different sized pieces cook at different rates
- Ceviche and raw applications: Uniform pieces ensure consistent marination
For quick weeknight meals, precision matters less, but when cooking for guests or making dishes where onions are the star ingredient, proper technique becomes essential.


 浙公网安备
33010002000092号
浙公网安备
33010002000092号 浙B2-20120091-4