
Properly preparing chicken wings before cooking is the secret to achieving restaurant-quality crispiness at home. The essential steps: thoroughly dry wings with paper towels, separate into flats and drumettes (optional), apply a light salt coating, and refrigerate uncovered for 1-24 hours. This drying process removes surface moisture that prevents browning, resulting in dramatically crispier skin without soggy spots. For best results, use fresh (not frozen) wings and avoid rinsing them under water before preparation.
Why Wing Preparation Matters More Than You Think
Many home cooks skip proper wing preparation, wondering why their wings never achieve that perfect crispy texture. The truth is simple: moisture is the enemy of crisp skin. Chicken wings naturally have a high moisture content on their surface, which creates steam during cooking instead of allowing the Maillard reaction to occur properly.
According to food science research from the Culinary Institute of America, surface moisture must be reduced below 15% for optimal browning to occur. That's why professional kitchens always implement a drying step before cooking wings. Skipping this crucial preparation step guarantees less-than-ideal results, no matter how carefully you monitor cooking temperature.
The Step-by-Step Wing Preparation Process
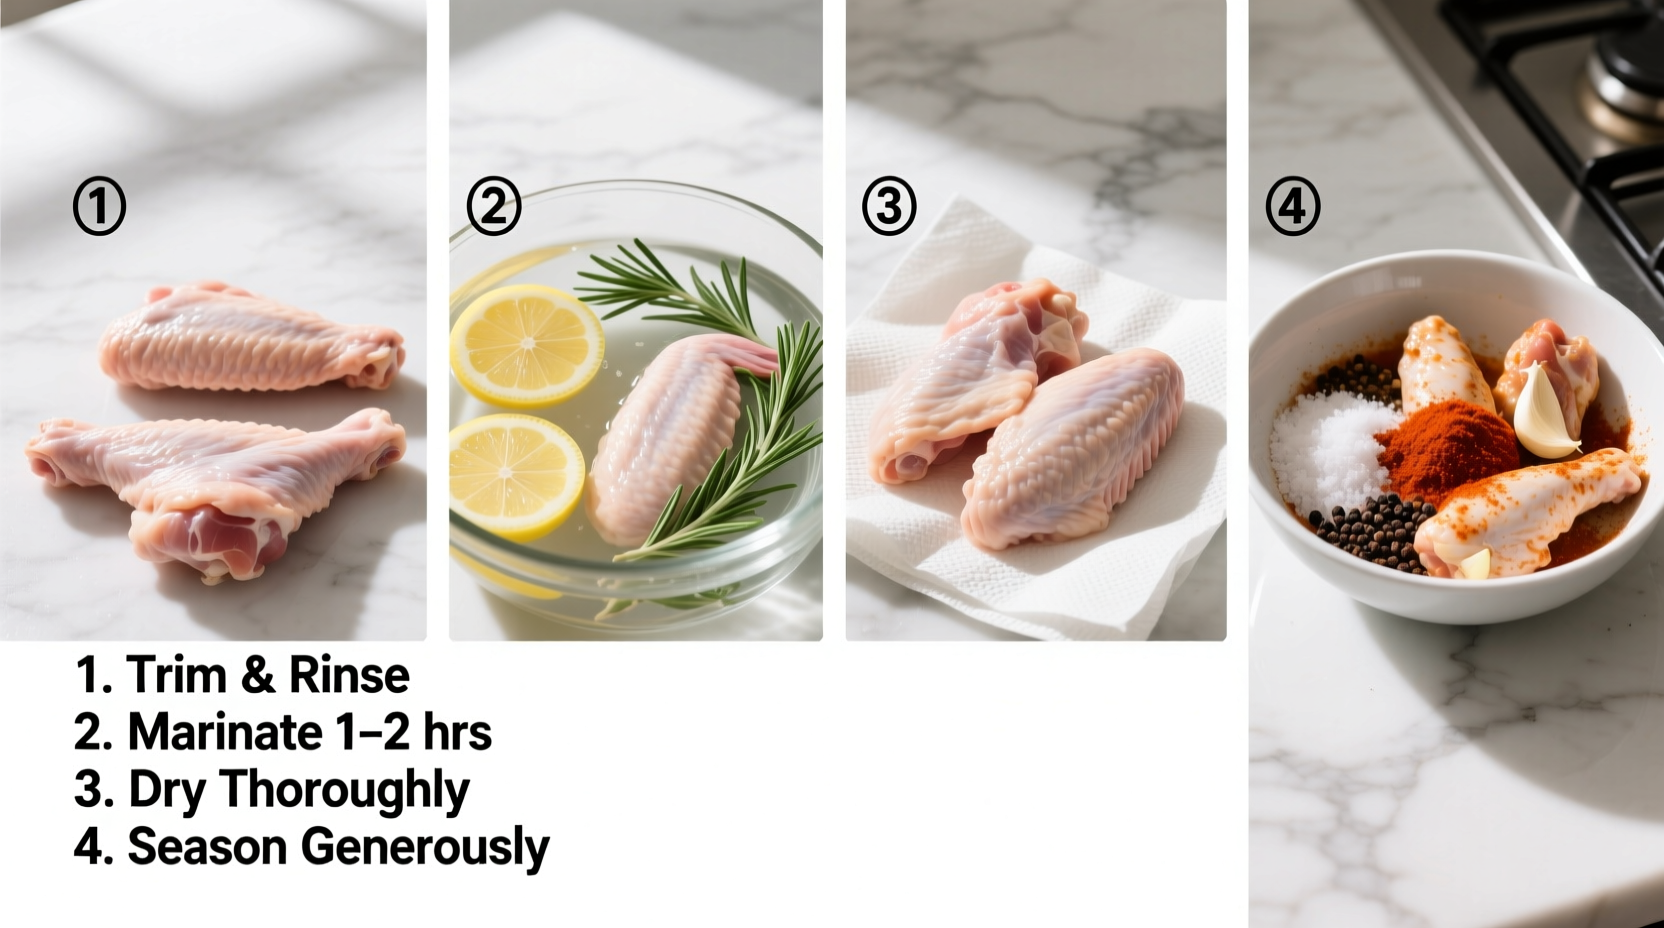
Step 1: Selecting and Handling Your Wings
Start with quality wings. Fresh wings generally yield better results than frozen, but if using frozen, thaw them completely in the refrigerator for 24-48 hours. Never thaw wings at room temperature as this creates food safety risks.
The USDA Food Safety and Inspection Service recommends keeping poultry at or below 40°F during thawing to prevent bacterial growth. Properly thawed wings should feel firm to the touch with no lingering ice crystals.
Step 2: The Critical Drying Process
This is where most home cooks go wrong. Simply patting wings dry isn't enough for truly exceptional results. Follow these professional techniques:
- Remove wings from packaging and place on multiple layers of paper towels
- Gently press to absorb surface moisture (change towels as they become saturated)
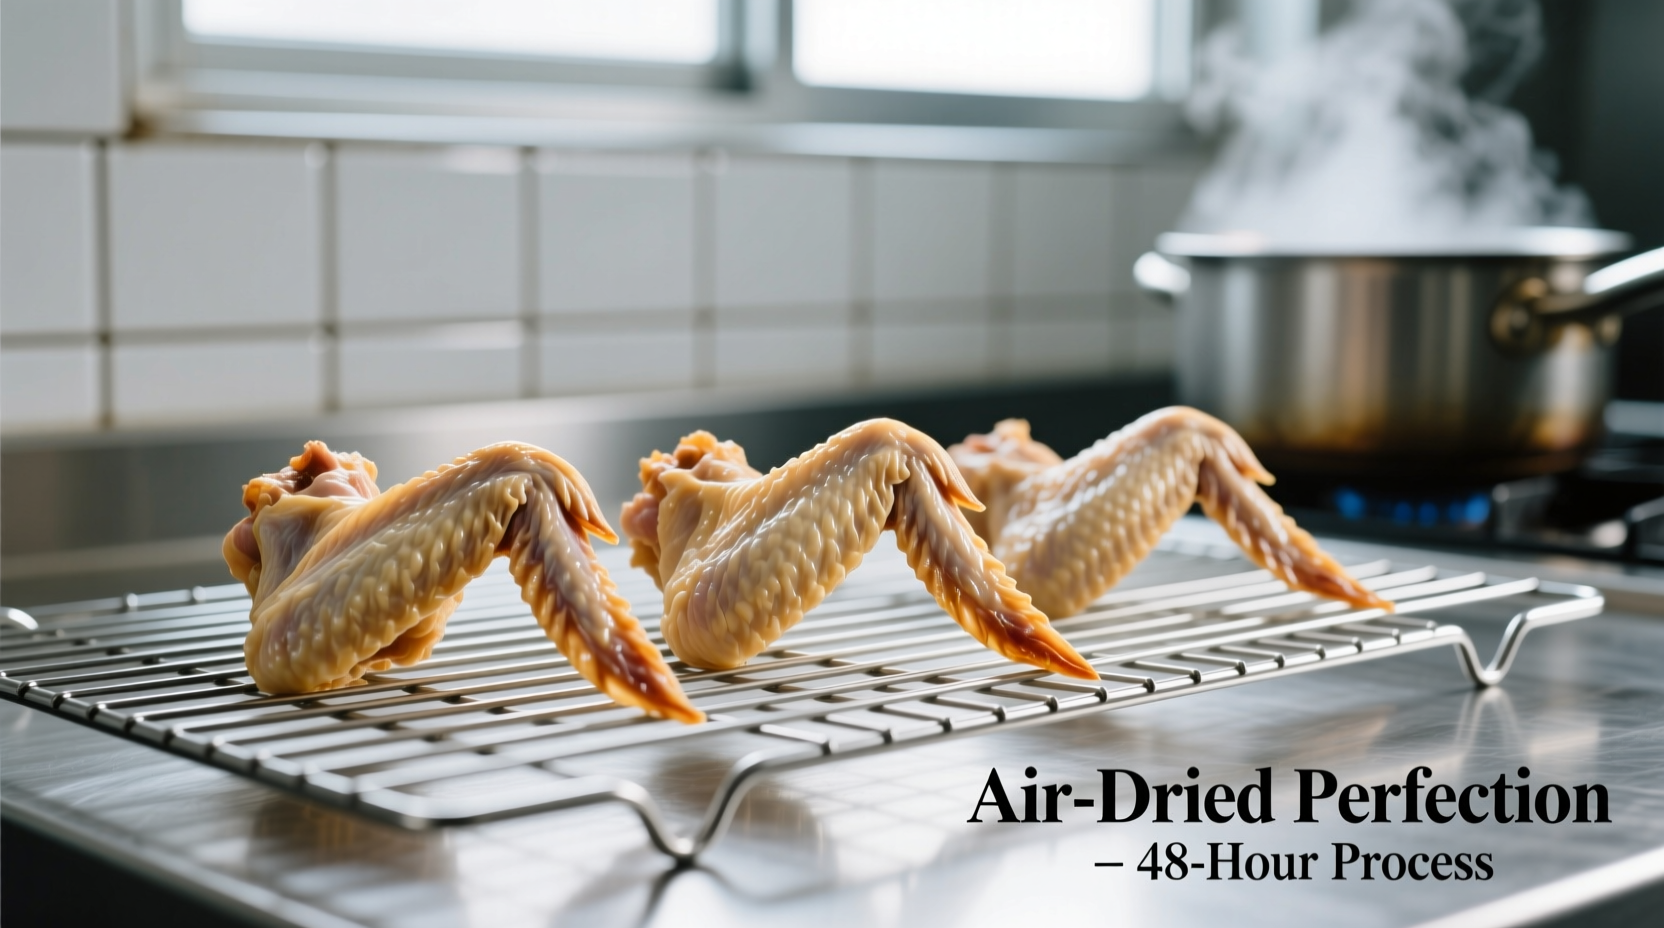
- For best results, place wings on a wire rack over a baking sheet
- Refrigerate uncovered for 1-24 hours
During this refrigeration period, the circulating air continues to draw out surface moisture. The longer the drying time (within reason), the crispier your final product will be. Many restaurant kitchens prepare wings 24 hours in advance using this method.
| Drying Method | Time Required | Crispiness Result |
|---|---|---|
| Quick pat dry only | 5 minutes | Moderate (soggy spots common) |
| Pat dry + 1 hour fridge | 1 hour 5 minutes | Good |
| Pat dry + 4 hours fridge | 4 hours 5 minutes | Very Good |
| Pat dry + 24 hours fridge | 24 hours 5 minutes | Excellent (restaurant quality) |
Step 3: Separating Wings (Optional but Recommended)
Most whole chicken wings come with three parts: the drumette (meaty end), flat (middle section), and tip (wingette). Separating them offers several advantages:
- More uniform cooking (tips cook faster than meatier sections)
- Easier to achieve consistent crispiness across all pieces
- Better surface area for sauce adherence
- Removes the cartilage-heavy tip which most people don't eat
To separate wings properly, locate the natural joints between sections. Using a sharp chef's knife or kitchen shears, cut through these joints. Save the tips for making stock if desired.
Step 4: The Dry Brine Technique
After drying, apply a light coating of salt (about 1 teaspoon per pound of wings). This serves two critical purposes:
- Enhances flavor penetration
- Helps draw out additional moisture through osmosis
Food science studies show that salt applied 1-4 hours before cooking improves texture by partially denaturing proteins, allowing them to retain more moisture during cooking while still achieving crisp skin. Don't over-salt - you can always add more seasoning after cooking.
Step 5: Final Preparation Before Cooking
Right before cooking, remove wings from the refrigerator and let them sit at room temperature for 20-30 minutes. This temperature adjustment ensures more even cooking.
If you're planning to apply a wet marinade or sauce before cooking, do this immediately before they go into your cooking method of choice. For dry rubs, apply now and let sit for 15-30 minutes to allow flavors to penetrate.
Special Considerations for Different Cooking Methods
While the basic preparation steps remain consistent, certain cooking methods benefit from slight adjustments:
For Baking or Air Frying
These dry-heat methods benefit most from extended drying time. The longer you can refrigerate wings uncovered (up to 24 hours), the better your results will be. Place wings directly on the rack with space between them for optimal air circulation.
For Frying
While the drying process is still critical, you can reduce refrigeration time to 1-4 hours for fried wings. Excessively dry wings can sometimes absorb too much oil. Make sure oil is properly heated to 350-375°F before adding wings.
For Grilling
Grilled wings benefit from a light oil coating after the drying process to prevent sticking. Consider using a two-zone fire setup - sear over direct heat, then finish over indirect heat to ensure thorough cooking without burning.
Avoiding Common Wing Preparation Mistakes
Even with proper technique, certain pitfalls can undermine your efforts:
- Washing wings under water - This reintroduces moisture and spreads bacteria
- Using wet marinades too early - Adds moisture back to the surface
- Crowding wings during drying - Prevents proper air circulation
- Skipping the salt step - Misses out on texture and flavor benefits
- Using frozen wings without proper thawing - Creates excess moisture
Remember that wing preparation isn't just about following steps—it's understanding why each step matters. When you know the science behind the process, you can adapt techniques to your specific situation while still achieving excellent results.
Frequently Asked Questions
How long should I dry chicken wings in the refrigerator?
For optimal results, refrigerate wings uncovered for 12-24 hours. However, even 1-4 hours makes a noticeable difference compared to no drying time. The longer drying period allows more surface moisture to evaporate, resulting in dramatically crispier skin.
Can I skip drying chicken wings before cooking?
You can skip drying, but you'll sacrifice crispiness. Without proper drying, wings will steam instead of brown, resulting in rubbery or soggy skin. At minimum, thoroughly pat wings dry with paper towels before cooking. For best results, implement the full drying process in the refrigerator.
Should I remove the skin from chicken wings before cooking?
No, the skin is essential for achieving crispy wings. The fat beneath the skin renders during cooking, basting the meat from within while the skin itself becomes crispy. Removing the skin eliminates the textural contrast that makes wings so appealing and results in drier meat.
Can I use baking powder to make wings crispier?
Yes, a small amount of baking powder (not baking soda) can enhance crispiness. Mix 1 teaspoon baking powder per pound of wings with your salt. The alkaline nature raises the skin's pH, accelerating the Maillard reaction. Don't exceed recommended amounts as too much can create a metallic taste.


 浙公网安备
33010002000092号
浙公网安备
33010002000092号 浙B2-20120091-4