
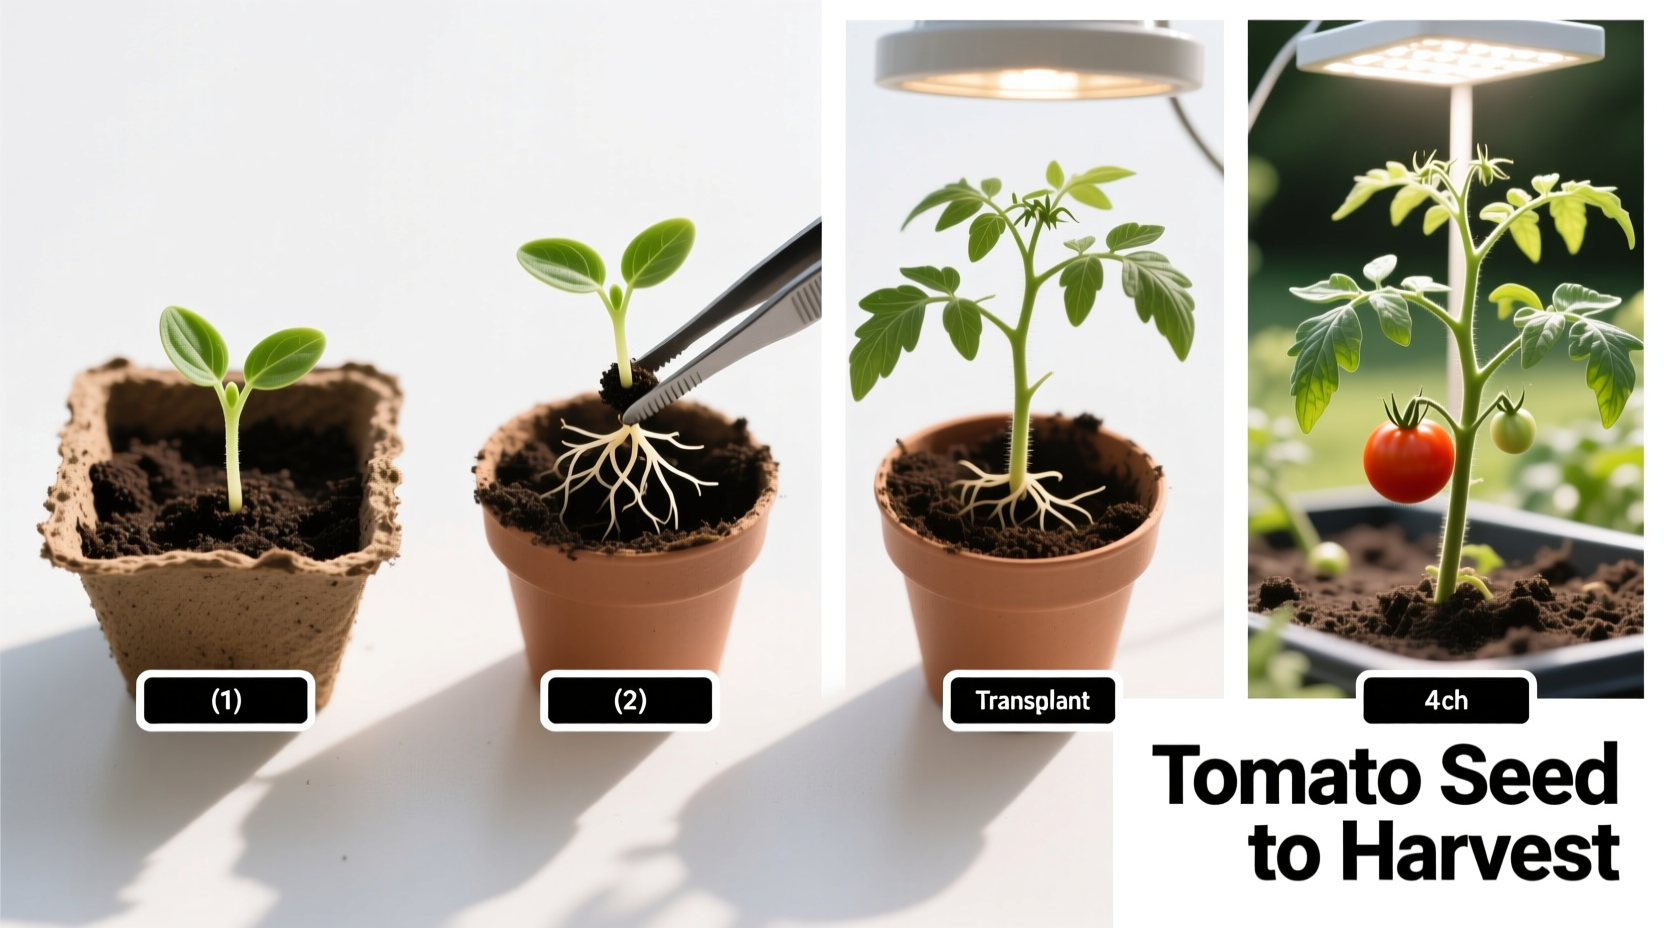
Start tomato seeds indoors 6-8 weeks before your last expected frost date, using a sterile seed starting mix at a depth of 1/4 inch. Maintain soil temperature between 70-80°F (21-27°C) for optimal germination, which typically occurs within 5-10 days. Provide 14-16 hours of bright light daily and transplant seedlings into larger containers when they develop their first true leaves.
There's nothing quite like harvesting sun-warmed tomatoes you grew from seed yourself. While many gardeners opt for starter plants, growing tomatoes from seed gives you access to hundreds of unique varieties and builds a deeper connection to your garden. This comprehensive guide walks you through every step of the process with science-backed techniques that ensure strong, healthy plants ready for your garden.
Why Start Tomatoes from Seed?
Starting tomatoes from seed offers significant advantages over purchasing seedlings. You'll gain access to heirloom and specialty varieties unavailable at nurseries, save money (a single seed packet costs less than one starter plant), and develop stronger, more resilient plants through the hardening-off process. Research from the University of Minnesota Extension shows home-started seedlings often outperform store-bought plants in both yield and disease resistance.
Essential Preparation Timeline
Timing is everything when starting tomatoes from seed. Begin your planning 8-10 weeks before your last expected frost date. This critical timeline ensures your seedlings reach the proper maturity without becoming root-bound before transplanting.
| Weeks Before Last Frost | Action Required | Key Considerations |
|---|---|---|
| 8-10 weeks | Select varieties and order seeds | Consider disease resistance and days to maturity |
| 6-8 weeks | Start seeds indoors | Use sterile seed starting mix, not garden soil |
| 4-6 weeks | Transplant seedlings to larger containers | Bury stem up to first set of leaves for stronger roots |
| 2-3 weeks | Begin hardening off process | Gradually increase outdoor exposure time |
| 0 weeks | Transplant to garden | Soil temperature should be at least 60°F (15.5°C) |
Choosing the Right Tomato Varieties
With over 10,000 tomato varieties available, selecting the right ones for your climate and needs is crucial. Consider these factors when making your selections:
- Days to maturity - Match to your growing season length
- Determinate vs. indeterminate - Bush varieties vs. vining plants
- Disease resistance - Look for codes like VFN (verticillium, fusarium, nematodes)
- Intended use - Slicing, sauce, or cherry tomatoes
The Old Farmer's Almanac recommends 'Celebrity' for beginners due to its disease resistance and reliable production, while 'Brandywine' offers exceptional flavor for those with longer growing seasons.
Step-by-Step Seed Starting Process
Materials You'll Need
- Sterile seed starting mix (never garden soil)
- Containers with drainage holes (cell packs or pots)
- Heat mat (optional but recommended)
- Grow lights or south-facing window
- Watering can with fine rose attachment
- Labeling system
Planting Your Seeds
- Fill containers with moistened seed starting mix, leaving 1/2 inch at the top
- Place 2-3 seeds per container at 1/4 inch depth
- Cover lightly with mix and mist with water
- Cover containers with plastic dome to retain moisture
- Place in warm location (70-80°F/21-27°C)
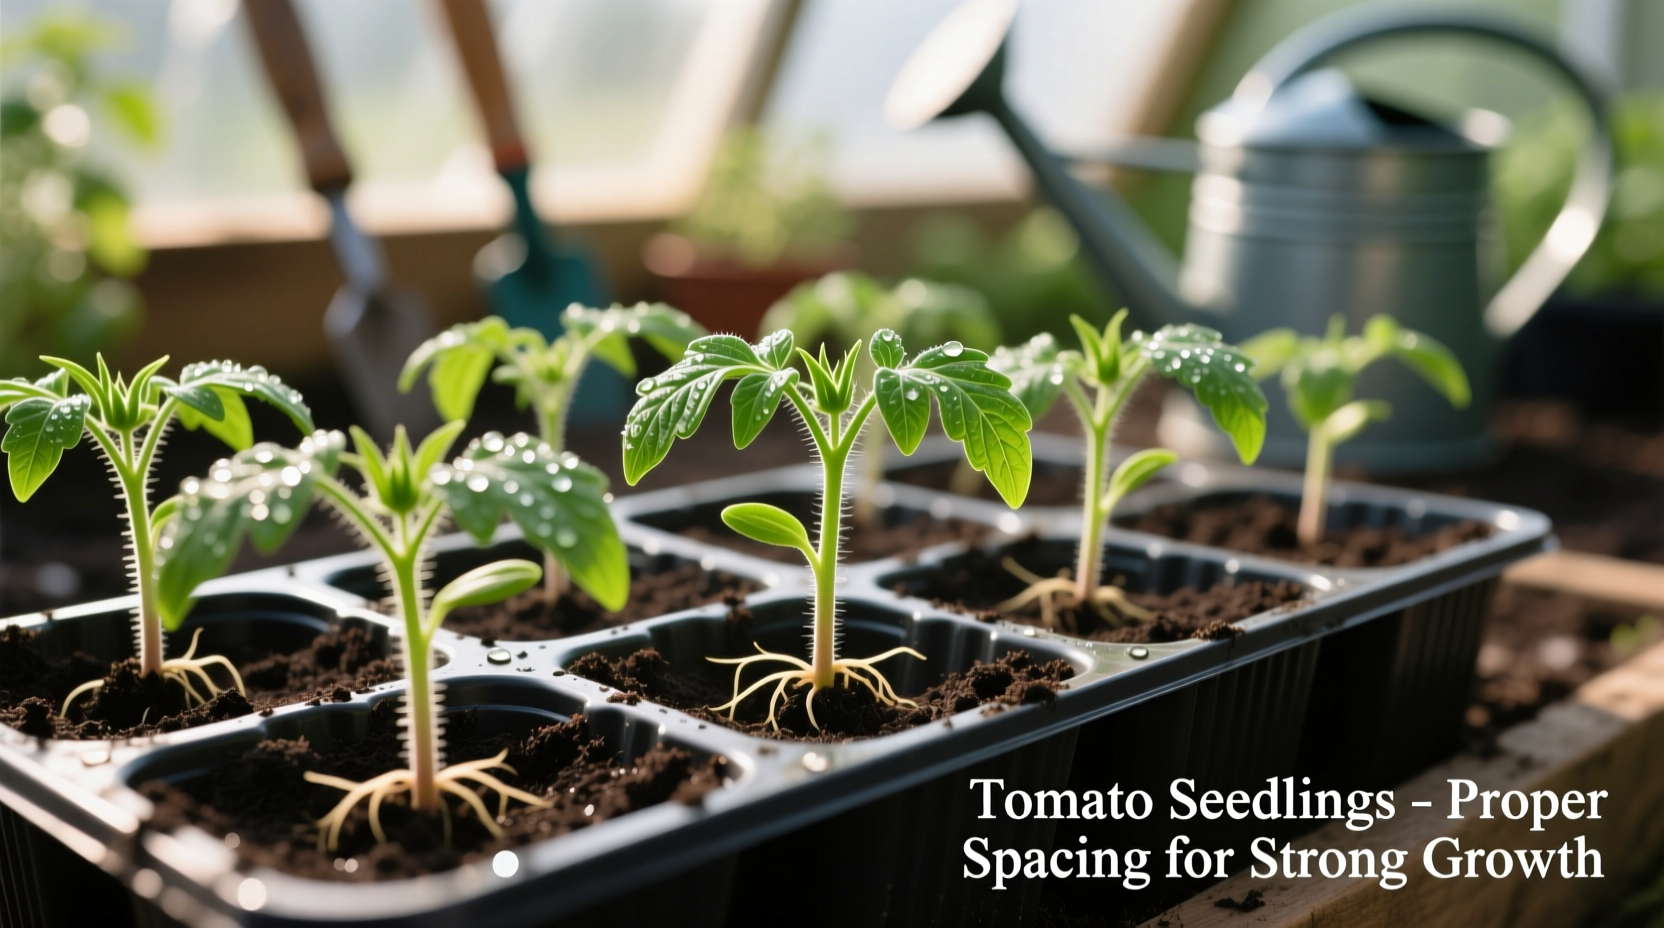
Seedling Care: Building Strong Foundations
Proper care during the seedling stage determines your plants' future success. Many beginners make critical mistakes during this phase that weaken plants before they even reach the garden.
Light Requirements
Tomato seedlings require 14-16 hours of bright light daily. A south-facing window often provides insufficient light, causing leggy, weak plants. The Penn State Extension recommends placing fluorescent or LED grow lights 2-3 inches above seedlings, raising the lights as plants grow. Rotate containers daily if using a single light source.
Watering Techniques
Keep the seed starting mix consistently moist but not soggy. Water from below by placing containers in a tray of water, allowing the mix to absorb moisture through the drainage holes. This encourages deeper root growth and prevents damping-off disease. Avoid overhead watering which can damage delicate seedlings.
Transplanting to Larger Containers
When seedlings develop their first set of true leaves (not the initial cotyledons), transplant them to 3-4 inch pots. Bury the stem up to the first set of leaves - tomatoes will develop roots along the buried stem, creating a stronger root system. Use a diluted fertilizer solution (half-strength) with the first watering after transplanting.
The Critical Hardening-Off Process
Skip this step and your carefully nurtured seedlings will likely suffer transplant shock. Hardening off gradually acclimates indoor-grown plants to outdoor conditions over 7-10 days.
Hardening-Off Schedule
- Days 1-2: Place seedlings in shaded, protected area for 1-2 hours
- Days 3-4: Increase exposure to 3-4 hours, including morning sun
- Days 5-6: Leave out for 5-6 hours, including more direct sun
- Days 7-10: Leave seedlings outdoors overnight if temperatures stay above 50°F (10°C)
Bring plants indoors if strong winds or extreme temperatures are forecast. The Oregon State University Extension emphasizes that this gradual transition significantly improves survival rates and reduces transplant shock.
Transplanting to Your Garden
Choose a sunny location with at least 6-8 hours of direct sunlight daily. Prepare the soil by incorporating 2-4 inches of compost and a balanced organic fertilizer. Dig holes deep enough to bury the stem up to the first set of leaves.
Proper Spacing Guidelines
- Determinate varieties: 24-36 inches apart
- Indeterminate varieties: 36-48 inches apart
- Rows: 4-5 feet apart
Water thoroughly after planting and apply 2-3 inches of organic mulch to conserve moisture and prevent soil-borne diseases. Install support systems (cages or stakes) at planting time to avoid damaging roots later.
Troubleshooting Common Problems
Even with careful planning, challenges may arise. Here's how to address the most frequent issues:
Leggy Seedlings
Caused by insufficient light. Solution: Bury the elongated stem when transplanting to larger containers or in the garden. Provide adequate lighting (14-16 hours daily) moving forward.
Damping-Off Disease
A fungal disease causing seedlings to collapse at soil level. Prevention: Use sterile seed starting mix, avoid overwatering, provide good air circulation, and consider a light sprinkle of cinnamon on the soil surface (a natural fungicide).
Slow Growth After Transplanting
Normal transplant shock typically lasts 3-7 days. Solution: Water consistently, avoid fertilizing immediately after transplanting, and ensure plants aren't exposed to temperatures below 55°F (13°C).
Harvesting Your Homegrown Tomatoes
Tomatoes continue ripening after picking, but flavor develops best when allowed to ripen on the vine. Harvest when fruits show full color development and yield slightly to gentle pressure. For the best flavor, pick tomatoes in the morning when sugars are highest.
Store harvested tomatoes at room temperature away from direct sunlight. Never refrigerate tomatoes, as temperatures below 55°F (13°C) destroy flavor compounds and alter texture. Use within 3-5 days for peak flavor.


 浙公网安备
33010002000092号
浙公网安备
33010002000092号 浙B2-20120091-4