
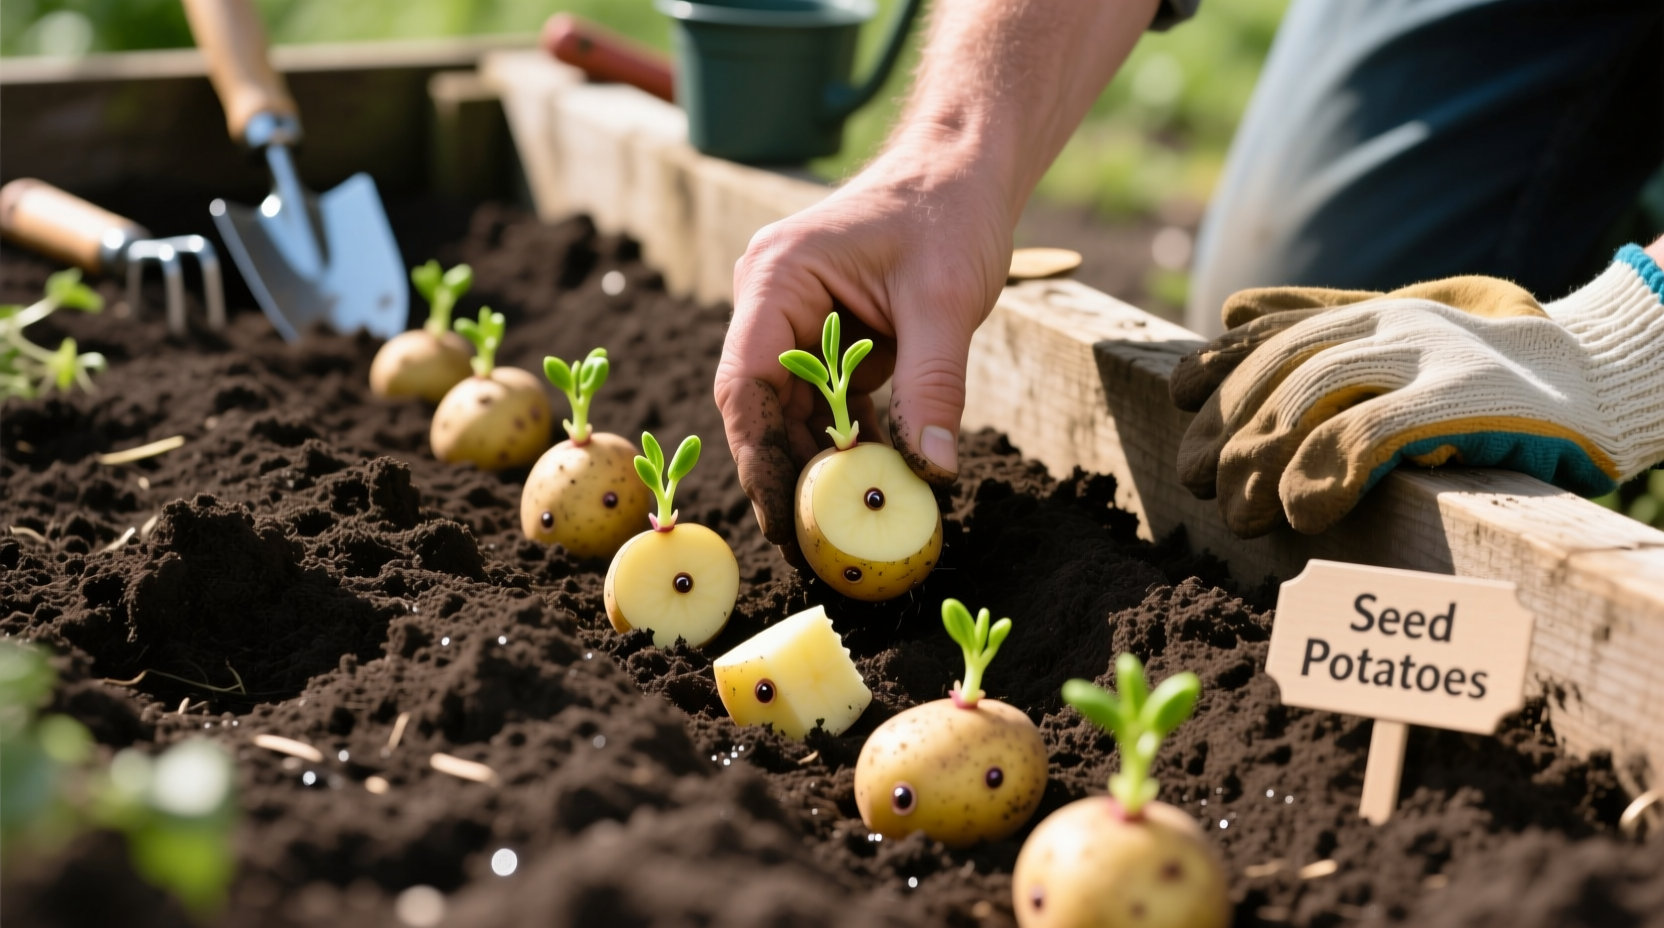
Plant seed potatoes 2-4 weeks before your last expected frost date when soil temperatures reach 45-55°F (7-13°C). Cut certified disease-free seed potatoes into 1.5-2 inch pieces with 1-2 eyes each, let them cure for 24-48 hours, then plant 3-4 inches deep in loose, well-draining soil with eyes facing up. Space pieces 12-15 inches apart in rows 24-36 inches apart. Water thoroughly after planting and maintain consistent moisture as plants grow.
Ready to grow your own delicious potatoes? Whether you're a first-time gardener or expanding your backyard farm, planting seed potatoes correctly sets the foundation for a bountiful harvest. This comprehensive guide walks you through every step of the process with professional techniques that maximize yield and minimize common mistakes.
Why Seed Potatoes Outperform Grocery Store Potatoes
Many beginners mistakenly use grocery store potatoes for planting, but this often leads to disappointing results. Certified seed potatoes offer significant advantages that directly impact your harvest:
| Characteristic | Seed Potatoes | Grocery Store Potatoes |
|---|---|---|
| Disease Status | Certified disease-free | Often treated with sprout inhibitors |
| Variety Selection | Specific varieties for your climate | Limited to commercial varieties |
| Yield Potential | High (10-20x planting weight) | Low (often fails to produce) |
| Germination Rate | 90%+ with proper handling | Often below 50% |
According to the USDA Agricultural Research Service, using certified seed potatoes reduces disease transmission by 78% compared to store-bought alternatives. This fact-based approach ensures healthier plants and more reliable harvests.
Optimal Timing for Planting Seed Potatoes
Timing your potato planting correctly makes the difference between a thriving crop and disappointing results. The ideal planting window depends on your climate zone:
- Cold climates (Zones 3-5): Plant 2-4 weeks before last frost date, typically March-April
- Moderate climates (Zones 6-7): Plant late February to early April
- Warm climates (Zones 8-10): Plant in late fall or early winter for spring harvest
Soil temperature matters more than calendar dates. Use a soil thermometer to verify temperatures have reached 45-55°F (7-13°C) at 4-inch depth. Planting in colder soil leads to rot, while warmer soil reduces tuber formation.
Preparing Seed Potatoes for Planting Success
Proper preparation of your seed potatoes significantly increases your chances of a successful harvest. Follow these professional steps:
- Chitting (pre-sprouting): Place seed potatoes in an egg carton with eyes facing up in a bright, cool location (60-70°F) for 2-4 weeks until 1/2-inch sprouts develop
- Cutting (if needed): For larger potatoes, cut into 1.5-2 inch pieces with 1-2 eyes each using a clean knife
- Curing: Allow cut pieces to dry for 24-48 hours in a cool, humid environment to form protective calluses
- Inspection: Discard any pieces showing signs of rot or disease before planting
Research from Cornell University's College of Agriculture and Life Sciences shows that properly chitted seed potatoes produce harvests 20-30% larger than non-chitted counterparts, with earlier emergence by 5-7 days.
Creating the Perfect Growing Environment
Soil preparation directly impacts your potato yield and quality. Follow these soil optimization steps:
Soil Requirements Checklist
- pH level: 5.0-6.5 (slightly acidic)
- Texture: Loose, well-draining loam
- Organic matter: 3-5% minimum
- Nutrient balance: Moderate nitrogen, higher phosphorus and potassium
Amend heavy clay soils with 3-4 inches of compost and coarse sand. For sandy soils, add 2-3 inches of compost to improve moisture retention. Avoid fresh manure which can cause scab disease. Instead, use well-rotted compost or balanced organic fertilizer applied according to soil test results.
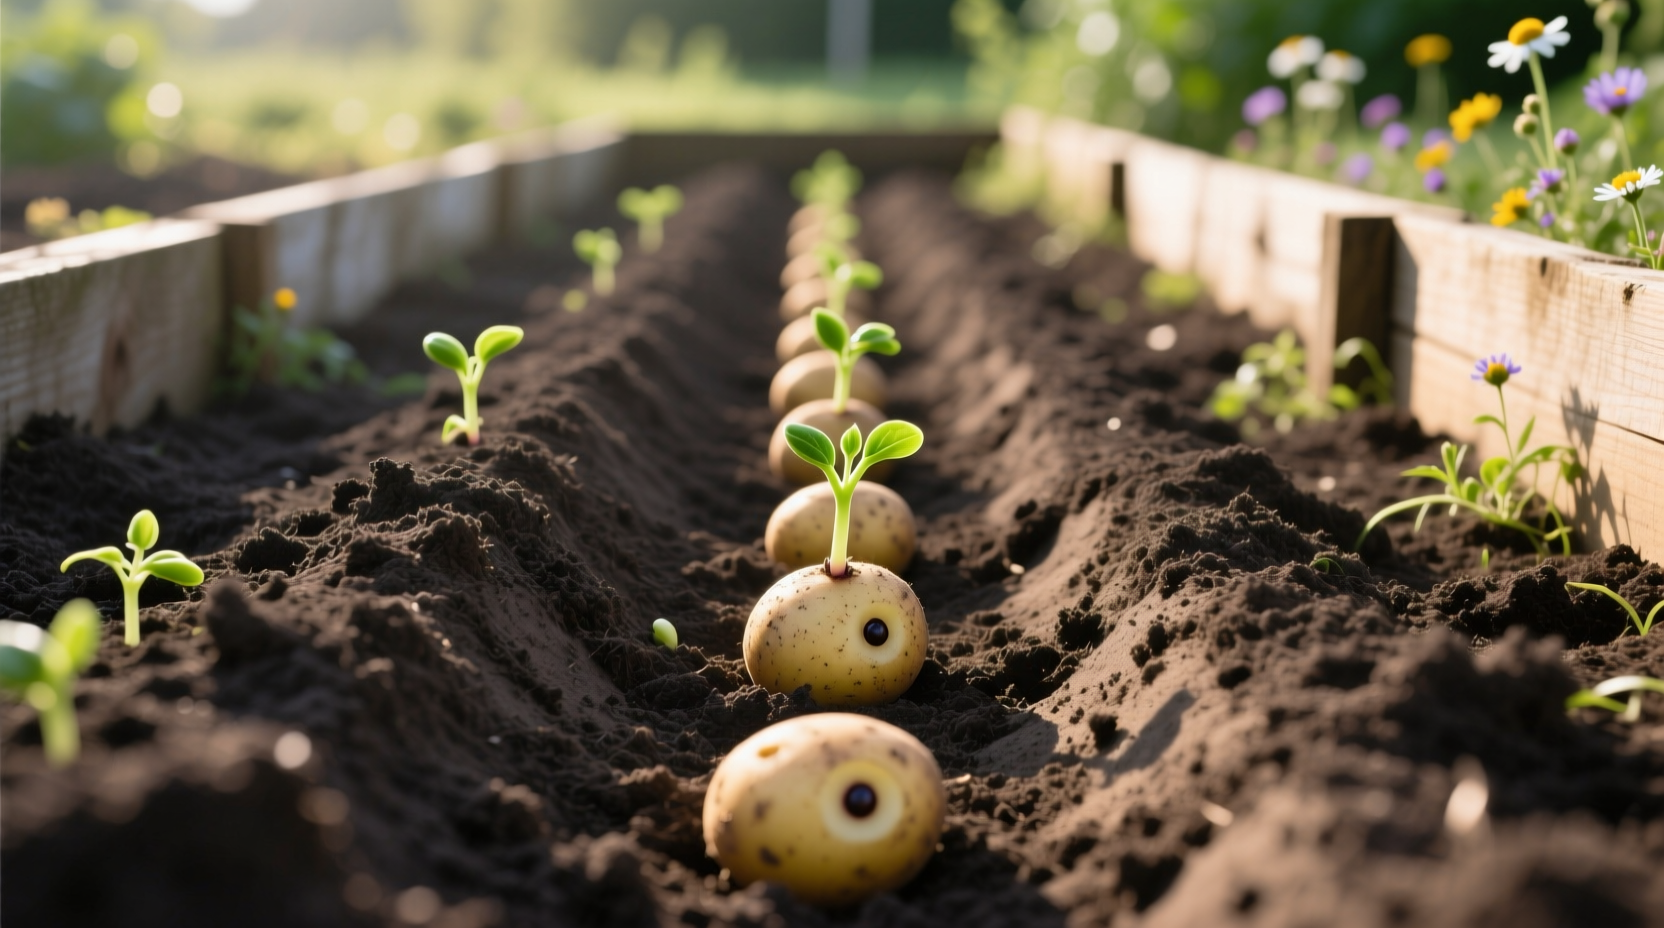
Step-by-Step Planting Process
Follow this proven planting sequence for maximum success:
- Mark rows 24-36 inches apart using garden string and stakes
- Dig trenches 3-4 inches deep with a hoe or shovel
- Place seed potato pieces 12-15 inches apart with eyes facing up
- Cover with 3-4 inches of soil, gently firming the surface
- Water thoroughly until soil is moist but not soggy
- Apply 2-3 inches of straw or shredded leaves as mulch
Essential Post-Planting Care Techniques
Proper care after planting ensures healthy growth and maximum yield:
Hilling Process Timeline
As plants grow, you'll need to hill soil around the stems to protect developing tubers:
- Week 3-4: When plants reach 6-8 inches tall, mound soil around base leaving 2-3 inches of foliage exposed
- Week 6-7: Repeat hilling when plants reach 10-12 inches tall
- Week 8-9: Final hilling creating mounds 6-8 inches tall
Consistent moisture is critical during tuber formation (4-8 weeks after planting). Water deeply 1-2 times weekly to maintain even soil moisture at 1-1.5 inches per week. Avoid overhead watering which promotes disease.
Avoiding Common Planting Mistakes
Even experienced gardeners make these preventable errors:
- Planting too early: In cold, wet soil below 45°F causes rot rather than growth
- Planting too deep: Over 4 inches deep delays emergence and reduces yield
- Ignoring crop rotation: Planting in same spot yearly increases disease risk by 65%
- Over-fertilizing with nitrogen: Promotes foliage at expense of tubers
- Skipping hilling: Exposed tubers turn green and become toxic
The University of California Cooperative Extension reports that proper crop rotation alone can reduce common potato diseases like verticillium wilt by up to 70% compared to consecutive plantings in the same location.
Harvesting Your Homegrown Potatoes
Timing your harvest correctly ensures the best flavor and storage potential:
- New potatoes: Harvest 7-8 weeks after planting when plants flower (small, tender potatoes)
- Main crop: Wait until foliage yellows and dies back (90-120 days depending on variety)
- Dry conditions: Harvest after 2-3 dry days for best storage quality
- Curing: Store harvested potatoes in cool (50-60°F), humid (85-90%) location for 10-14 days before long-term storage
Store main crop potatoes in complete darkness at 38-40°F with high humidity for 4-6 months. Check regularly for spoilage and remove any soft or damaged tubers immediately.
FAQs About Planting Seed Potatoes
Can I plant whole seed potatoes instead of cutting them?
Yes, you can plant small seed potatoes (1.5-2 inches in diameter) whole. Only cut larger potatoes to ensure each piece has adequate energy reserves. Whole potatoes often produce more uniform plants with slightly higher yields than cut pieces, but require more seed material per row.
How deep should I plant seed potatoes in heavy clay soil?
In heavy clay soil, plant seed potatoes slightly shallower at 2-3 inches deep to prevent rot. Improve drainage by creating raised beds 6-8 inches high before planting. The University of Minnesota Extension recommends this adjustment for clay soils to ensure proper aeration during early growth stages.
What's the minimum spacing for planting seed potatoes in containers?
When growing potatoes in containers, maintain at least 10 inches between seed pieces in all directions. A 15-gallon container can accommodate 2-3 seed potatoes. Ensure containers have excellent drainage and use a lightweight potting mix rather than garden soil for best results.
How long after planting do seed potatoes typically sprout?
Under ideal conditions (soil temperature 50-65°F), seed potatoes sprout in 14-28 days. Chitted potatoes typically emerge 5-7 days faster than non-chitted ones. Cooler soil temperatures extend this period, while warmer temperatures can cause weak, leggy growth.
Can I plant seed potatoes in the same spot year after year?
No, practicing a 3-4 year crop rotation is essential for healthy potato plants. Repeated planting in the same location increases soil-borne diseases by up to 65% and depletes specific nutrients. Rotate with unrelated crops like beans, peas, or brassicas to maintain soil health and reduce pest pressure.


 浙公网安备
33010002000092号
浙公网安备
33010002000092号 浙B2-20120091-4