
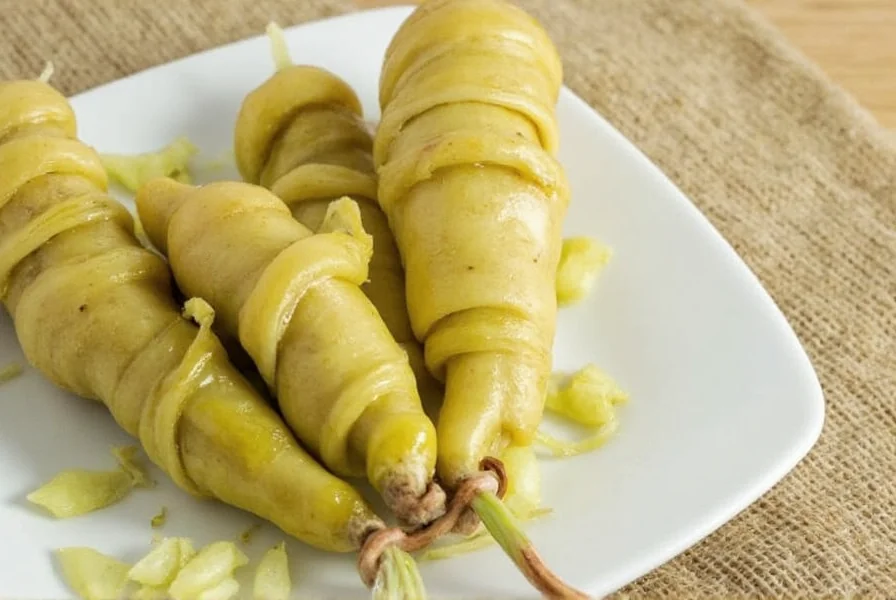
Pickled ginger, known as gari in Japanese cuisine, is a vibrant accompaniment to sushi that cleanses the palate between bites. While store-bought versions are readily available, homemade pickled ginger offers superior flavor, texture, and the satisfaction of crafting this traditional condiment yourself. The pickling process transforms sharp, fibrous ginger into tender, slightly sweet morsels with a beautiful pale pink hue.
Why Make Your Own Pickled Ginger
Creating pickled ginger at home gives you complete control over ingredients and flavor profile. Unlike commercial varieties that often contain artificial coloring and preservatives, homemade versions use natural ingredients. Freshly pickled ginger maintains better texture and a brighter flavor profile compared to mass-produced alternatives. This simple preservation technique also allows you to use seasonal ginger when it's most flavorful and economical.
Essential Ingredients for Perfect Pickled Ginger
The magic of pickled ginger happens through a precise balance of ingredients. Here's what you'll need for a standard batch that yields approximately 2 cups:
| Ingredient | Amount | Notes |
|---|---|---|
| Fresh young ginger | 8 oz (225g) | Look for smooth, thin-skinned ginger with pinkish tips |
| Rice vinegar | 1 cup (240ml) | Unseasoned, for authentic flavor |
| Granulated sugar | 3/4 cup (150g) | Adjust to taste preference |
| Sea salt | 1 1/2 tsp (9g) | Helps maintain crispness |
| Water | 1/4 cup (60ml) | For diluting the brine |
For authentic Japanese-style gari, young spring ginger is preferred because of its tender texture and natural pink tips, which create the characteristic pale pink color without artificial dyes. If young ginger isn't available, regular mature ginger works well too—simply add 1/4 teaspoon of beet juice to achieve the traditional pink hue.

Step-by-Step Pickling Process
1. Prepare the Ginger
Peel the ginger using a spoon to gently scrape away the skin without removing excess flesh. Slice the ginger as thinly as possible (about 1/16 inch thick) using a sharp knife or mandoline. For authentic sushi ginger, slice against the grain to maximize tenderness. Place the slices in a bowl and sprinkle with 1 teaspoon of salt. Massage gently and let sit for 15 minutes to draw out excess moisture and reduce sharpness.
2. Create the Pickling Brine
Combine rice vinegar, sugar, remaining salt, and water in a small saucepan. Heat over medium heat just until the sugar dissolves completely—do not boil. Remove from heat and let cool to room temperature. The ideal brine temperature before adding to ginger is between 70-80°F (21-27°C) to preserve texture.
3. Combine and Jar
Rinse the ginger slices briefly under cold water to remove excess salt, then gently squeeze out moisture. Place the ginger in a clean, sterilized glass jar. Pour the cooled brine over the ginger, ensuring all pieces are submerged. Leave approximately 1/2 inch of headspace at the top of the jar.
4. Rest and Store
Seal the jar tightly and refrigerate for at least 24 hours before using. The ginger will gradually turn a delicate pink as it pickles (naturally from the ginger's pigments reacting with the vinegar). For best flavor development, wait 3-5 days before serving. Properly stored in the refrigerator, homemade pickled ginger maintains optimal quality for 3-4 weeks.
Pro Tips for Perfect Pickled Ginger
Mastering the art of pickling ginger requires attention to detail. Here are professional techniques that elevate your results:
- Slicing technique matters: Thinner slices (1/16 inch) absorb brine faster and create the delicate texture prized in sushi ginger
- Brine temperature is critical: Adding hot brine to ginger causes it to become rubbery—always cool brine to room temperature first
- Natural coloring: Young ginger naturally turns pink in vinegar; mature ginger requires a few drops of beet juice for color
- Texture preservation: The salt treatment before pickling helps maintain a tender-yet-firm texture
- Flavor balance: Adjust sugar-to-vinegar ratio to taste—more sugar creates sweeter sushi ginger, while less sugar yields a more traditional Japanese profile
Storage and Shelf Life
Store your homemade pickled ginger in the refrigerator at all times in an airtight container. The high acidity of the vinegar-based brine preserves the ginger effectively, but refrigeration maintains optimal texture and flavor. Properly stored pickled ginger remains safe to eat for 3-4 weeks, though peak flavor occurs between days 3-10 after pickling. Check for any signs of spoilage including mold, off odors, or significant texture changes before consuming.
Variations to Explore
Once you've mastered the basic technique for how to pickle ginger, experiment with these creative adaptations:
- Sweetness adjustment: Reduce sugar to 1/2 cup for a more traditional Japanese profile, or increase to 1 cup for Western palates
- Spiced version: Add a star anise pod or slice of fresh chili to the brine for complexity
- Lemon-infused: Replace 1/4 cup of vinegar with fresh lemon juice for brightness
- Quick-pickled: For immediate use, skip the 24-hour rest and use after 2 hours (though flavor won't be as developed)
- Golden variation: Use turmeric (1/8 tsp) instead of beet juice for color and additional health benefits
Troubleshooting Common Issues
Even experienced home preservers encounter challenges when learning how to pickle ginger properly. Here's how to address frequent problems:
- Ginger remains too sharp: The initial salt treatment wasn't long enough—extend to 20 minutes next time
- Texture becomes rubbery: Brine was too hot when added—always cool completely before pouring over ginger
- No pink color develops: Using mature ginger—add 1-2 tsp beet juice to the brine for natural coloring
- Brine appears cloudy: Normal with natural ingredients; becomes clear after 48 hours as ginger releases compounds
- Flavor too vinegary: Increase sugar by 2-3 tablespoons in your next batch for better balance
Using Your Homemade Pickled Ginger
While traditionally served with sushi, homemade pickled ginger has versatile applications. Thinly slice it for sushi accompaniment, chop finely for salad dressings, or add to stir-fries for a bright flavor accent. The pickling liquid itself makes an excellent base for marinades or vinaigrettes. For authentic sushi presentation, serve small portions of pickled ginger between different types of fish to cleanse the palate.


 浙公网安备
33010002000092号
浙公网安备
33010002000092号 浙B2-20120091-4