
Making delicious homemade soup is simpler than most people realize. Whether you're preparing a quick weeknight meal or crafting an elaborate dinner, understanding the fundamental soup-making process transforms ordinary ingredients into extraordinary results. This guide reveals professional techniques that work for virtually any soup type, from hearty stews to delicate broths.
Essential Tools for Soup Making
Before starting your soup preparation, ensure you have these kitchen essentials. While specialized equipment can be helpful, these basic tools will serve most soup-making needs effectively.
| Tool | Why It's Important | Minimum Requirement |
|---|---|---|
| Heavy-bottomed pot | Prevents scorching during long simmers | 4-6 quart capacity |
| Wooden spoon | Won't scratch pots and distributes heat evenly | One sturdy spoon |
| Sharp chef's knife | Ensures even vegetable cuts for uniform cooking | 8-inch blade minimum |
| Mesh strainer | Removes impurities from broth | Fine-mesh variety |
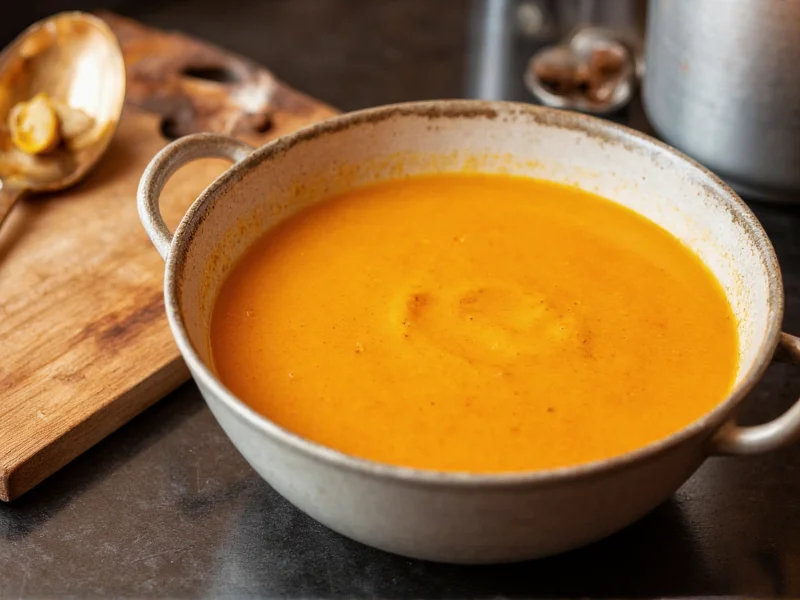
Building Flavor: The Soup Making Process
The foundation of exceptional soup lies in proper flavor development. Many home cooks skip crucial steps that professional chefs consider non-negotiable. Follow these steps to create soup with restaurant-quality depth.
Step 1: Prepare Your Ingredients Properly
Chef's always follow the mirepoix principle—dicing vegetables uniformly ensures even cooking. For most soups, use a 2:1:1 ratio of onions, carrots, and celery. Chop ingredients to similar sizes based on cooking time: larger pieces for long simmers, smaller for quick soups. Never rush this stage; properly cut vegetables make the difference between a mediocre and magnificent soup.
Step 2: Develop Flavor Through Sautéing
Begin by heating oil or butter over medium heat until shimmering but not smoking. Add onions first, cooking until translucent before adding other vegetables. This gradual approach builds complex flavors. For meat-based soups, brown meat in batches to avoid steaming—this Maillard reaction creates rich, savory notes that boiling alone cannot achieve. Proper browning takes 8-10 minutes and requires patience.
Step 3: Deglaze for Maximum Flavor
After sautéing, you'll notice browned bits stuck to the pot bottom—these contain concentrated flavor. Pour in 1/4 cup of wine, vinegar, or broth while scraping the bottom with a wooden spoon. This technique, called deglazing, incorporates these flavorful compounds into your soup. Allow the liquid to reduce by half before adding remaining broth. This simple step elevates homemade soup from good to exceptional.
Step 4: Simmer, Don't Boil
Maintain a gentle simmer—small bubbles breaking the surface occasionally—not a rolling boil. Vigorous boiling breaks down vegetables too quickly and emulsifies fat into the broth, creating cloudiness. Most vegetable soups require 20-30 minutes of simmering; bean and meat soups need 45-90 minutes. The soup is ready when vegetables pierce easily with a fork but maintain their shape.
Soup Variations for Different Dietary Needs
Once you master basic soup technique, customization becomes effortless. These adaptations maintain flavor while accommodating various dietary requirements without compromising quality.
- Gluten-free option: Replace flour thickeners with cornstarch slurry (1 tbsp cornstarch to 2 tbsp cold water) added during final minutes of cooking
- Vegan alternative: Use mushroom trimmings and kombu seaweed for umami depth instead of animal-based stocks
- Low-sodium version: Boost flavor with extra herbs, lemon zest, and roasted garlic rather than salt
- Creamy texture without dairy: Blend cooked cauliflower or white beans into broth for luxurious mouthfeel
Common Soup Mistakes and Solutions
Even experienced cooks encounter soup challenges. Understanding these frequent issues helps troubleshoot problems before they ruin your meal.
Problem: Bland-tasting soup
Solution: Layer seasonings throughout cooking rather than adding all at the end. Start with aromatics, add dried herbs early, and finish with fresh herbs and acid. Taste and adjust seasoning at multiple stages. Remember that salt enhances existing flavors but doesn't create them—proper browning and deglazing establish the flavor foundation.
Problem: Cloudy broth
Solution: Avoid vigorous boiling which emulsifies fat into the liquid. For already cloudy broth, clarify by whisking in beaten egg whites which trap impurities as they cook. Strain through cheesecloth for crystal-clear results. Alternatively, accept that rustic soups don't require perfect clarity.
Problem: Overcooked vegetables
Solution: Add delicate vegetables like peas or spinach during the last 5 minutes of cooking. For chunky vegetable soups, cut root vegetables smaller than softer vegetables since they require longer cooking. Consider the par-cook method: partially cook harder vegetables separately before adding to the soup.
Storage and Reheating Best Practices
Proper storage maintains soup quality for future meals. Cool soup rapidly by placing the pot in an ice bath, stirring occasionally. Transfer to airtight containers, leaving one inch of headspace for expansion. Refrigerate for up to 4 days or freeze for 3 months.
When reheating, avoid boiling which can make vegetables mushy and proteins tough. Gently warm soup over medium-low heat, stirring occasionally. For cream-based soups, add a splash of liquid during reheating to prevent separation. Always taste and adjust seasoning after reheating as flavors concentrate during storage.
Advanced Techniques for Flavor Enhancement
Once comfortable with basic soup preparation, experiment with these professional techniques to elevate your results:
- Roasting vegetables first: Caramelizing vegetables before adding liquid creates deeper, sweeter flavors—ideal for tomato, butternut squash, or root vegetable soups
- Finishing with fresh elements: Add bright notes just before serving with chopped herbs, citrus zest, or a drizzle of quality olive oil
- Creating flavor layers: Add dried herbs early in cooking and fresh herbs at the end for complex aromatic profiles
- Using finishing acids: A splash of vinegar, lemon juice, or wine just before serving brightens flavors and balances richness
Frequently Asked Questions
What's the best way to thicken soup without flour?
Blend cooked potatoes, beans, or cauliflower directly into the soup for natural thickening. Alternatively, make a cornstarch slurry (1 tablespoon cornstarch mixed with 2 tablespoons cold water) and stir it in during the last 5 minutes of cooking. For creamier texture without dairy, puree part of the soup and return it to the pot.
How can I fix soup that's too salty?
Add raw potato chunks to absorb excess salt (remove after 15-20 minutes), dilute with unsalted broth or water, or balance with acid like lemon juice or vinegar. Adding a small amount of sugar can also counteract saltiness. For cream-based soups, a splash of cream helps mellow excessive salt.
What vegetables work best for clear broth soups?
For clear broths, use leeks, parsnips, fennel, and mild celery varieties. Avoid starchy vegetables like potatoes or carrots which cloud the broth. Chop vegetables uniformly small (1/4 inch) for delicate soups. Strain the finished broth through cheesecloth for crystal-clear results, especially important for consommé or Asian-style broths.
How long should I simmer different types of soup?
Vegetable soups need 20-30 minutes, bean soups require 45-60 minutes, and meat-based soups benefit from 1.5-3 hours of gentle simmering. Quick soups like tomato or egg drop need only 15 minutes. Always simmer until vegetables are tender but not mushy, and meats are fork-tender. Overcooking diminishes flavor and texture.
Can I make soup without stock or broth?
Yes, create flavorful liquid using vegetable trimmings, mushroom stems, and herb scraps simmered in water for 30-45 minutes. For instant flavor, add a Parmesan rind, kombu seaweed, or dried mushrooms to plain water. The key is building flavor through proper sautéing and deglazing techniques rather than relying solely on pre-made stocks.


 浙公网安备
33010002000092号
浙公网安备
33010002000092号 浙B2-20120091-4