
Growing your own turmeric is simpler than many gardeners realize, and this guide provides everything you need for a successful harvest. Turmeric (Curcuma longa), the vibrant golden spice behind curry powder and renowned for its health benefits, thrives in tropical conditions but can be cultivated in various climates with proper care. Whether you're an experienced gardener or trying your first spice crop, understanding the specific requirements for how to grow turmeric at home ensures optimal results.
Understanding Turmeric Plant Characteristics
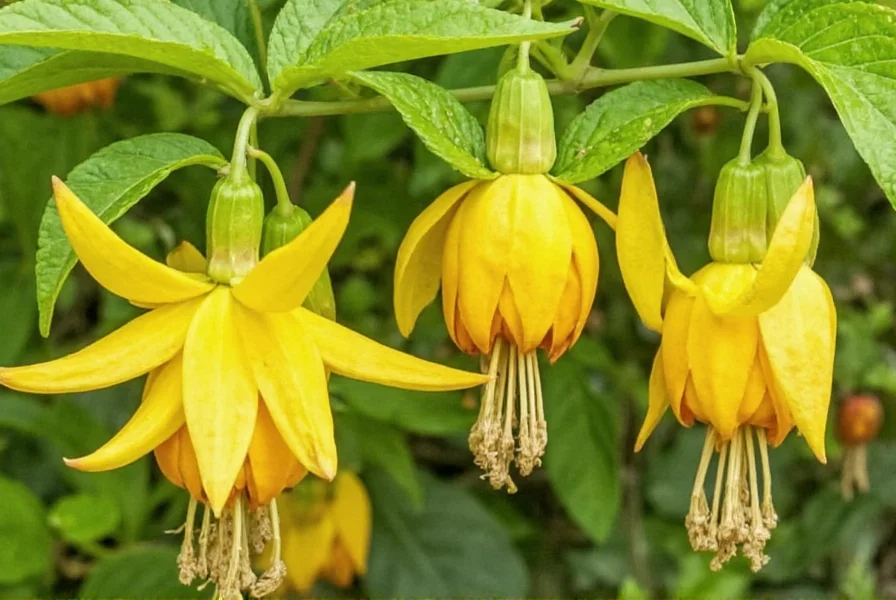
Turmeric is a perennial herbaceous plant related to ginger, growing 3-4 feet tall with trumpet-shaped yellow flowers and large green leaves. The valuable part is the underground rhizome, which contains curcumin—the compound responsible for turmeric's distinctive color and health properties. Unlike many herbs, turmeric requires a long growing season of 8-10 months to develop substantial rhizomes.
Ideal Climate and Location for Turmeric Cultivation
Turmeric originates from Southeast Asia and prefers warm, humid conditions similar to its native habitat. The optimal temperature range is 68-86°F (20-30°C), with high humidity levels. While it can tolerate partial shade, 6-8 hours of filtered sunlight produces the best yields. In cooler climates, growing turmeric in containers allows you to move plants indoors during colder months.
| Climate Zone | Planting Method | Special Considerations |
|---|---|---|
| Tropical (USDA 9-11) | Direct ground planting | Plant year-round; provide afternoon shade |
| Temperate (USDA 7-8) | Start indoors, transplant after frost | Requires 8-10 month frost-free period |
| Cooler Climates (USDA 3-6) | Container gardening | Bring indoors when temperatures drop below 50°F |
Soil Preparation for Optimal Turmeric Growth
The best soil for turmeric cultivation is loamy, well-draining, and rich in organic matter with a pH between 5.5 and 7.5. Heavy clay soils retain too much moisture and cause rhizome rot, while sandy soils drain too quickly. Amend your soil with 2-3 inches of compost or well-rotted manure before planting to improve fertility and structure.
For container growing, use a high-quality potting mix with added perlite for drainage. Choose containers at least 12 inches deep with adequate drainage holes. Turmeric rhizomes need space to expand vertically, so depth matters more than width.
Planting Turmeric: Step-by-Step Guide
The turmeric planting season begins in spring after the last frost when soil temperatures reach at least 60°F. Follow these steps for successful planting:
- Select quality rhizomes: Choose plump, firm rhizomes with multiple buds (eyes) from organic sources to avoid treated varieties
- Prepare rhizomes: Cut larger rhizomes into 1-2 inch pieces, each with 1-2 buds, and let them dry for 24-48 hours
- Planting depth: Place rhizomes 1-2 inches deep with buds facing upward
- Spacing: Space rhizomes 4-6 inches apart in rows 12-18 inches apart
- Initial watering: Water thoroughly after planting, then maintain consistent moisture
For container planting, use one rhizome per 12-inch pot. Turmeric grows well alongside companion plants like beans, peas, and leafy greens that don't compete for the same nutrients.
Watering and Care Requirements
Consistent moisture is critical for turmeric plant care. Water regularly to keep soil evenly moist but not waterlogged—about 1 inch of water per week. During dry periods, increase watering frequency. Mulch with 2-3 inches of straw or wood chips to retain moisture and regulate soil temperature.
Fertilize monthly with a balanced organic fertilizer (10-10-10) or compost tea during the growing season. Reduce feeding as harvest approaches. Turmeric benefits from high potassium levels, so consider adding banana peels to your compost or using potassium-rich amendments.
Managing Pests and Diseases Organically
Turmeric's natural compounds make it relatively pest-resistant, but these issues may occur:
- Leaf spot: Remove affected leaves; improve air circulation; avoid overhead watering
- Rhizome rot: Caused by overwatering; ensure proper drainage; rotate crops annually
- Aphids: Spray with insecticidal soap or neem oil solution
- Spider mites: Increase humidity; spray with water; apply neem oil
Prevent problems by practicing crop rotation, maintaining proper spacing, and keeping the area weed-free. Healthy soil with adequate organic matter supports strong plants that resist pests naturally.
Harvesting Turmeric: Timing and Technique
Knowing when to harvest turmeric is crucial for maximum flavor and curcumin content. Most varieties are ready 8-10 months after planting, when the leaves turn yellow and begin to dry. Stop watering 2-3 weeks before harvest to allow rhizomes to mature and reduce moisture content.
To harvest:
- Cut back the dying foliage to 2-3 inches above soil level
- Carefully dig around the plant with a garden fork
- Lift the entire root system gently from the soil
- Brush off excess soil (avoid washing at this stage)
- Separate the main rhizomes from smaller fingers
Allow harvested turmeric to cure in a shaded, well-ventilated area for 7-10 days before cleaning and storing. This curing process enhances flavor and extends storage life.
Storage and Usage of Homegrown Turmeric
Properly stored turmeric rhizomes can last several months. Options include:
- Refrigeration: Store in a paper bag in the crisper drawer for 2-3 weeks
- Freezing: Peel, slice, and freeze in airtight containers for up to 6 months
- Drying: Slice thinly and dehydrate at 135°F until brittle, then grind into powder
- Preserving: Make turmeric paste with water or create golden milk concentrate
Fresh turmeric has a brighter, more complex flavor than store-bought powder. Use it grated in smoothies, stir-fries, rice dishes, or teas for maximum health benefits.
Troubleshooting Common Turmeric Growing Problems
Even with proper care, you might encounter these issues:
- Slow growth: Check soil temperature (needs to be above 60°F); ensure adequate nutrients
- Yellowing leaves: Could indicate overwatering or nutrient deficiency; test soil
- No rhizome development: Insufficient growing season; may need longer than 8 months
- Small rhizomes: Overcrowding; insufficient nutrients; poor soil drainage
Remember that turmeric is a slow starter—don't be concerned if growth seems minimal during the first few months. The plant focuses energy on developing its root system before significant above-ground growth appears.
Extending Your Turmeric Growing Season
For gardeners in cooler climates, these techniques help maximize your organic turmeric cultivation success:
- Start rhizomes indoors 6-8 weeks before last frost
- Use black plastic mulch to warm soil faster in spring
- Grow in containers that can be moved indoors when temperatures drop
- Provide supplemental lighting if growing indoors during winter
- Choose early-maturing varieties like 'Madagascar' or 'Thai Yellow'
With proper planning, you can enjoy homegrown turmeric year-round, even in non-tropical climates. The key is understanding your specific growing conditions and adapting techniques accordingly.
Frequently Asked Questions
How long does it take to grow turmeric from planting to harvest?
Turmeric requires 8-10 months from planting to harvest. The plant needs this extended growing season to develop substantial rhizomes. You'll know it's ready when the leaves turn yellow and begin to die back, typically in late fall or early winter for spring-planted crops.
Can I grow turmeric in containers if I live in a cold climate?
Yes, container growing is ideal for cold climates. Use pots at least 12 inches deep with good drainage. Start indoors in spring, move outside when temperatures stay above 50°F, and bring containers indoors before first frost. Maintain temperatures between 68-86°F for optimal growth.
Why are my turmeric plants not producing large rhizomes?
Small rhizomes typically result from insufficient growing time, overcrowding, poor soil nutrition, or inadequate watering. Ensure your plants have 8-10 months of warm growing conditions, space rhizomes 4-6 inches apart, use nutrient-rich soil, and maintain consistent moisture without waterlogging.
What's the best way to prepare soil for turmeric cultivation?
The best soil for turmeric is loamy, well-draining, and rich in organic matter with pH 5.5-7.5. Amend garden soil with 2-3 inches of compost or well-rotted manure. For containers, use quality potting mix with added perlite. Avoid heavy clay soils that retain too much moisture, which can cause rhizome rot.
How do I know when turmeric is ready to harvest?
Turmeric is ready to harvest when the leaves turn yellow and begin to dry (typically 8-10 months after planting). Stop watering 2-3 weeks before harvest to allow rhizomes to mature. The stems will naturally fall over when ready. Carefully dig around the plant and lift the entire root system for harvesting.


 浙公网安备
33010002000092号
浙公网安备
33010002000092号 浙B2-20120091-4