

Starting Your Ginger Growing Journey
Growing ginger from ginger is one of the most accessible home gardening projects, requiring minimal equipment and space. Whether you're using grocery store ginger or fresh rhizomes from a nursery, the process remains fundamentally the same. This tropical plant thrives in warm, humid environments but can be successfully cultivated indoors in most climates with proper attention to its specific needs.
Essential Materials for Growing Ginger
Before beginning your ginger cultivation, gather these basic supplies:
- Fresh ginger rhizome (preferably organic, as non-organic may be treated to prevent sprouting)
- Wide, shallow container (at least 8 inches deep) with drainage holes
- Well-draining potting mix (combine regular potting soil with perlite or sand)
- Watering can with fine spray
- Organic fertilizer (balanced formula)
- Misting bottle for humidity control
| Material | Why It's Important | Alternative Options |
|---|---|---|
| Organic ginger rhizome | Non-organic ginger may be treated with growth inhibitors | Ask at local Asian markets for untreated ginger |
| Shallow container | Ginger grows horizontally, not vertically | Repurposed plastic bins with drainage holes |
| Well-draining soil | Prevents rhizome rot from excess moisture | Coconut coir and perlite mixture |
Step-by-Step Ginger Propagation Process
Follow these precise steps for successful ginger propagation from ginger root:
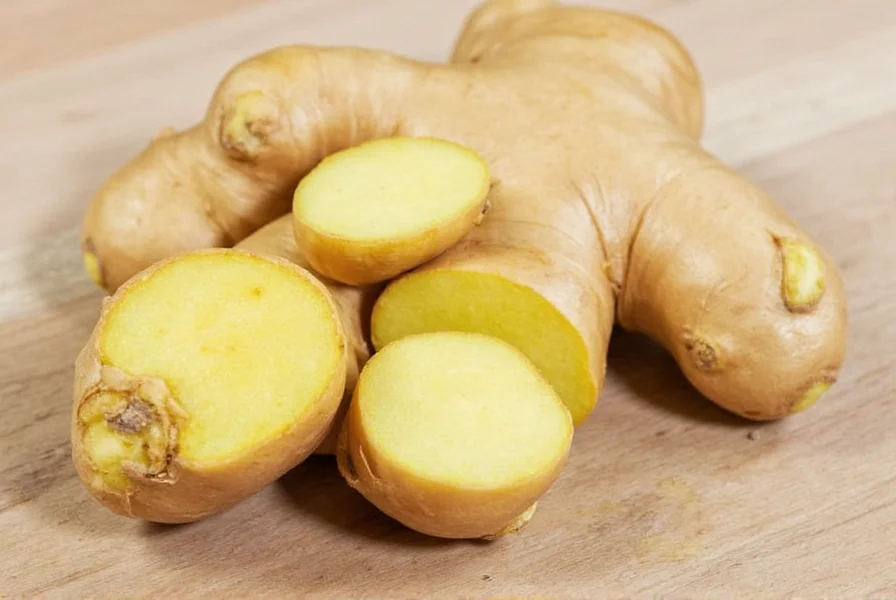
1. Selecting and Preparing the Ginger Root
Choose a plump, firm ginger rhizome with multiple visible growth buds (knobby protrusions called "eyes"). Organic ginger works best as conventional grocery store ginger may be treated with sprout inhibitors. Soak the rhizome in warm water for 1-2 hours to encourage sprouting, then cut into 1-2 inch pieces, ensuring each piece has 2-3 eyes. Allow cut surfaces to dry for 24 hours to form a protective callus.
2. Planting Your Ginger
Fill your container with 2-3 inches of prepared soil mix. Place ginger pieces horizontally with eyes facing upward, spacing them 6-8 inches apart. Cover with 1-2 inches of soil. Water thoroughly until moist but not soggy. The ideal soil moisture level resembles a damp sponge—moist to the touch but not releasing water when squeezed.
3. Creating the Ideal Growing Environment
Ginger requires specific environmental conditions to thrive:
- Temperature: Maintain between 70-90°F (21-32°C)—never below 50°F (10°C)
- Light: Filtered sunlight or partial shade (indoors: east-facing window)
- Humidity: 70-80% humidity (use a pebble tray or humidifier indoors)
- Watering: Keep soil consistently moist but never waterlogged
Caring for Your Growing Ginger Plant
Proper care ensures healthy ginger development throughout its growth cycle:
Watering Schedule
Water when the top inch of soil feels dry. During active growth (spring-summer), this typically means watering 2-3 times weekly. Reduce watering in fall as growth slows. Always use room-temperature water to avoid shocking the plant. The best indicator of proper watering is leaf health—drooping leaves indicate underwatering, while yellowing leaves suggest overwatering.
Fertilizing Requirements
Begin fertilizing 4-6 weeks after planting with a balanced, organic liquid fertilizer (10-10-10) diluted to half strength. Apply every 4-6 weeks during the growing season. In the final 2-3 months before harvest, switch to a potassium-rich fertilizer to encourage rhizome development. Avoid high-nitrogen fertilizers which promote excessive leaf growth at the expense of rhizome development.
Monitoring Growth Progress
Ginger follows a predictable growth pattern:
- Weeks 1-4: Sprouts emerge as small green shoots
- Weeks 5-12: Foliage develops into reed-like stems
- Months 4-6: Plant reaches full height (2-3 feet)
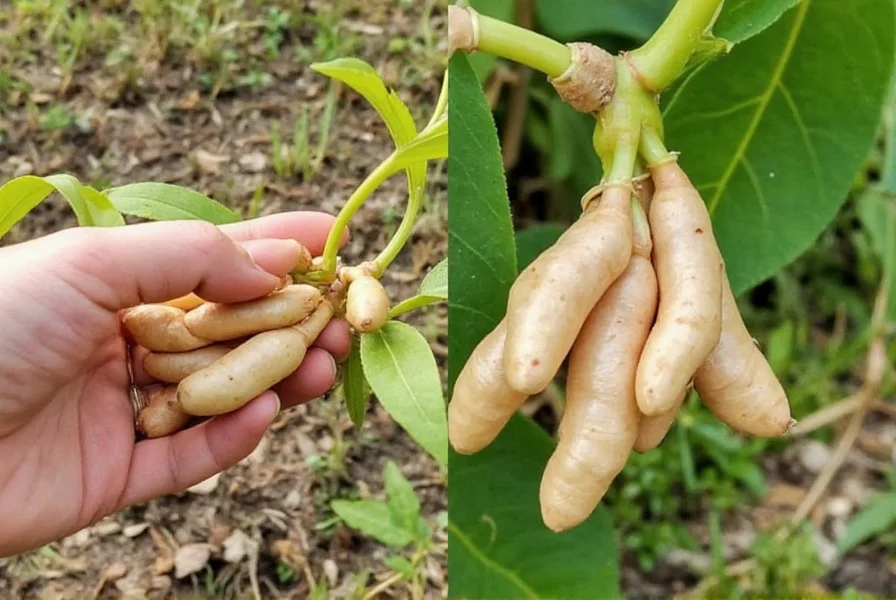
- Months 7-10: Rhizomes mature and expand underground
Harvesting Your Home-Grown Ginger
Timing your ginger harvest correctly ensures maximum flavor and yield:
Determining Harvest Readiness
Ginger is ready for harvest when:
- The leaves begin to yellow and die back naturally (typically 8-10 months after planting)
- The rhizomes have developed multiple segments with firm, smooth skin
- The outer skin turns from pale yellow to a richer golden-brown color
Harvesting Techniques
For a complete harvest, carefully dig up the entire plant, being mindful not to damage the delicate rhizomes. Gently brush off excess soil (avoid washing initially). For a partial harvest, you can carefully remove outer sections while leaving the central plant intact to continue growing. After harvesting, cure the ginger by air-drying for 2-3 days before storing.
Troubleshooting Common Ginger Growing Problems
Even with proper care, ginger growers may encounter these issues:
Rotting Rhizomes
Cause: Overwatering or poor drainage
Solution: Reduce watering frequency, improve soil drainage with additional perlite, and ensure containers have adequate drainage holes. If rot has started, remove affected sections and replant healthy portions.
Yellowing Leaves
Cause: Overwatering, nutrient deficiency, or excessive direct sunlight
Solution: Adjust watering schedule, apply balanced fertilizer, and move to a location with filtered light. Trim severely affected leaves to encourage new growth.
Lack of Growth
Cause: Dormant rhizome, cool temperatures, or insufficient light
Solution: Ensure temperatures stay above 70°F, provide adequate indirect light, and be patient—ginger often has a slow start before rapid growth begins.
Storing and Using Your Home-Grown Ginger
Proper storage extends the shelf life of your harvested ginger:
- Store unpeeled ginger in a paper bag in the refrigerator crisper drawer for 2-3 weeks
- For longer storage, freeze ginger (it can be grated frozen)
- Preserve in vinegar or honey for culinary use
- Save a portion of your harvest to plant for the next growing cycle
Frequently Asked Questions
Can you grow ginger from grocery store ginger?
Yes, you can grow ginger from grocery store ginger, though organic ginger works best as conventional ginger may be treated with sprout inhibitors. Look for plump pieces with visible growth buds (eyes), soak in warm water for a few hours, then plant with eyes facing up in well-draining soil.
How long does it take to grow ginger from ginger root?
Ginger typically takes 8-10 months to reach full maturity from planting. You'll see sprouts emerge in 2-4 weeks, but the rhizomes need the full growing season to develop substantial size. In ideal conditions with warm temperatures and consistent moisture, ginger reaches harvest readiness when the leaves begin to yellow and die back.
What's the best soil for growing ginger at home?
The best soil for ginger is a well-draining mix that retains some moisture. Combine regular potting soil with perlite or coarse sand in a 2:1 ratio. Ginger prefers slightly acidic soil with a pH of 5.5-6.5. Avoid heavy clay soils that retain too much water, as this can cause rhizome rot. The ideal texture should feel like a damp sponge—moist but not waterlogged.
Can you grow ginger indoors year-round?
Yes, ginger can be grown indoors year-round with proper conditions. It requires temperatures between 70-90°F, high humidity (70-80%), and indirect light. An east-facing window provides ideal lighting, or you can use grow lights for 6-8 hours daily. Maintain humidity with a pebble tray or humidifier, and water when the top inch of soil feels dry. Indoor ginger typically grows slower than outdoor plants but can still produce harvestable rhizomes in 10-12 months.
How do you know when ginger is ready to harvest?
Ginger is ready to harvest when the leaves begin to yellow and die back naturally, typically 8-10 months after planting. The rhizomes will have developed multiple segments and the outer skin will turn from pale yellow to a richer golden-brown color. You can gently brush away some soil to check the size without disturbing the plant significantly. Mature ginger rhizomes feel firm and heavy for their size with smooth, unwrinkled skin.


 浙公网安备
33010002000092号
浙公网安备
33010002000092号 浙B2-20120091-4